References:
Please refer to NMR ORC page (click) for the rack details with component-manuals
PDP Installation
- Download/Clone PDP from https://github.com/uva-spin/e1039-target-controls (see the PDP folder on this Git repository)
- Connect all the devices as it was explained in the ORC files on NMR ORC
- Install LabView Software
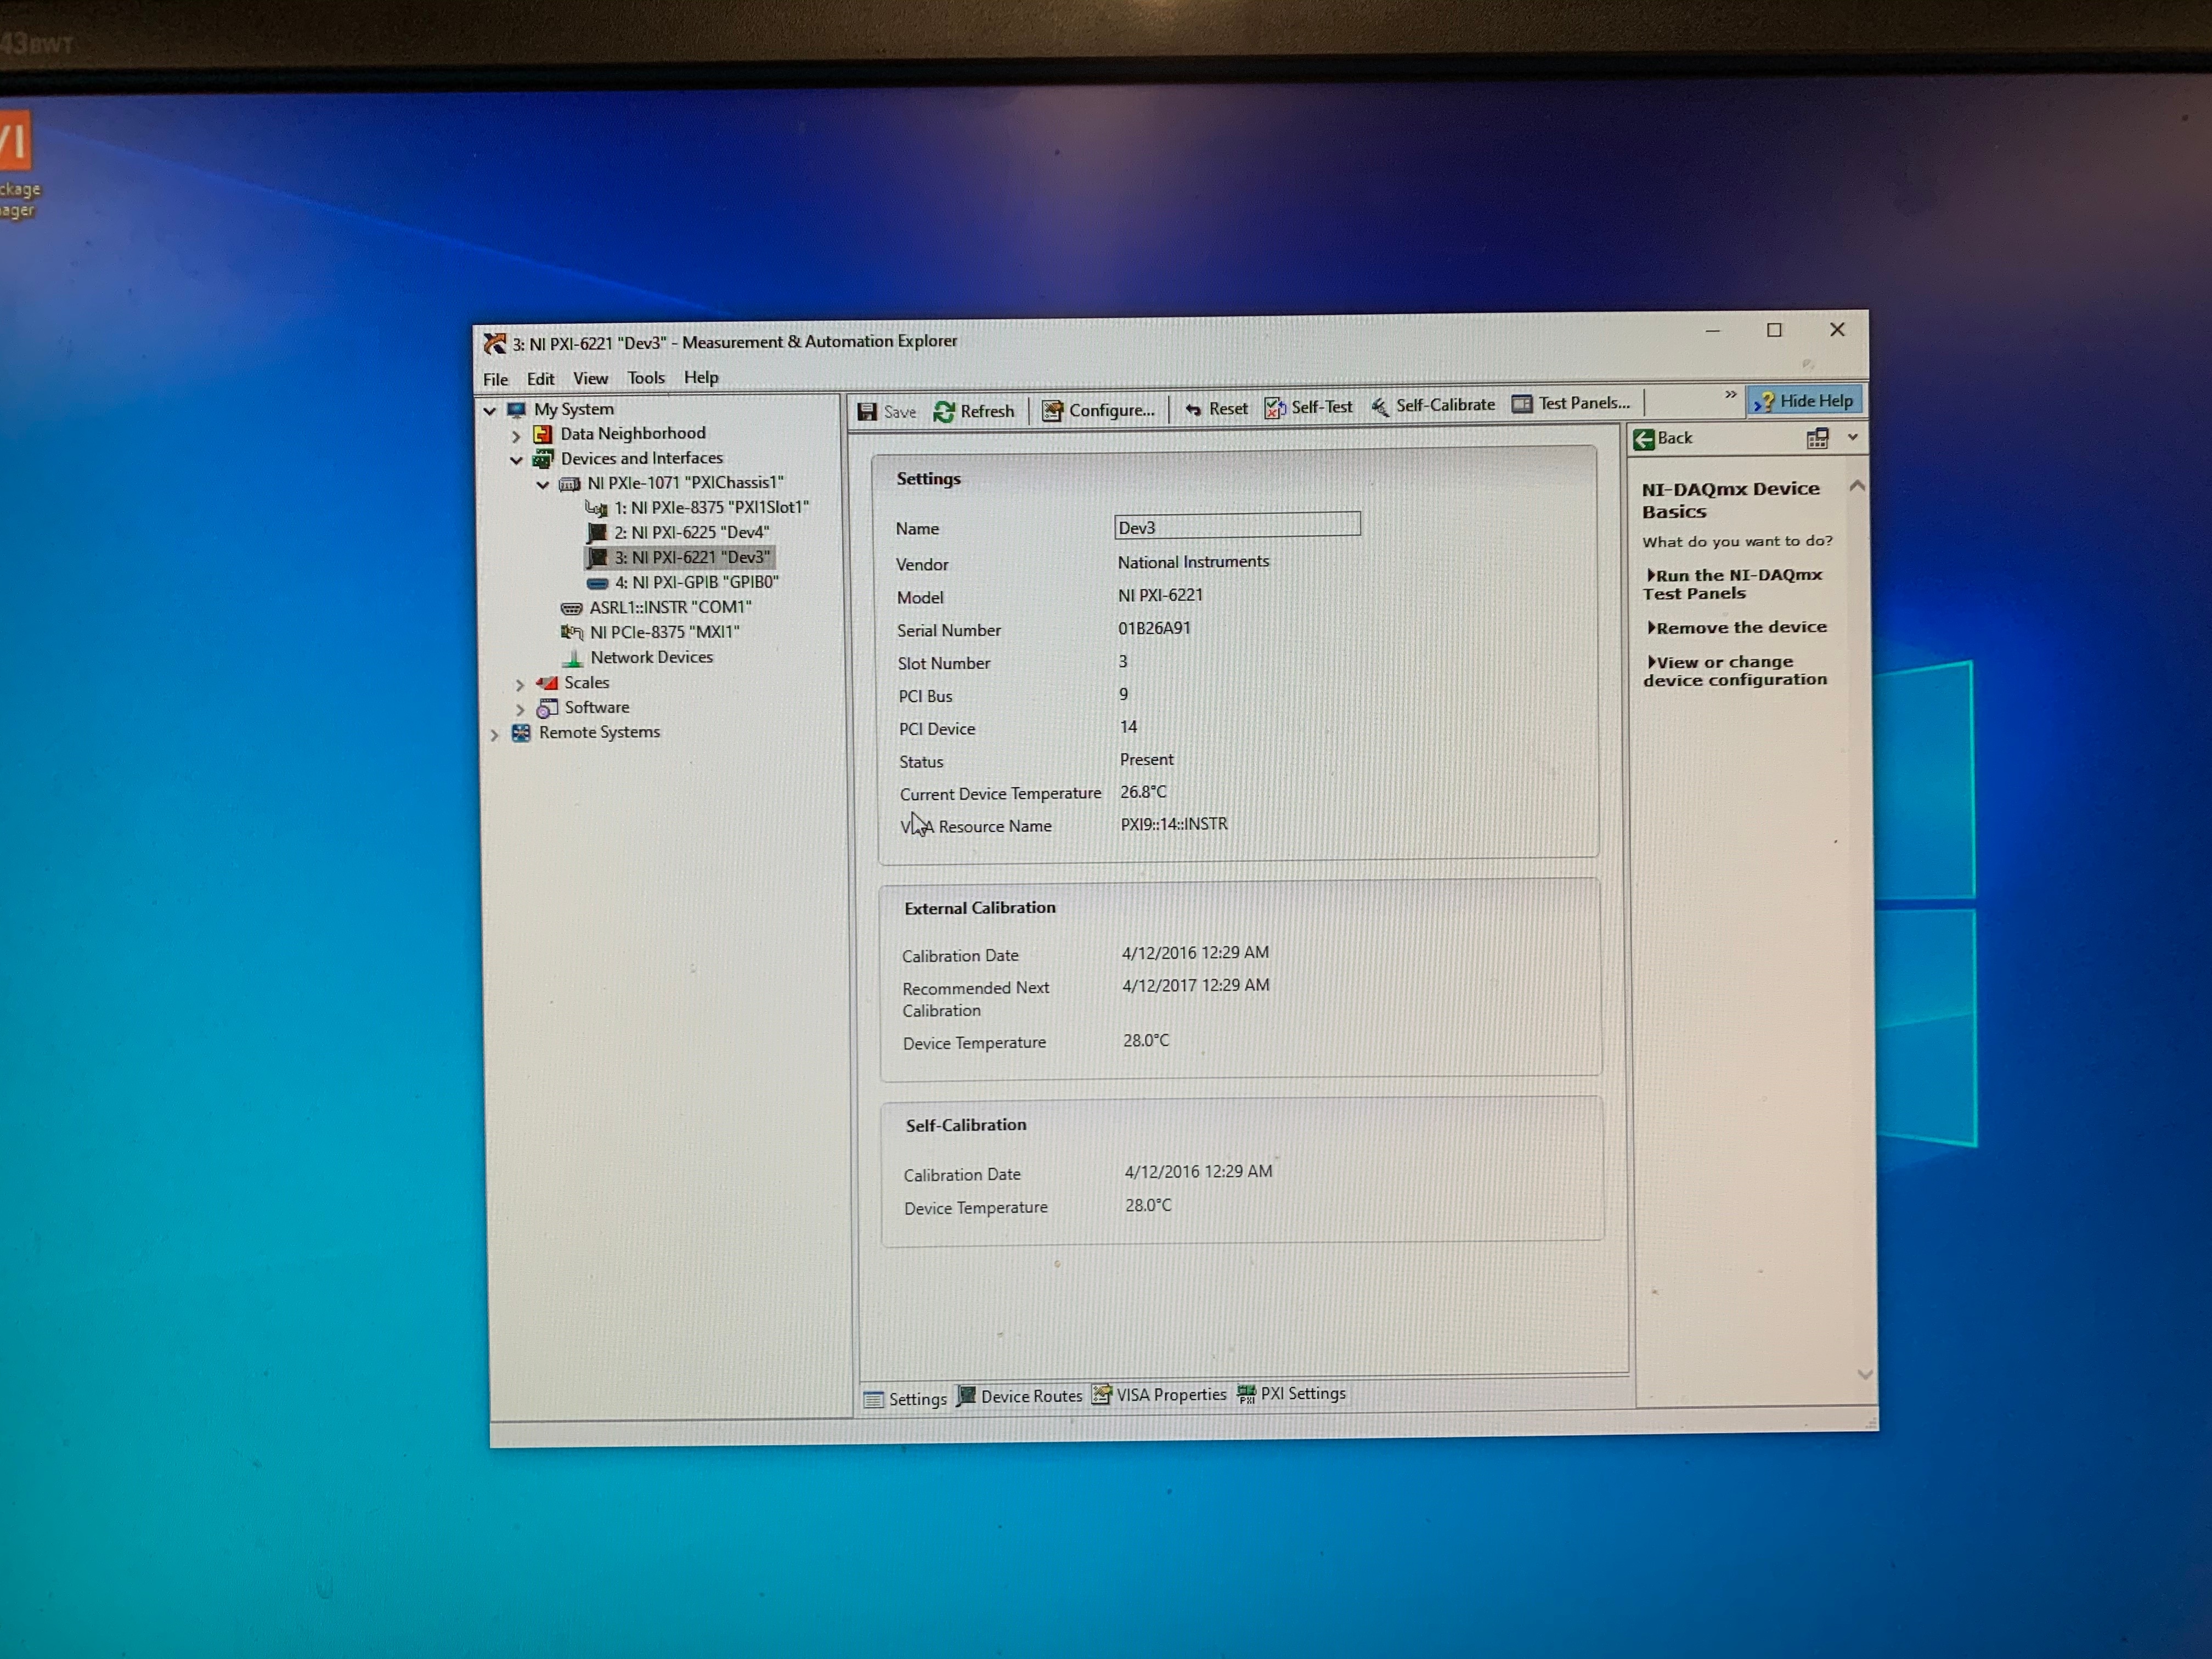
- Open "Measurement & Automation Explorer"
- Select "Device and Interfaces" > "NI PXle-1071 PXIChassis 1" on the list (see the screenshot below)
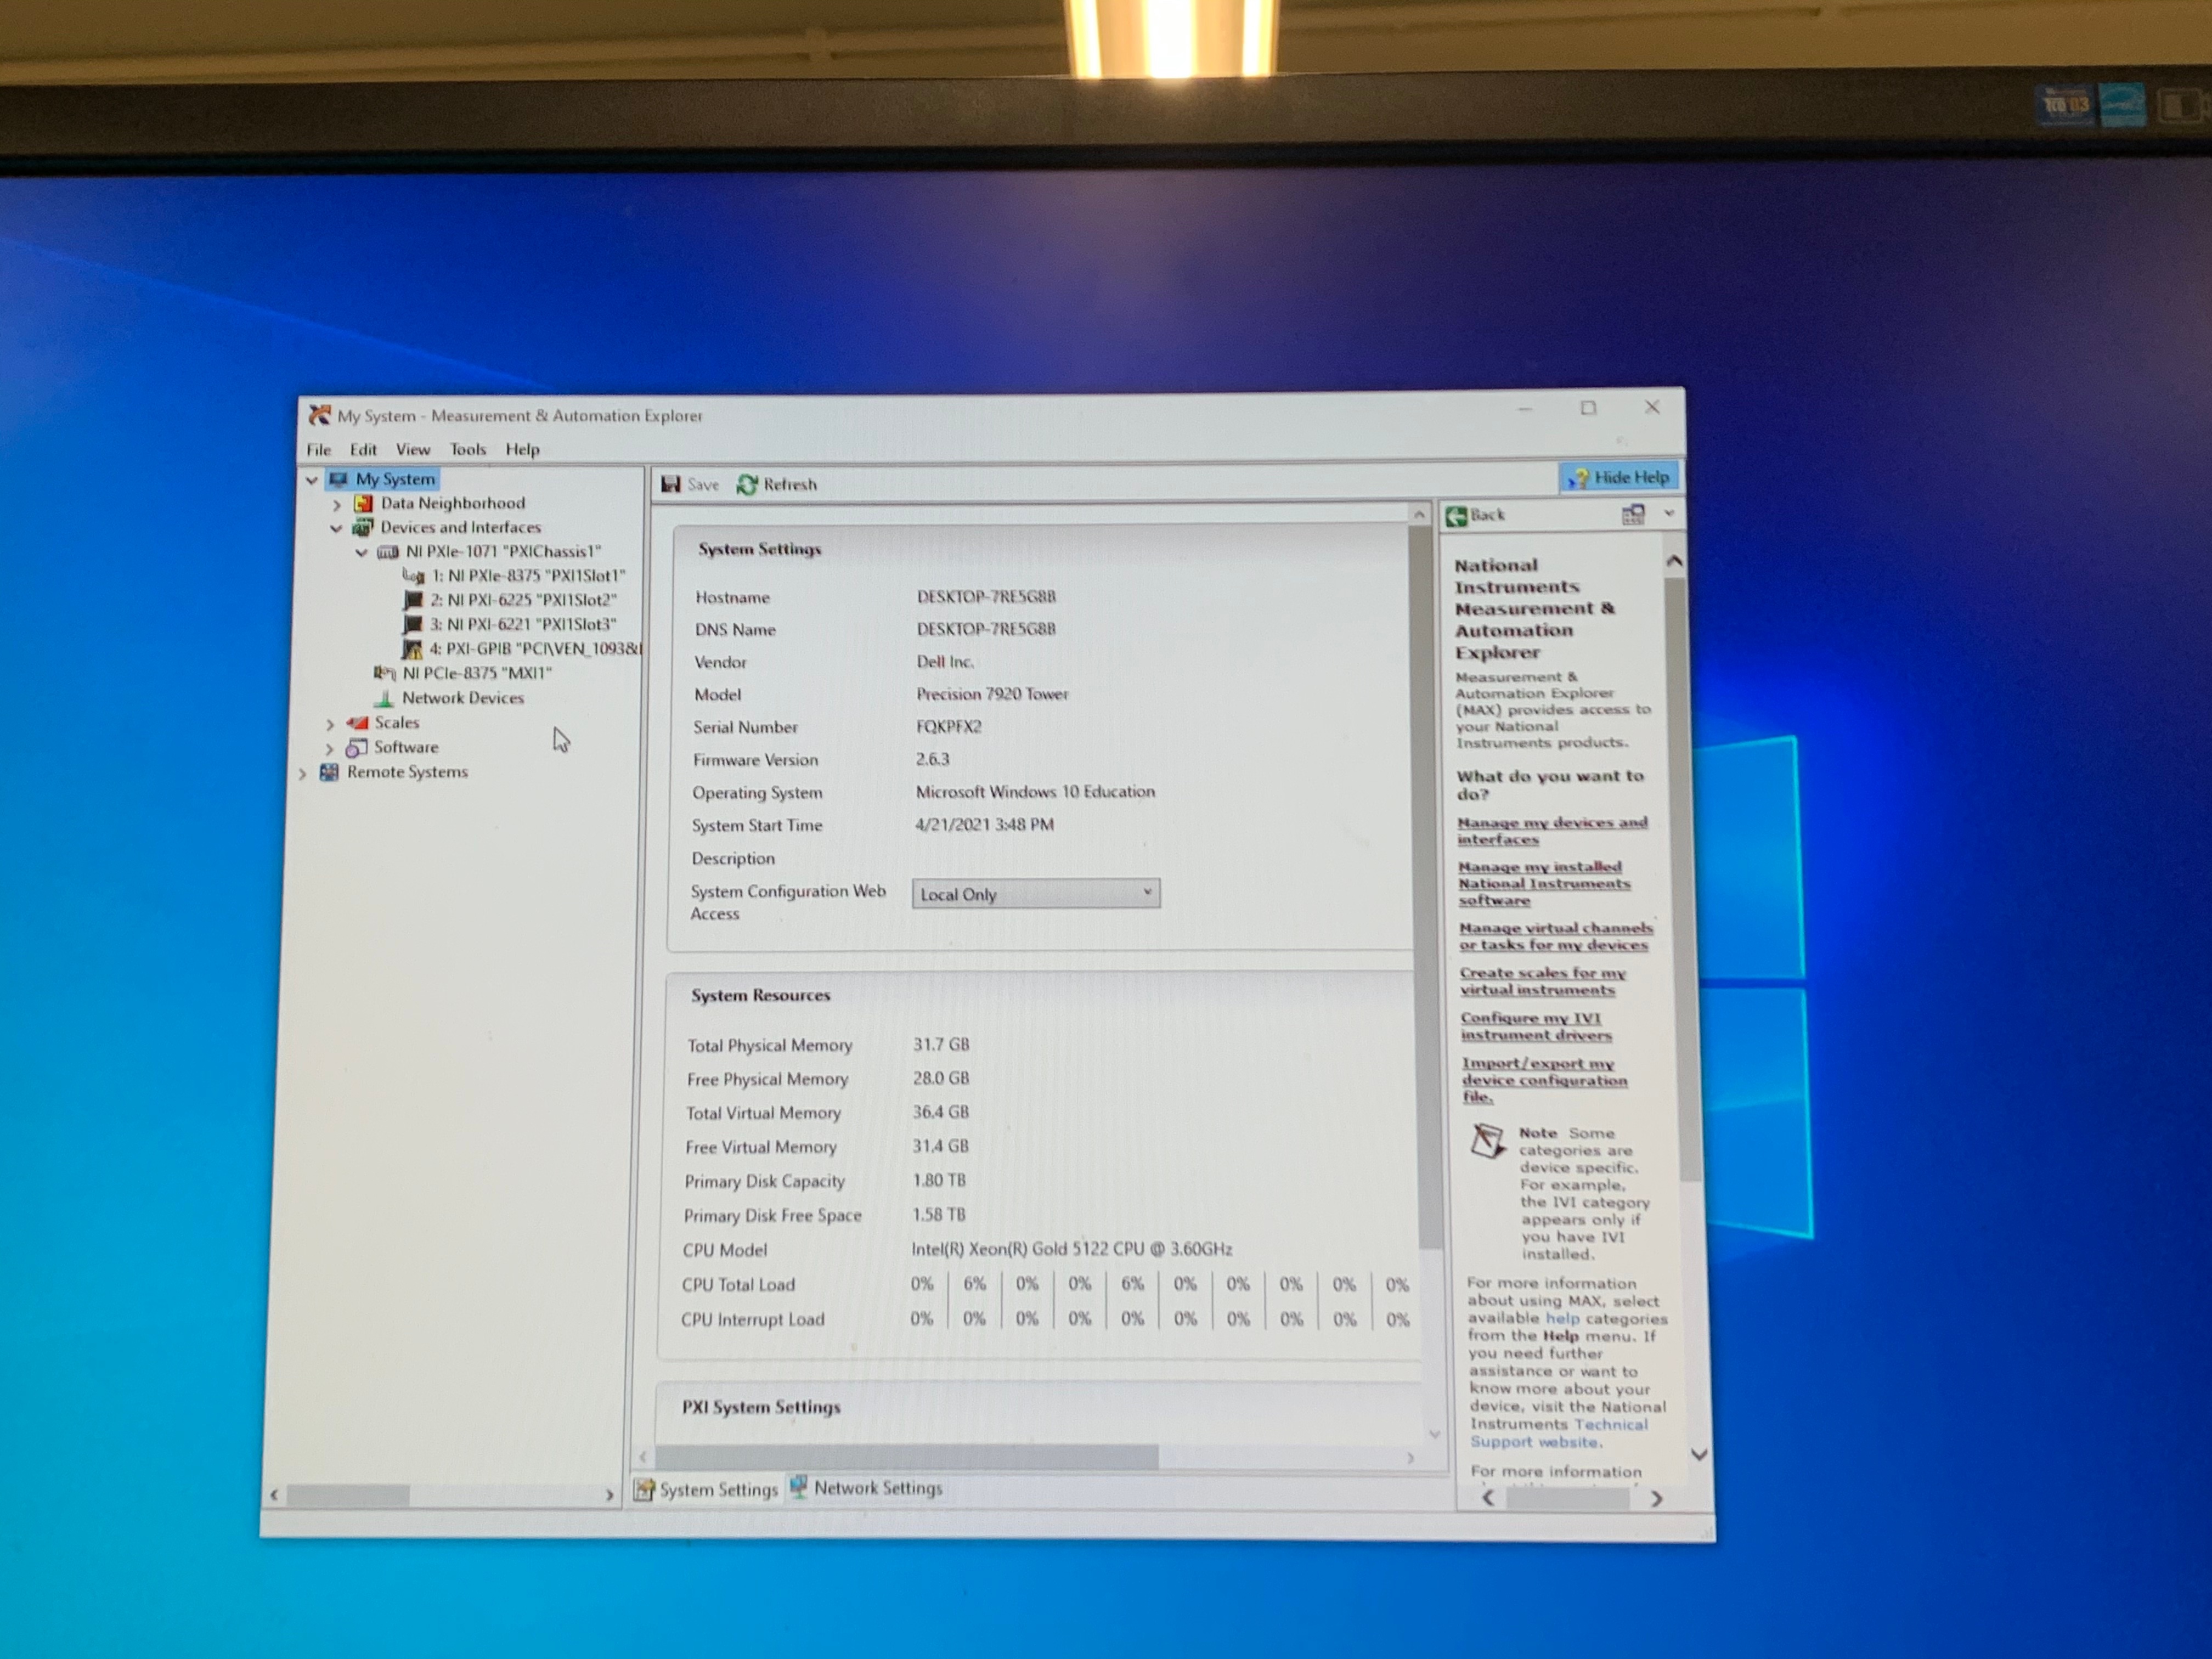
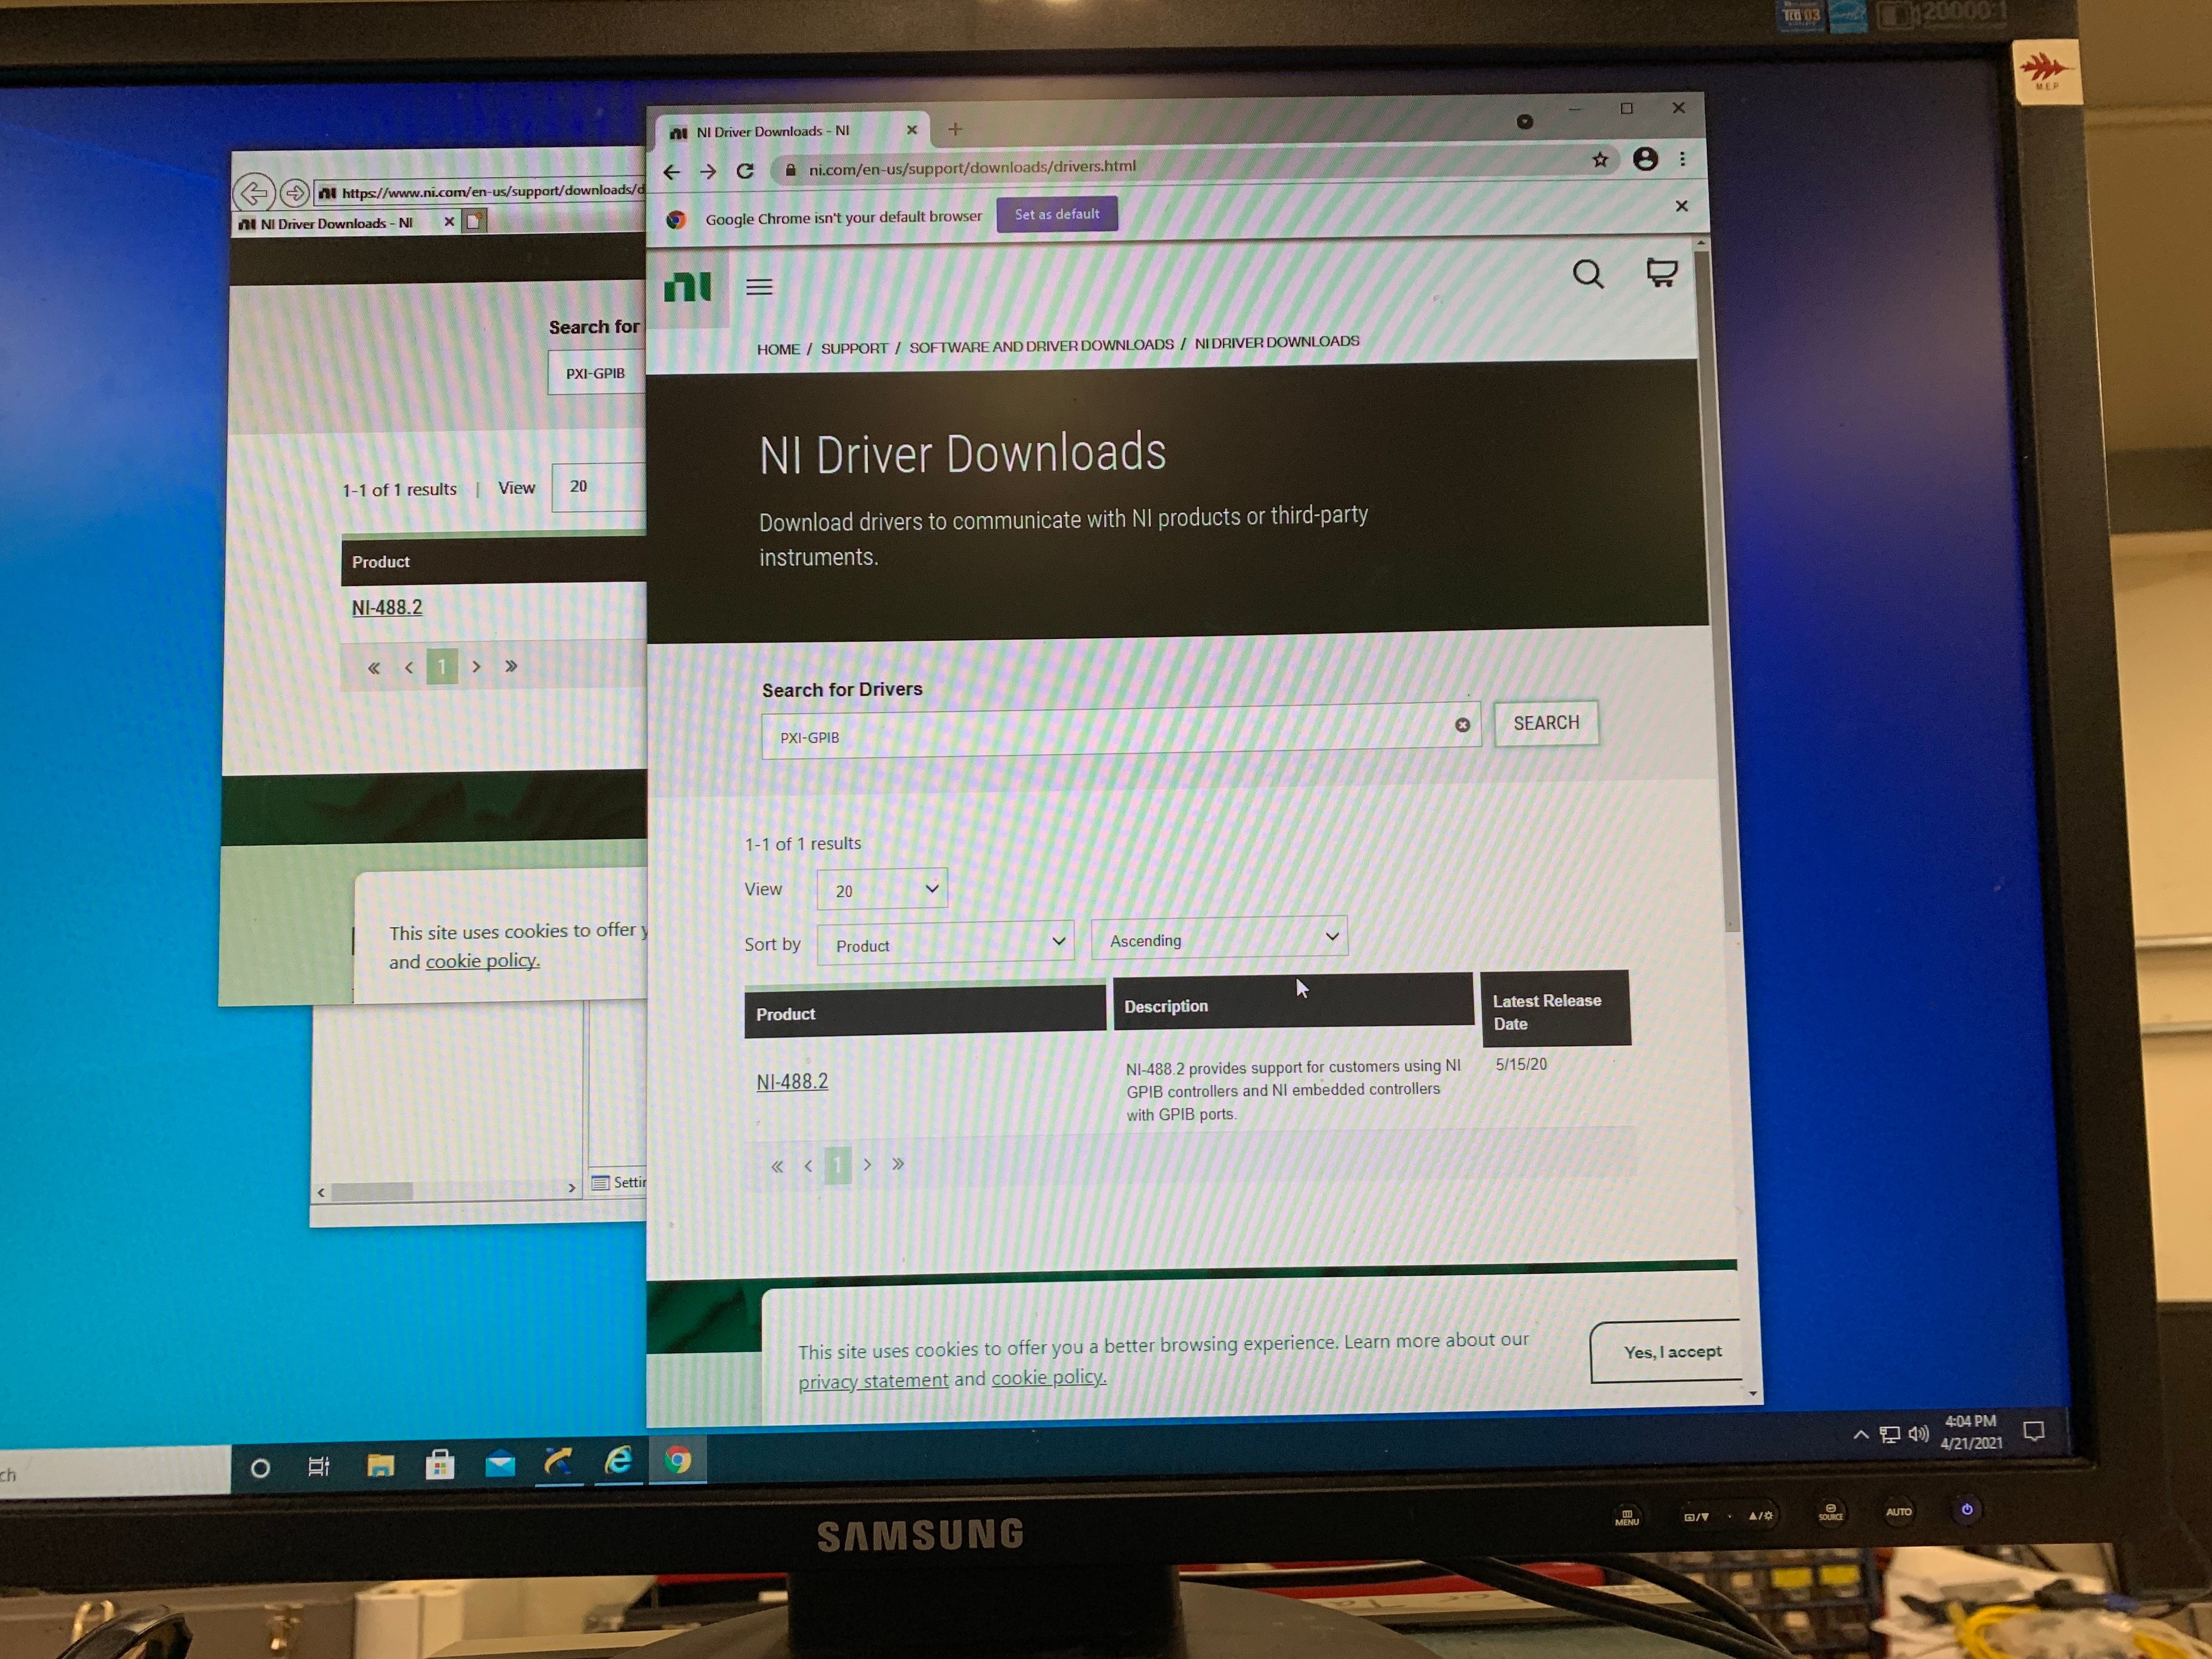
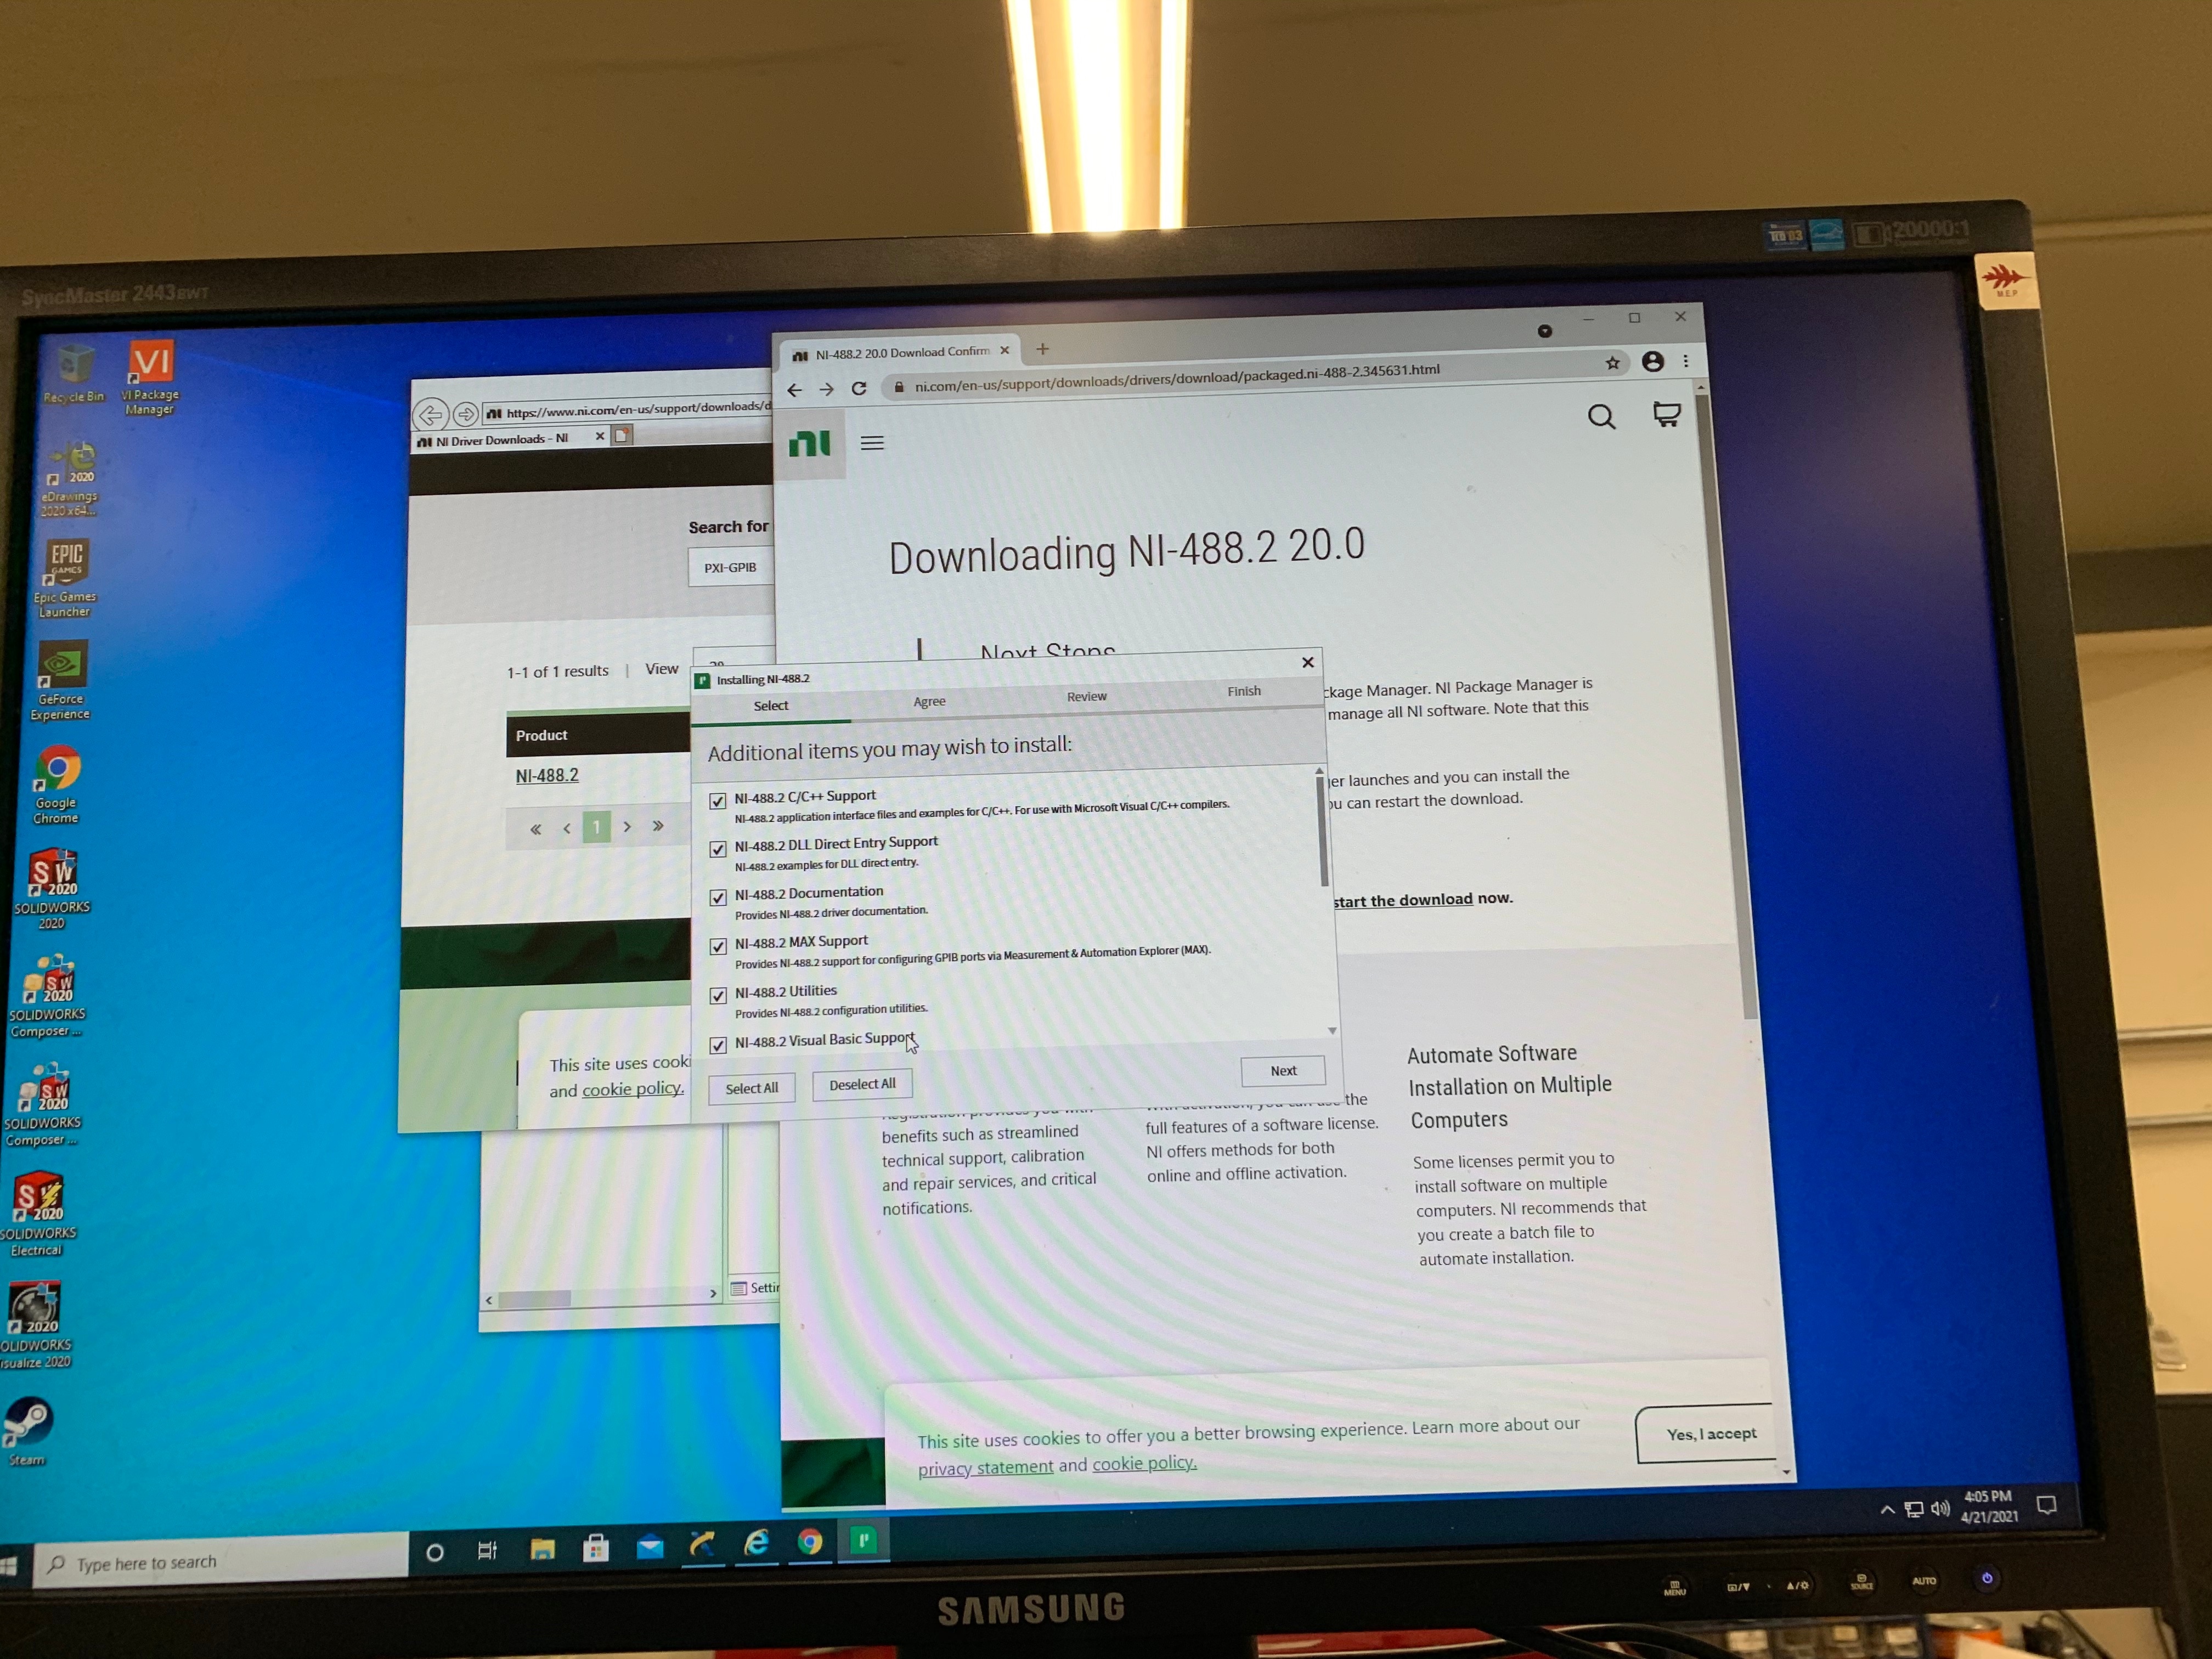
- Install the required drivers. Notice that there is one "caution" mark appeared in this example for missing driver for "PXI-GPIB" (please see the screenshots below)

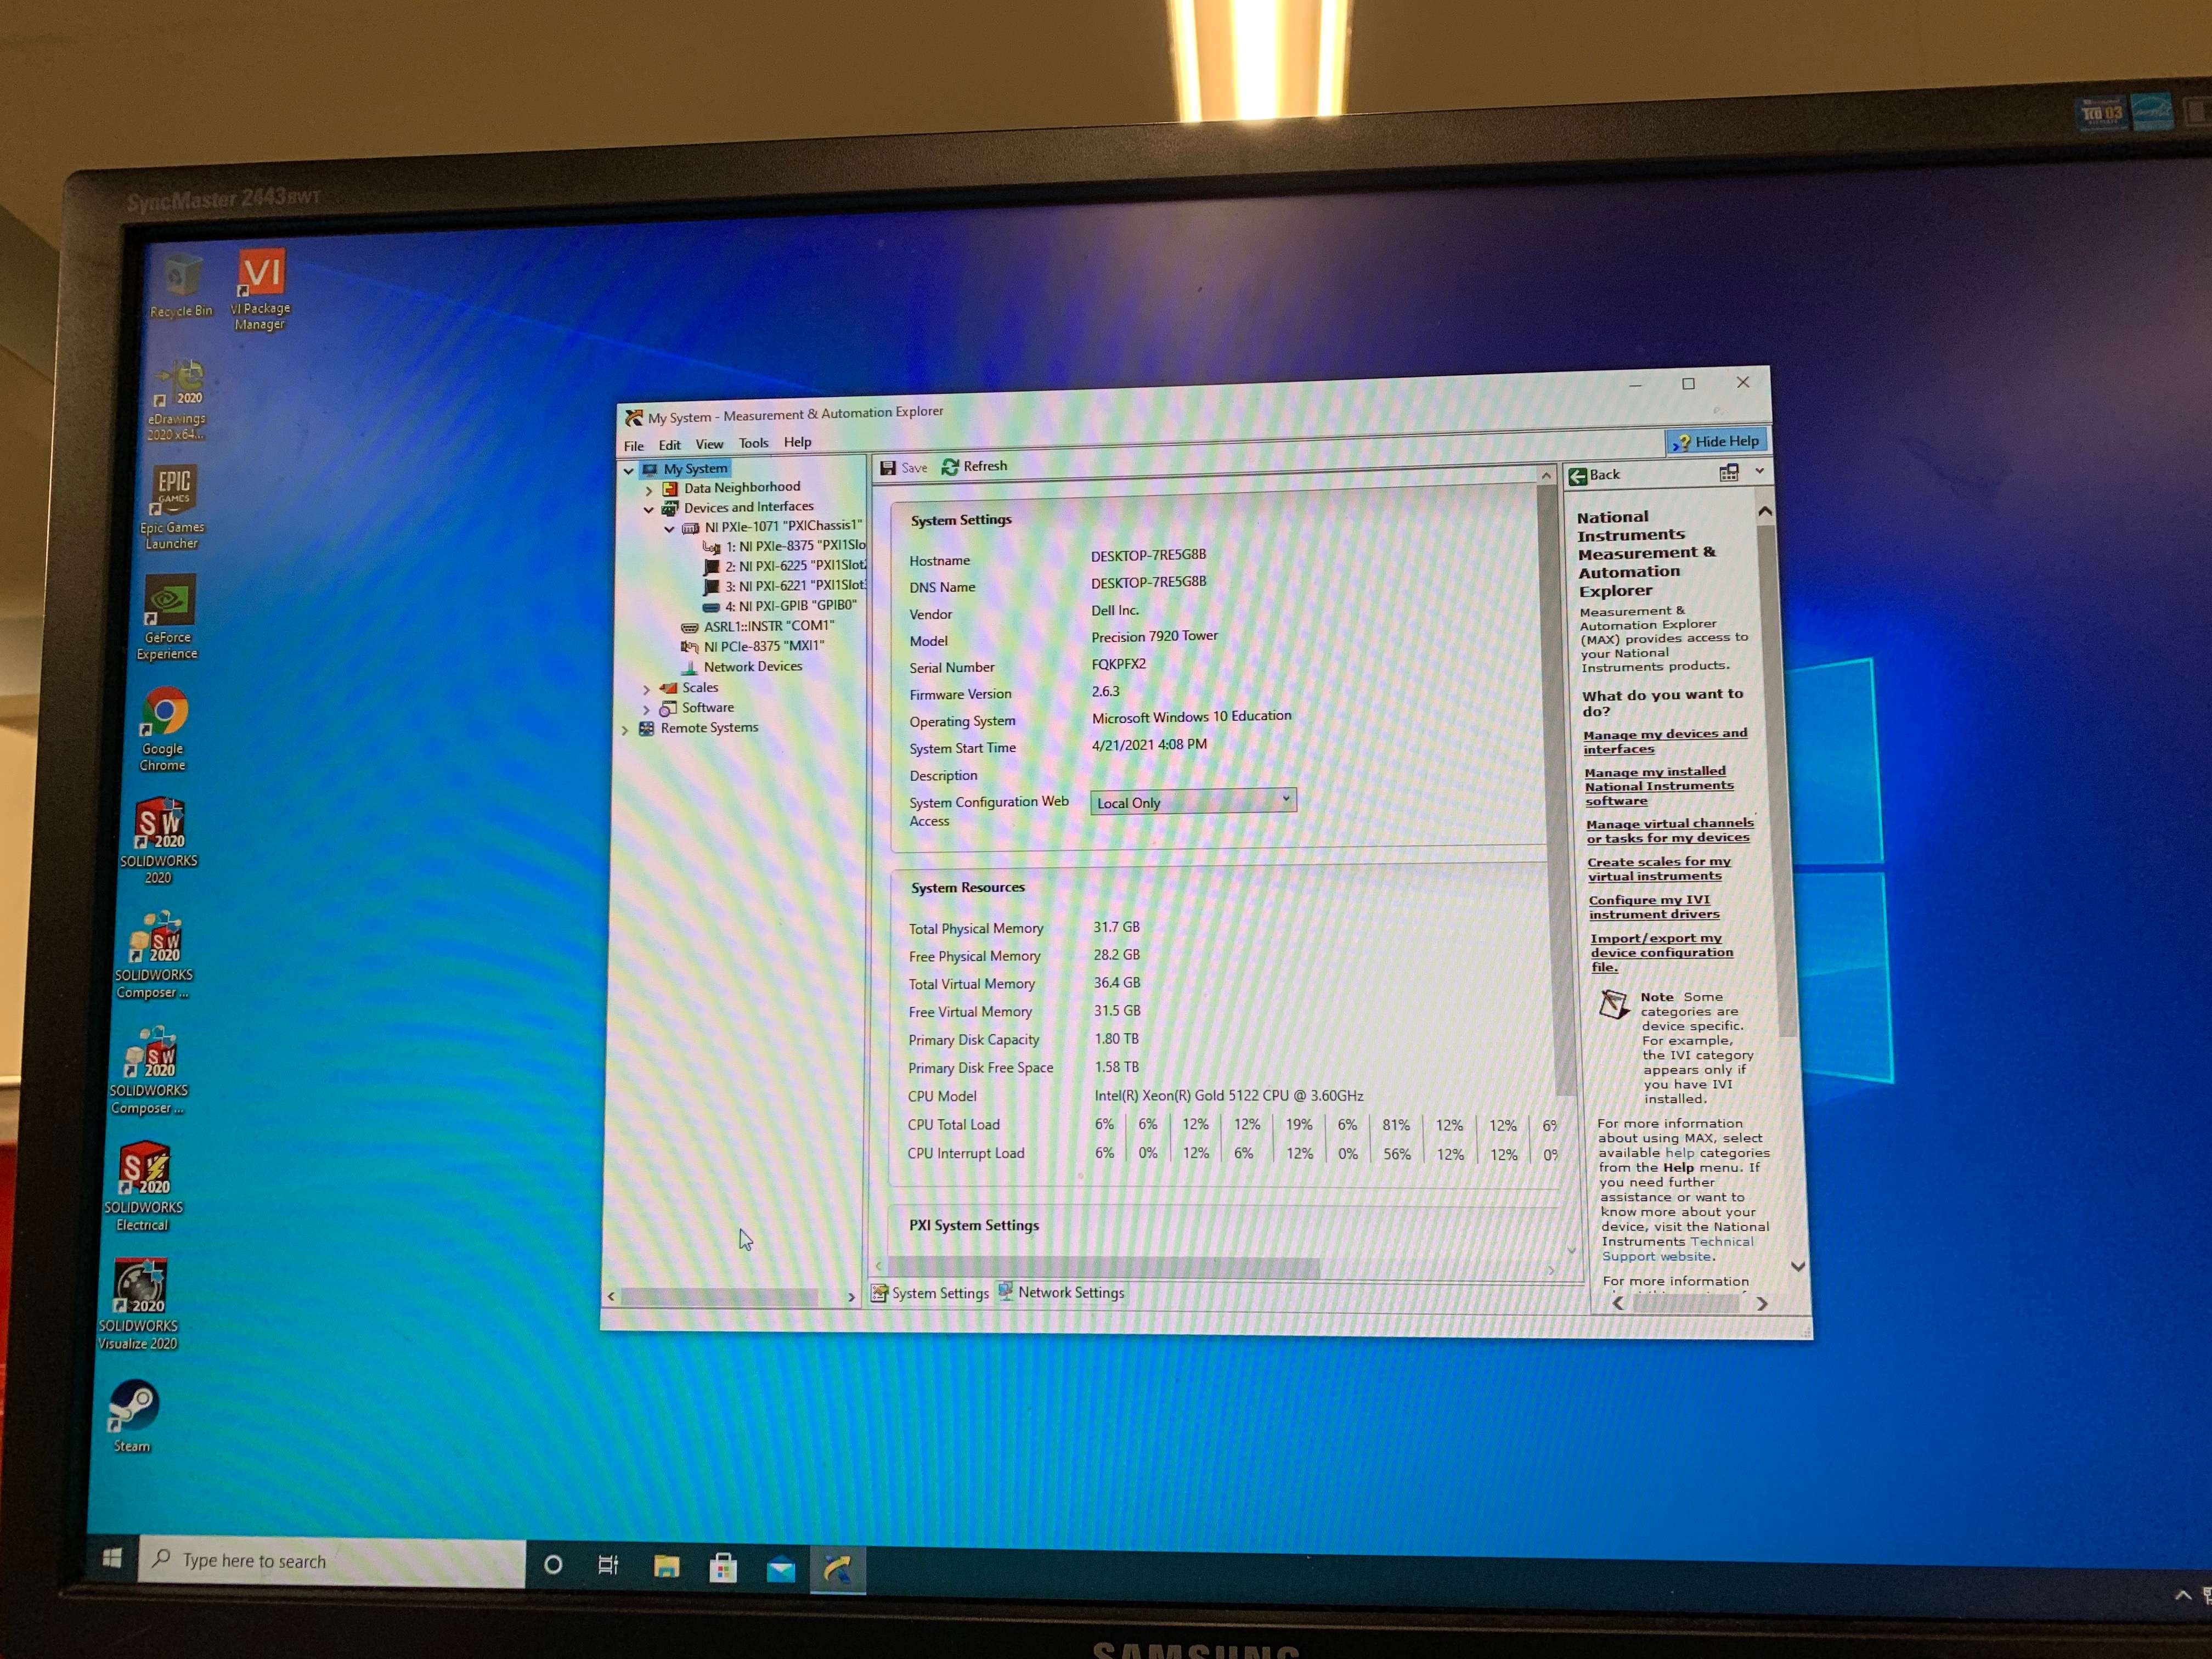
- Rename the PXI names as it appears in the following screenshot
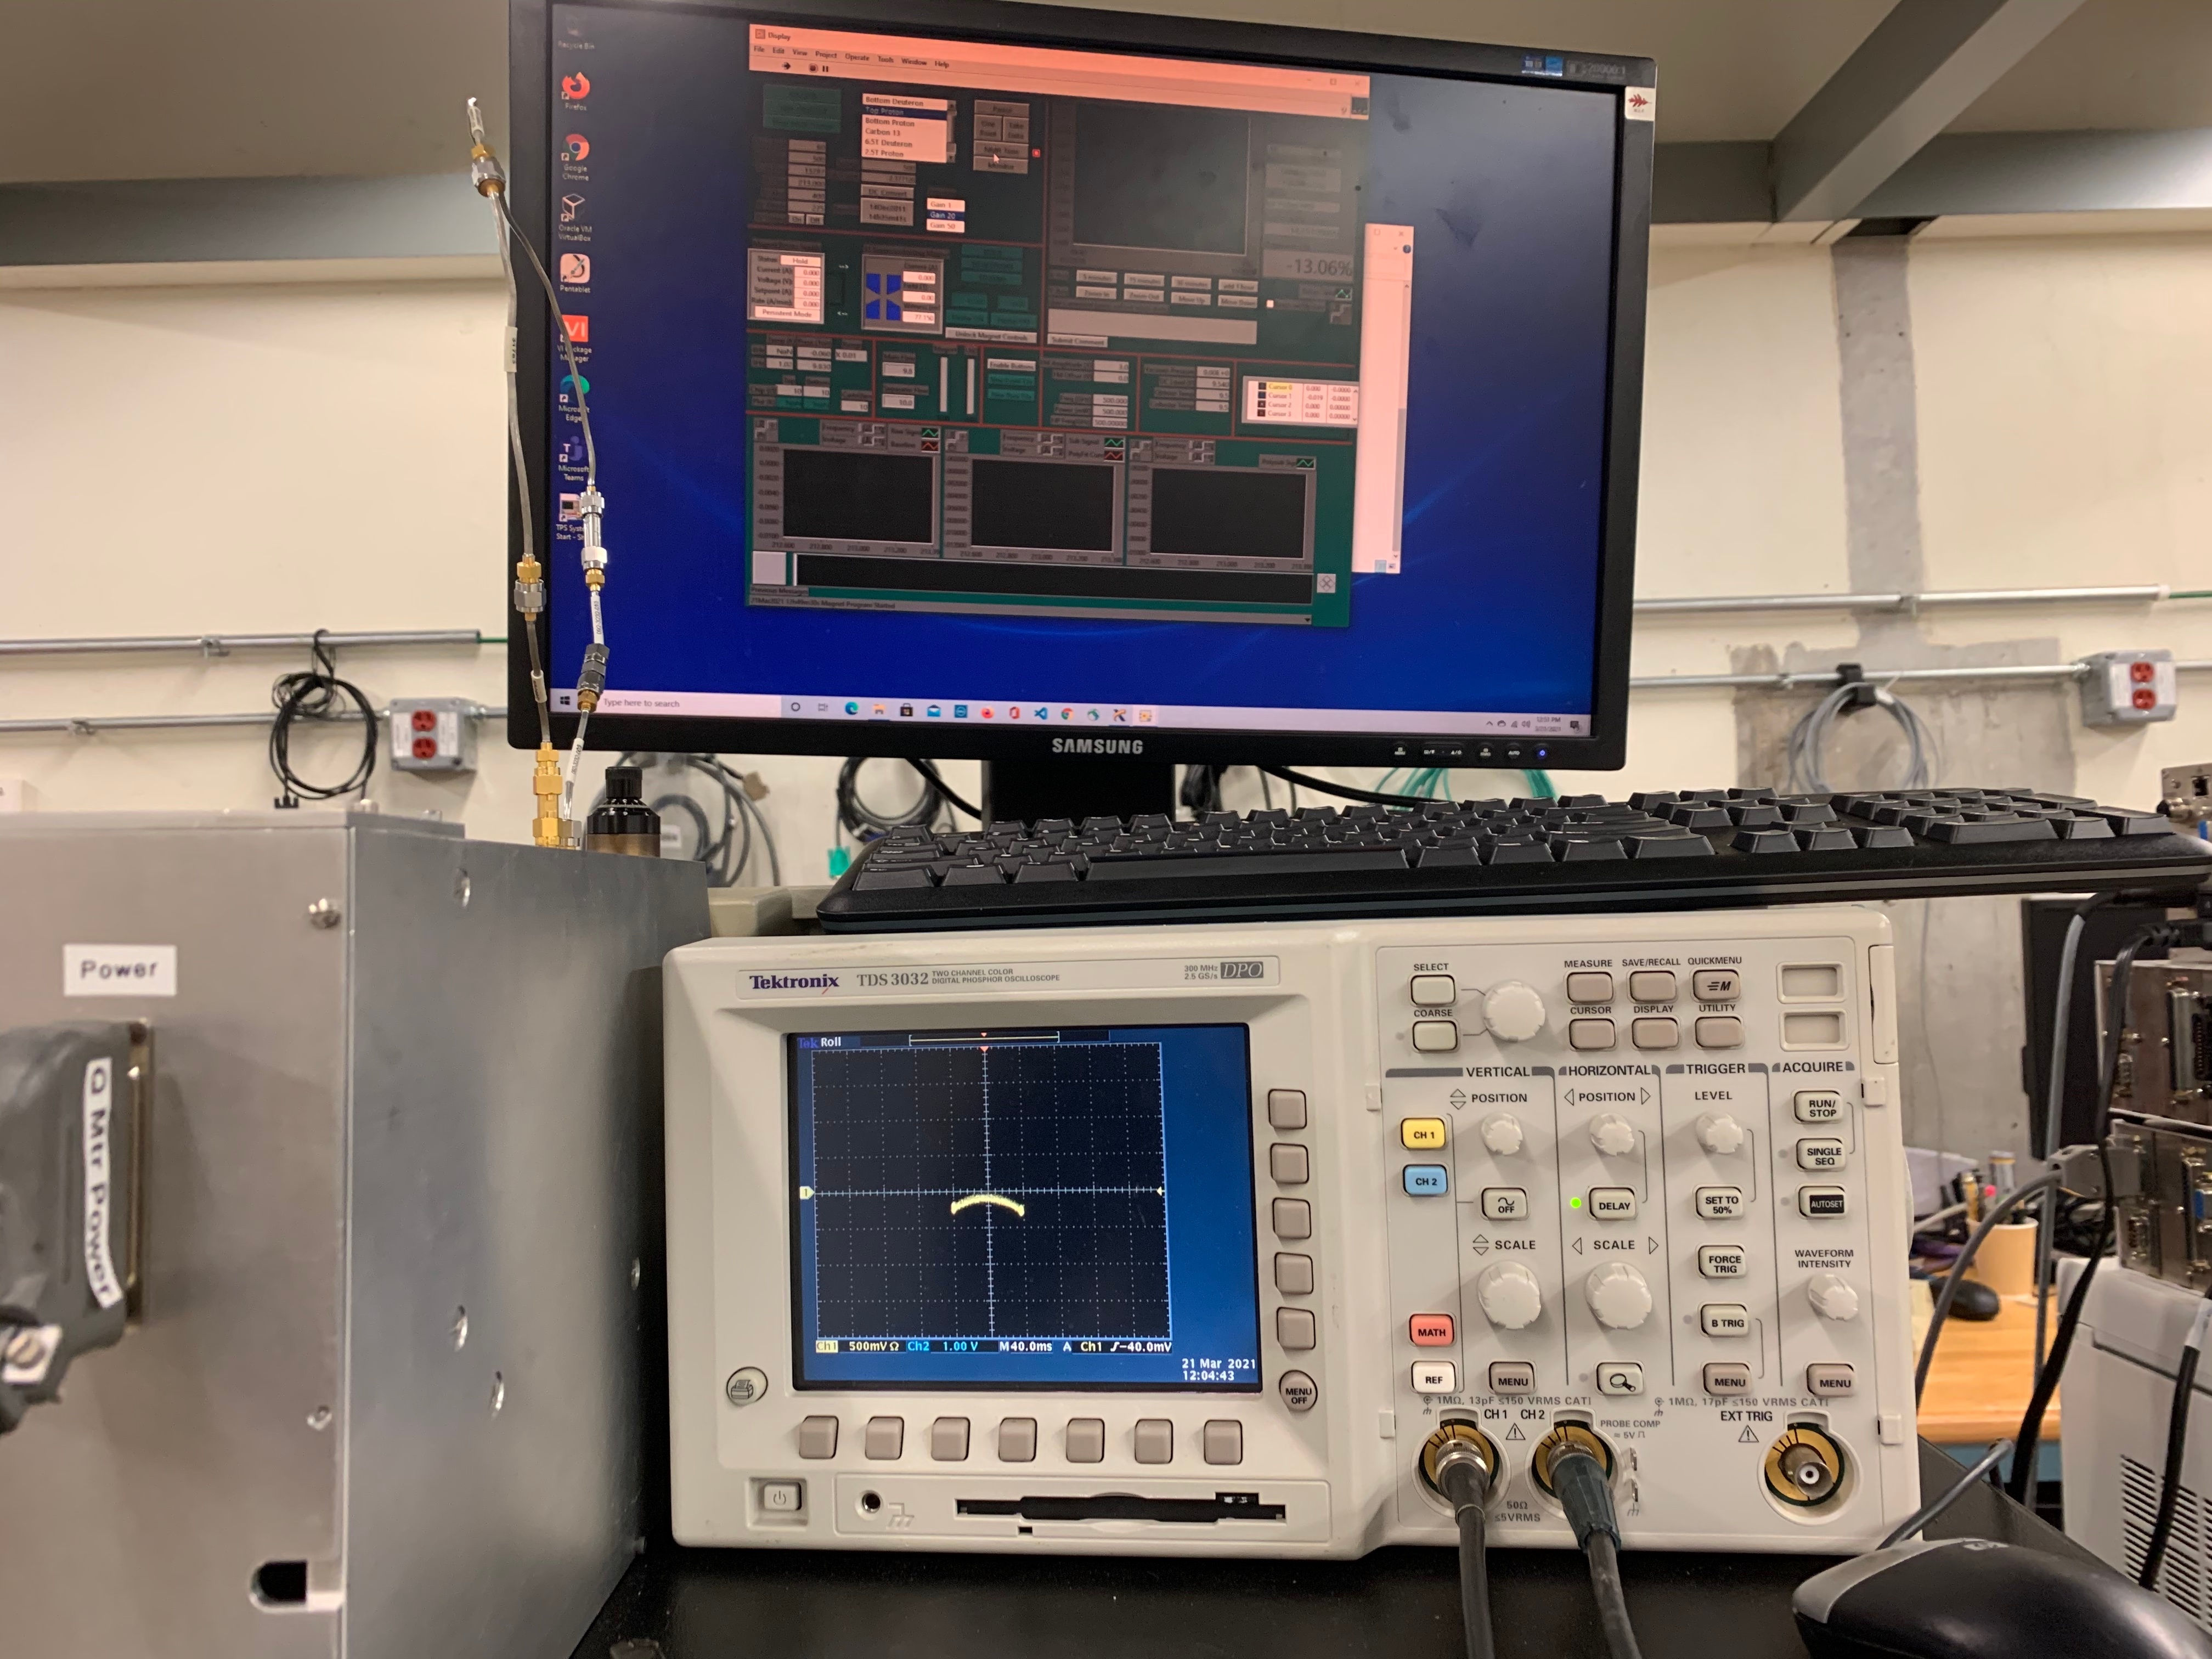
- Select "NMR Tune" mode and check the oscilloscope after tuning the Q-curve
- Then you will need to edit the B28_Setup file's "Path" with the correct path where your "events.csv" file will be recorded.
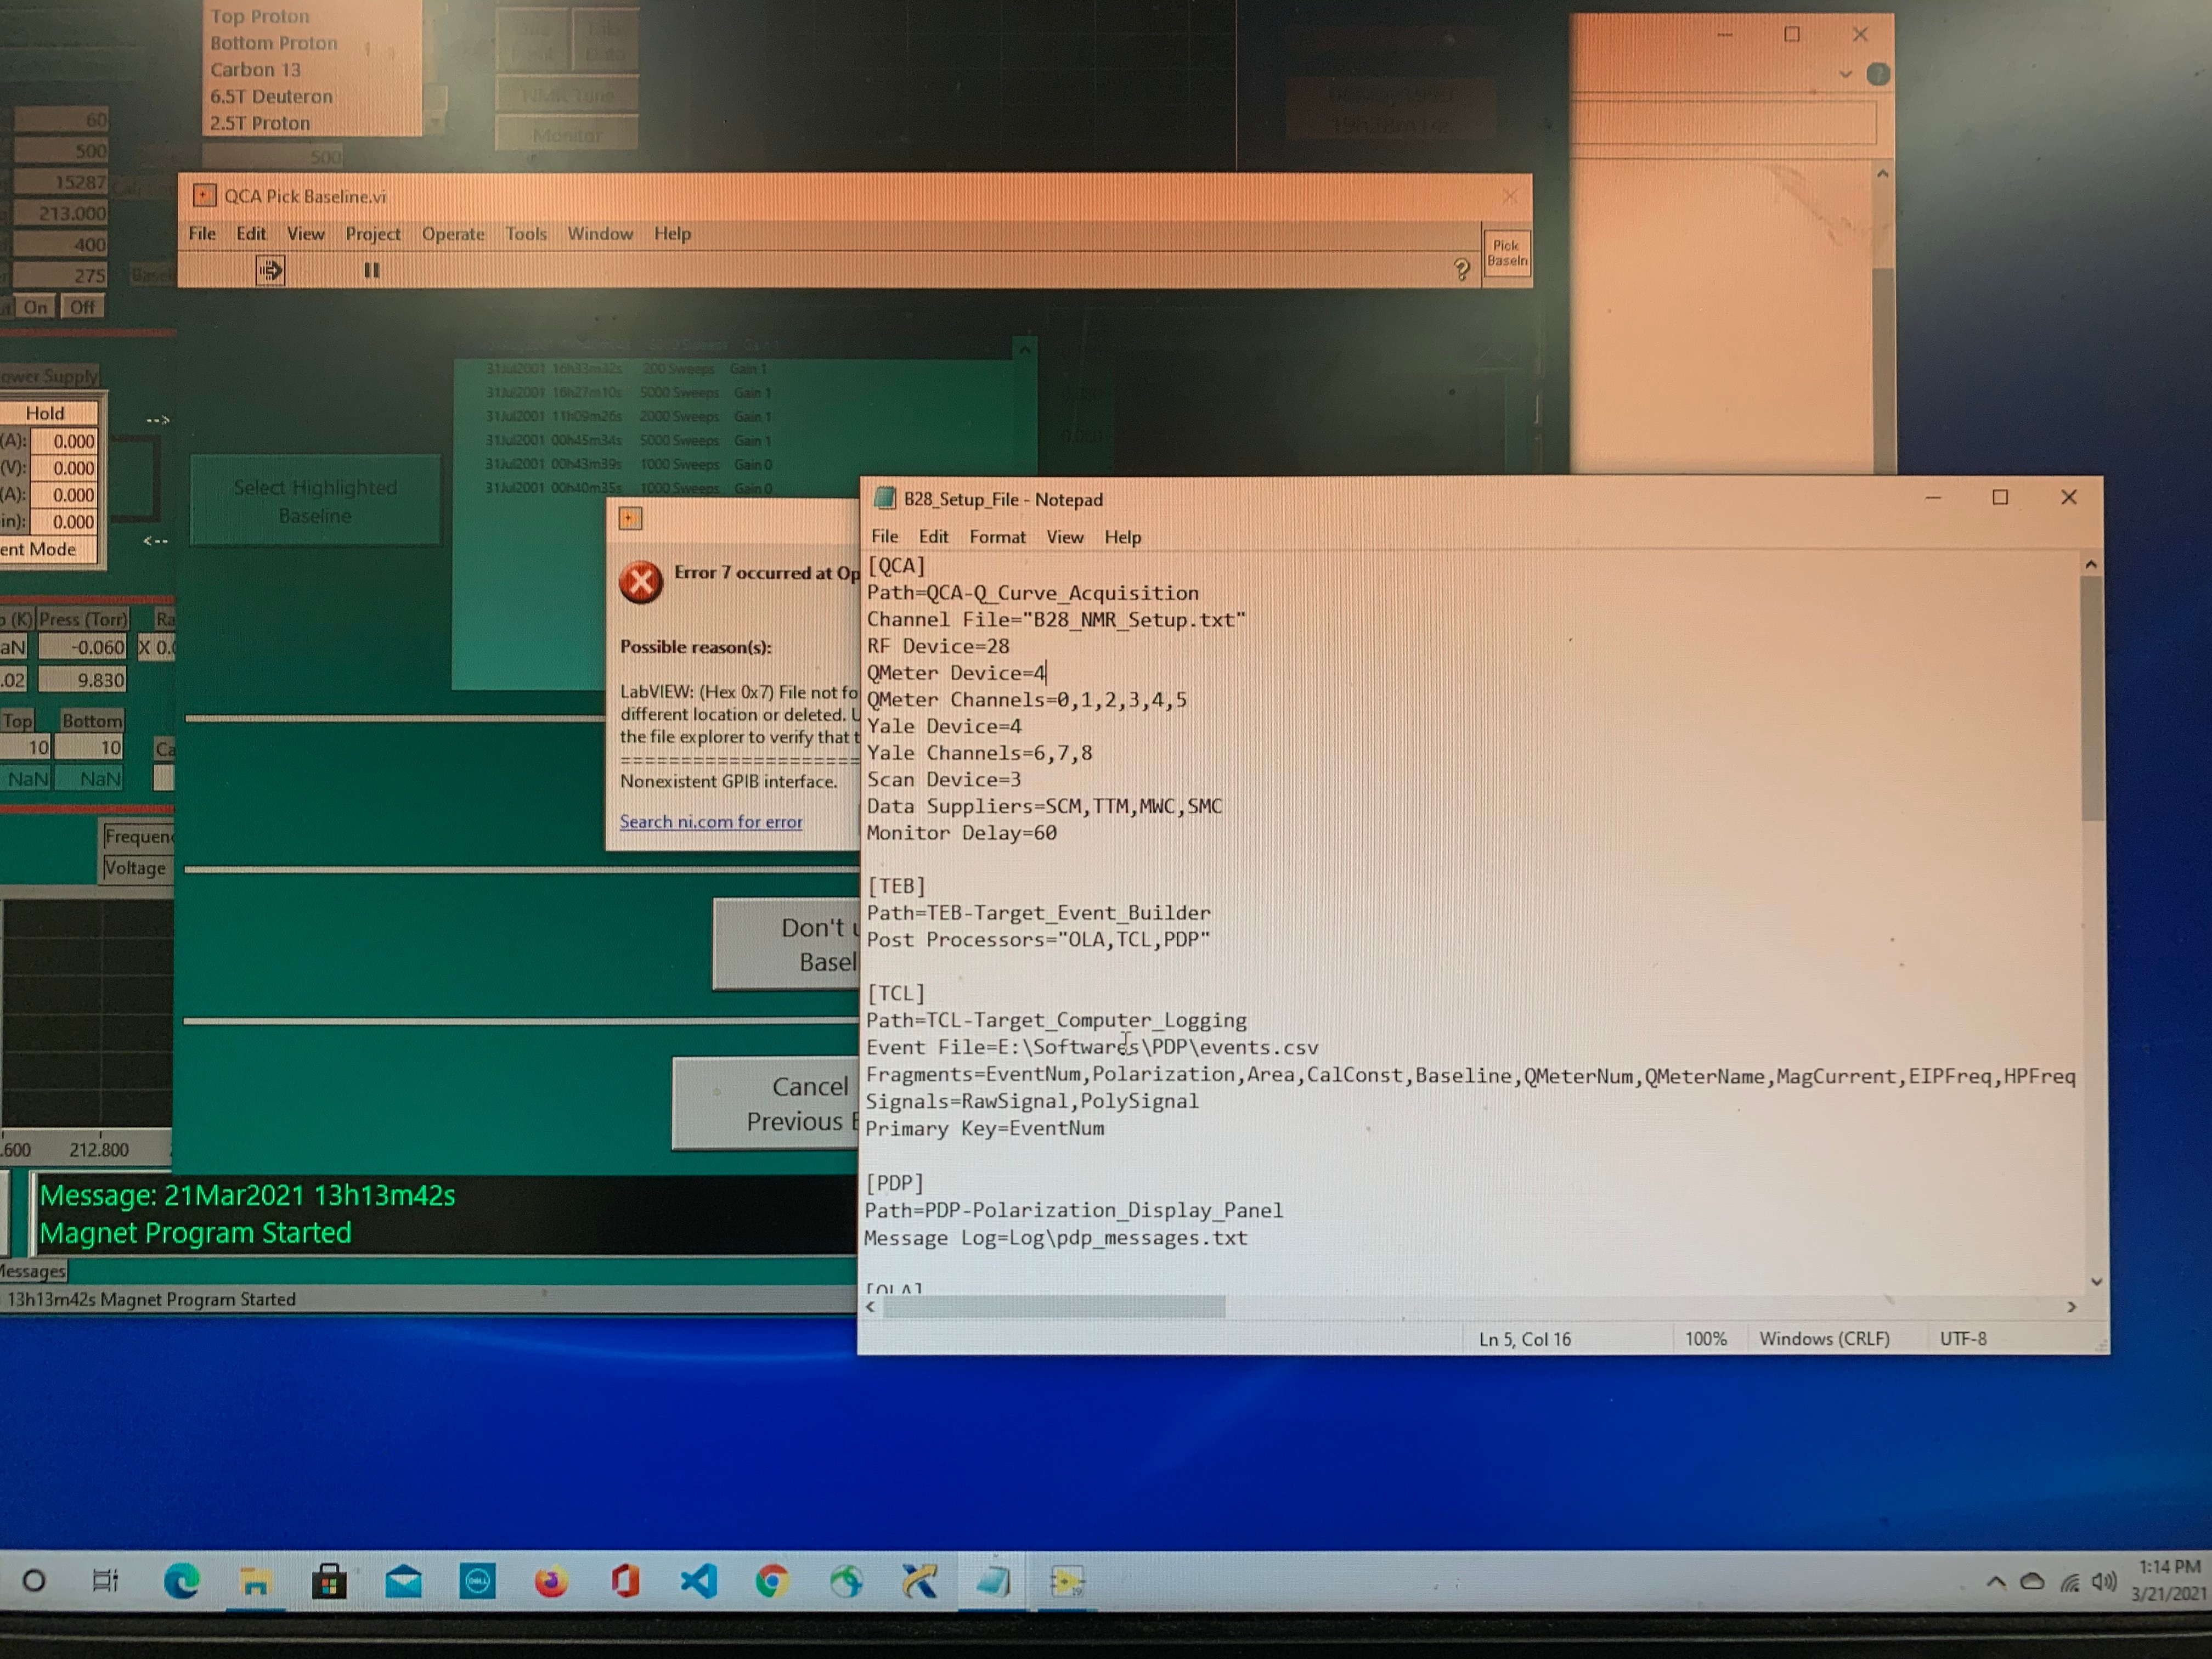
- Click on "Enable Buttons" and click on "New base File" (the one below "Enable Buttons") and then click on the "Disable Buttons".
- Select "Create a New Baseline"
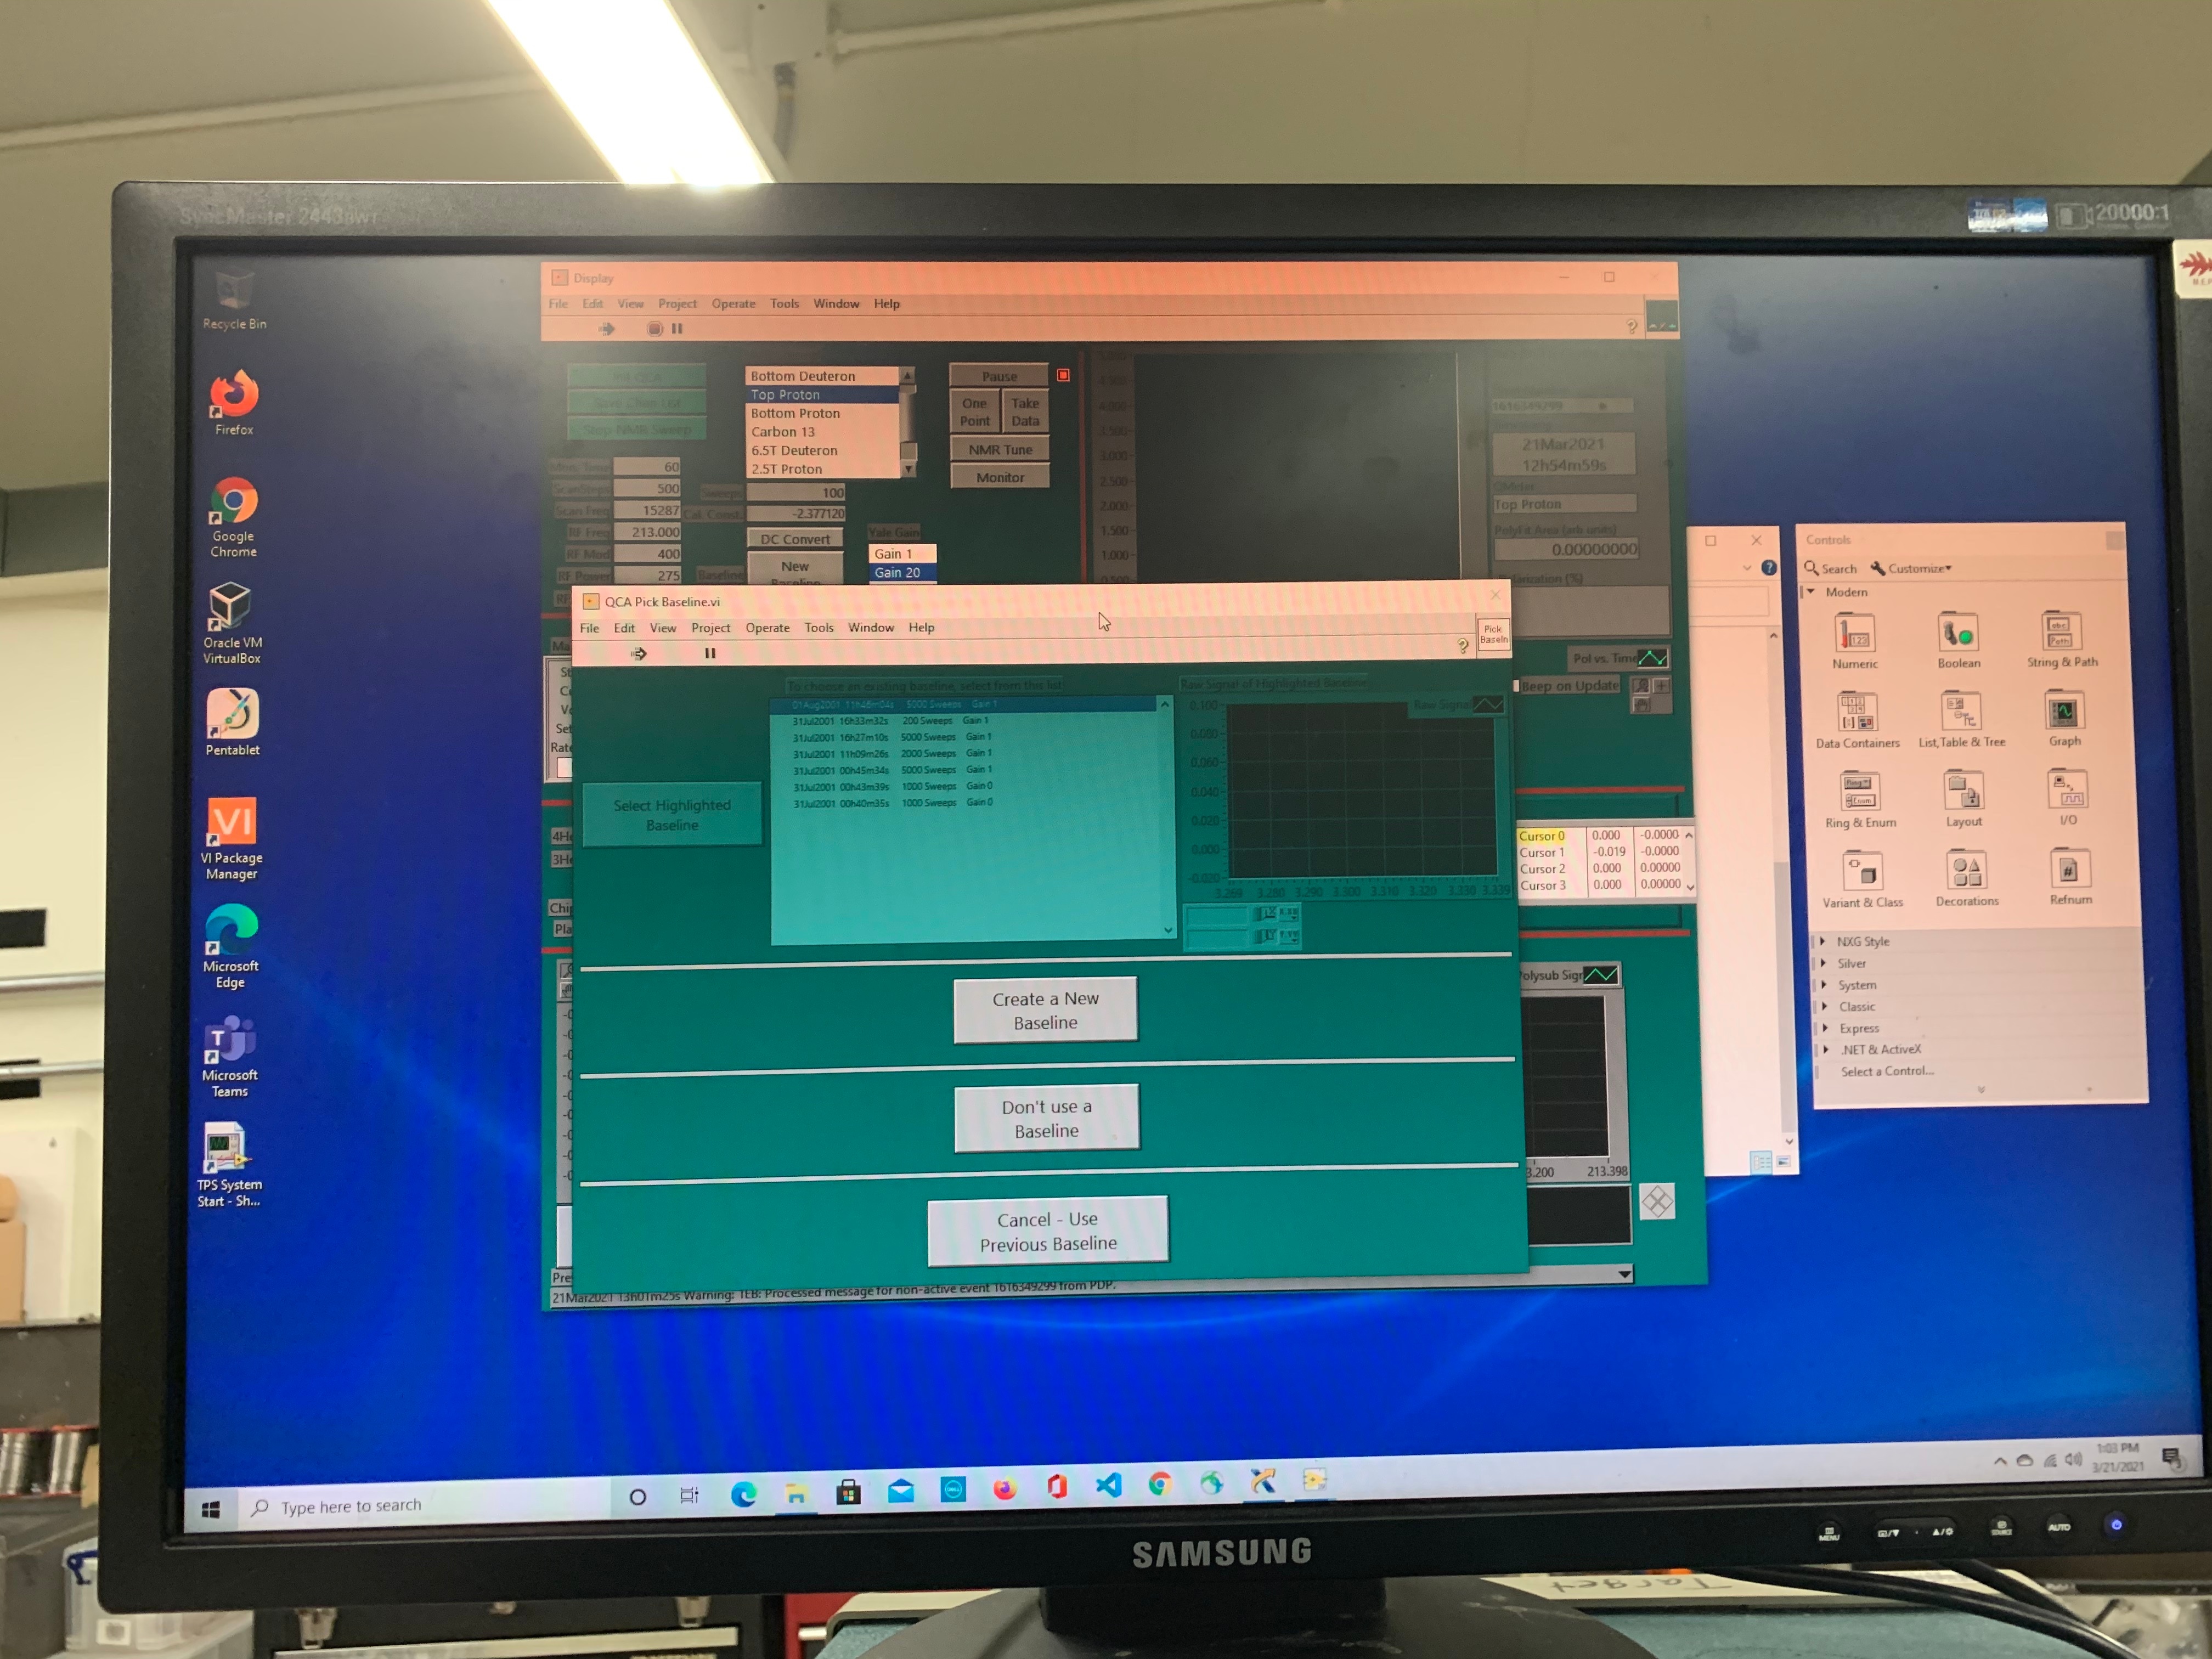
- Then make sure that you selected "Top Proton" as the target and modify number of sweeps (eg: it will take ~320 seconds for 5000 spweeps; you can reduce/change number on that text box and press "enter" after modification).
After that, press "One Point" and wait. PDP will take some time (you will see the count-down) and take the measurement (see the bottom left plot)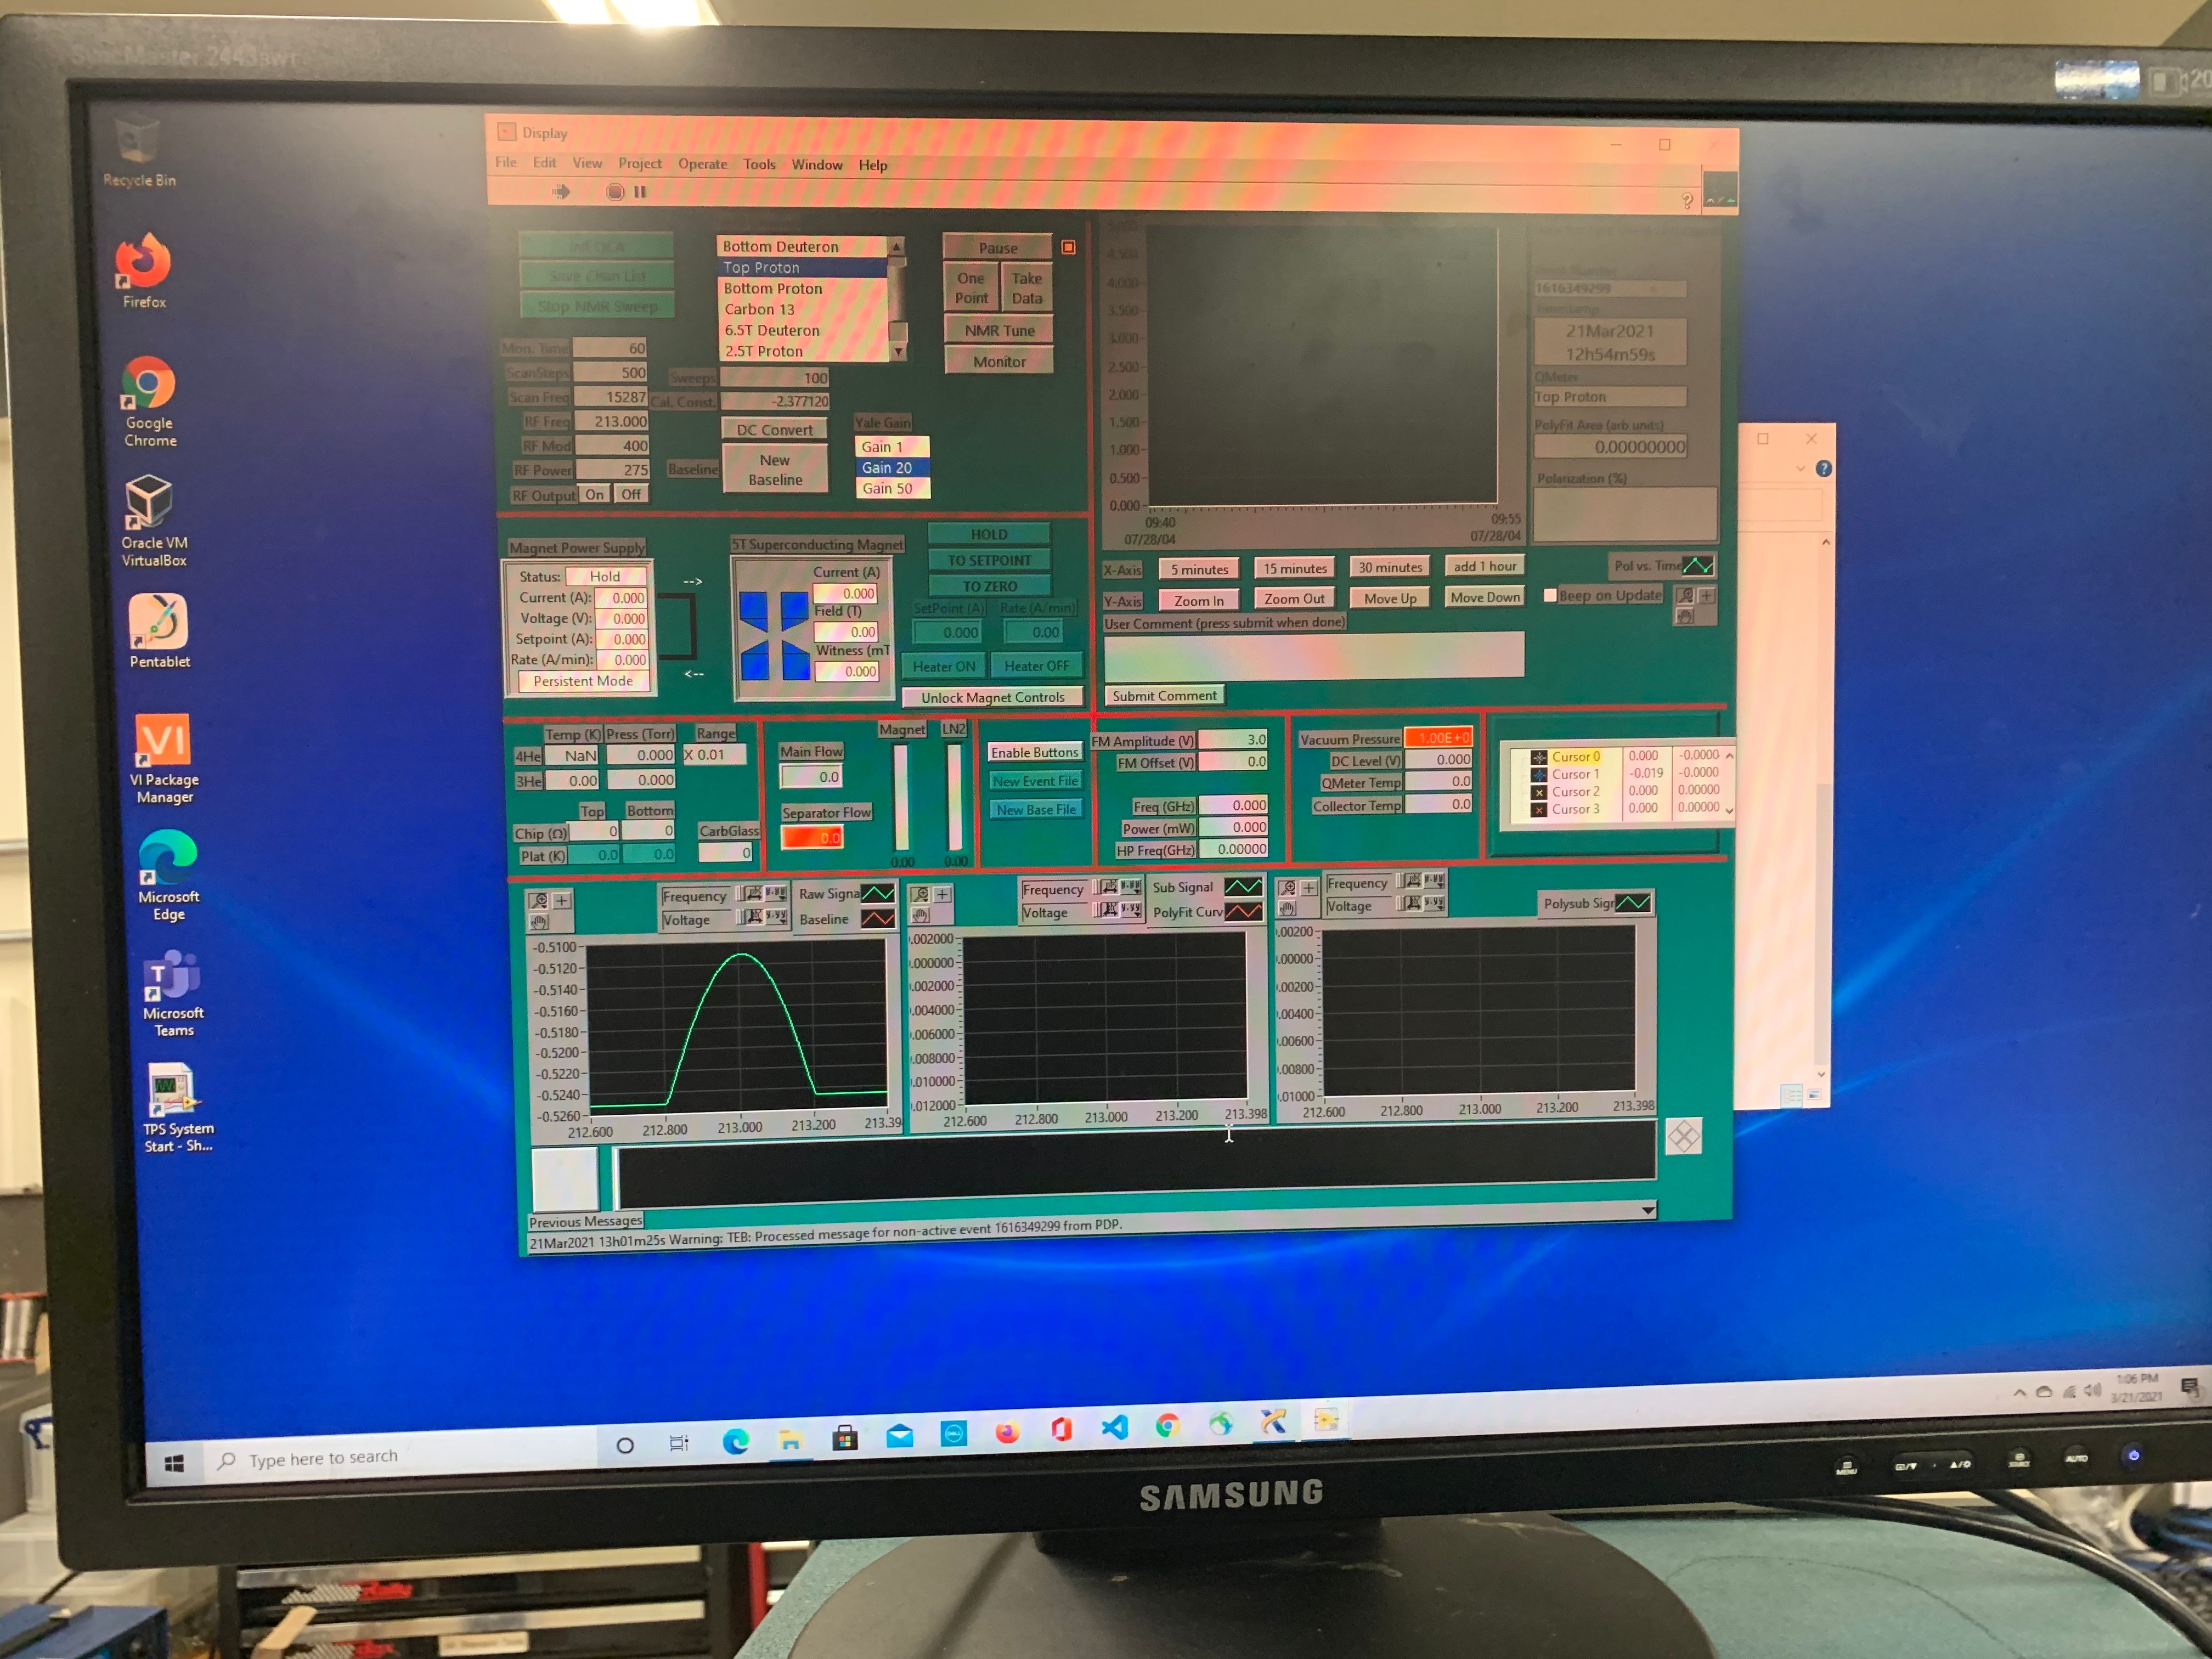
Tuning steps of the Q-meter
- Start with the "Diode" mode to figure-out the correct cable length: connect the coaxial cable to "Diode mode" on DIO box interface
We use the scale (in the oscilloscope) of the off-set of the Diode to know whether we are in/out side of the Q-meter's operational parameters within a reasonable deviation from lambda/2
i.e. if there is no cable connected (or the cable length is very far away from lambda/2), then the DC off-set will be about ~12V on the Diode.
In order to have it working correctly, you need to have ~3V (or less). [Make sure the oscilloscope's ground is set to 0] - There are two tuning parameters: length of the cable & capacitance of the system (Note: they are coupled)
Use a small screw-driver to change the capacitance of the variable-capacitor (check the Q-meter) for coarse adjustment and there is a knob for fine-tuning.
Looking at the line-segment appears on the oscilloscope screen, the length of the lambda/2 cable should be adjusted as,
i) If Left-hand-side is higher > "Lengthen" the cable
ii) If Right-hand-side is higher > "Reduce" the length of the cable
until we obtain a nearly horizontal (ideally up-side-down smiley face shape) line with the DC voltage less than ~3V. - Change from the "Diode mode" to "Phase" mode by connecting the coax cable to the phase cable. Press "DC-convert" button to get rid of any DC off-set when changing from Diode mode to Phase mode.
Change the Phase cable as,
i) If Left-hand-side is higher > "Lengthen" the cable
ii) If Right-hand-side is higher > "Reduce" the length of the cable
Windows TCP/IP Setting
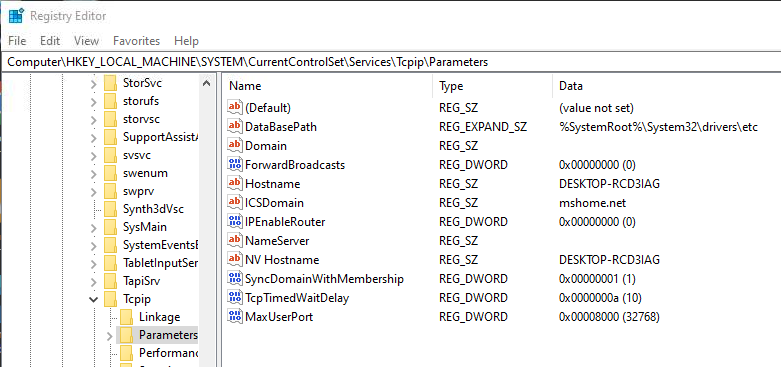
On 2022-April-20 we changed "TcpTimedWaitDelay" and "MaxUserPort" to "10" and "32768" via the registry editor. It was because the PDP encountered an error about the number of TCP connections, which happens probably when the polarization measurement is frequent. Here is a screenshot of the new settings in the registry editor. The cause and the solution of the problem is explained in this page for example.
Computer BIOS Setting
On 2022-Mar-01 we tried to use the NI Measurement & Automation Explorer. When we clicked "NI PXI-6225 "Dev4"" or "NI PXI-6221 "Dev3"" in the left-side menu, Windows 10 showed a blue screen saying "DRIVER VERIFIER DMA VIOLATION". PDP didn't work also. This error was found at the NI website; https://knowledge.ni.com/KnowledgeArticleDetails?id=kA03q000001DljOCAS&l=en-US .
The computer hardware was "Dell XPS 8940". We entered the BIOS menu (by hitting F2 during boot) and found under "System Logs" → "BIOS Events" that the firmware was update (automatically) on 2022-Mar-01. Most likely this update introduced a bad setting. According to the NI website, we disabled the following items on 2022-Mar-07. Then the error was resolved.
- "Security" → "UEFI Capsule Firmware Updates" — To prevent a future automated update.
- "Security" → "SMM Security Mitigation" — Probably not relevant this time?
- "Virtualization Supports" → "Virtualization"
- "Virtualization Supports" → "VT for Direct I/O"
Parts (for ordering purposes)
- Male connector for lambda/2 cables: https://www.mouser.com/ProductDetail/HUBER%2bSUHNER/11_SMA-50-2-15-111_NE?qs=Cv1v43EOJpqu%252BVcuuRq6eQ%3D%3D
- Female connector for lambda/2 cables: https://www.mouser.com/ProductDetail/HUBER%2bSUHNER/21_SMA-50-2-15-111_NE?qs=Cv1v43EOJpoKwN3%252BJX2jWQ%3D%3D
- NMR Lambda/2 cable from Teledyne (Quotes: QUO-19793-C4Q2L7.pdf , QUO-16717-K2B3R0.pdf)
- Small cables: https://www.pasternack.com/semirigid-0.034-50-ohm-coax-cable-copper-pe-034sr-p.aspx
- Small cable connectors: https://www.pasternack.com/nsearch.aspx?keywords=connector%20for%20PE-034SR&view_type=grid
(female): https://www.pasternack.com/ssma-female-standard-pe-034sr-connector-pe44424-p.aspx - Sensor cables: https://www.lakeshore.com/products/categories/overview/temperature-products/cryogenic-accessories/cryogenic-wire
https://shop.lakeshore.com/temperature-products/cryogenic-accessories/wire/quad-twist/quad-twist-wire-32-awg-7-6-m-25-ft.html - Deuteron crystals: https://www.mouser.com/ProductDetail/Fox-Abracon/FC4SDDDMC32.768-T1?qs=MLItCLRbWsxcHr7SXlyMGQ%3D%3D
- Q-meter receiver connector-base: https://www.mouser.com/ProductDetail/Linx-Technologies/CONSMA016-15-G?qs=OlC7AqGiEDk89VgzzF%252BR4g%3D%3D
- NIQuote_2488736-1.pdf
- Quotation_PXIe.pdf
- PCI Express card : https://www.ni.com/en-us/support/model.pcie-8375.html