...
1. Sign in to Audio-Video
| Section |
|---|
| Column |
|---|
| 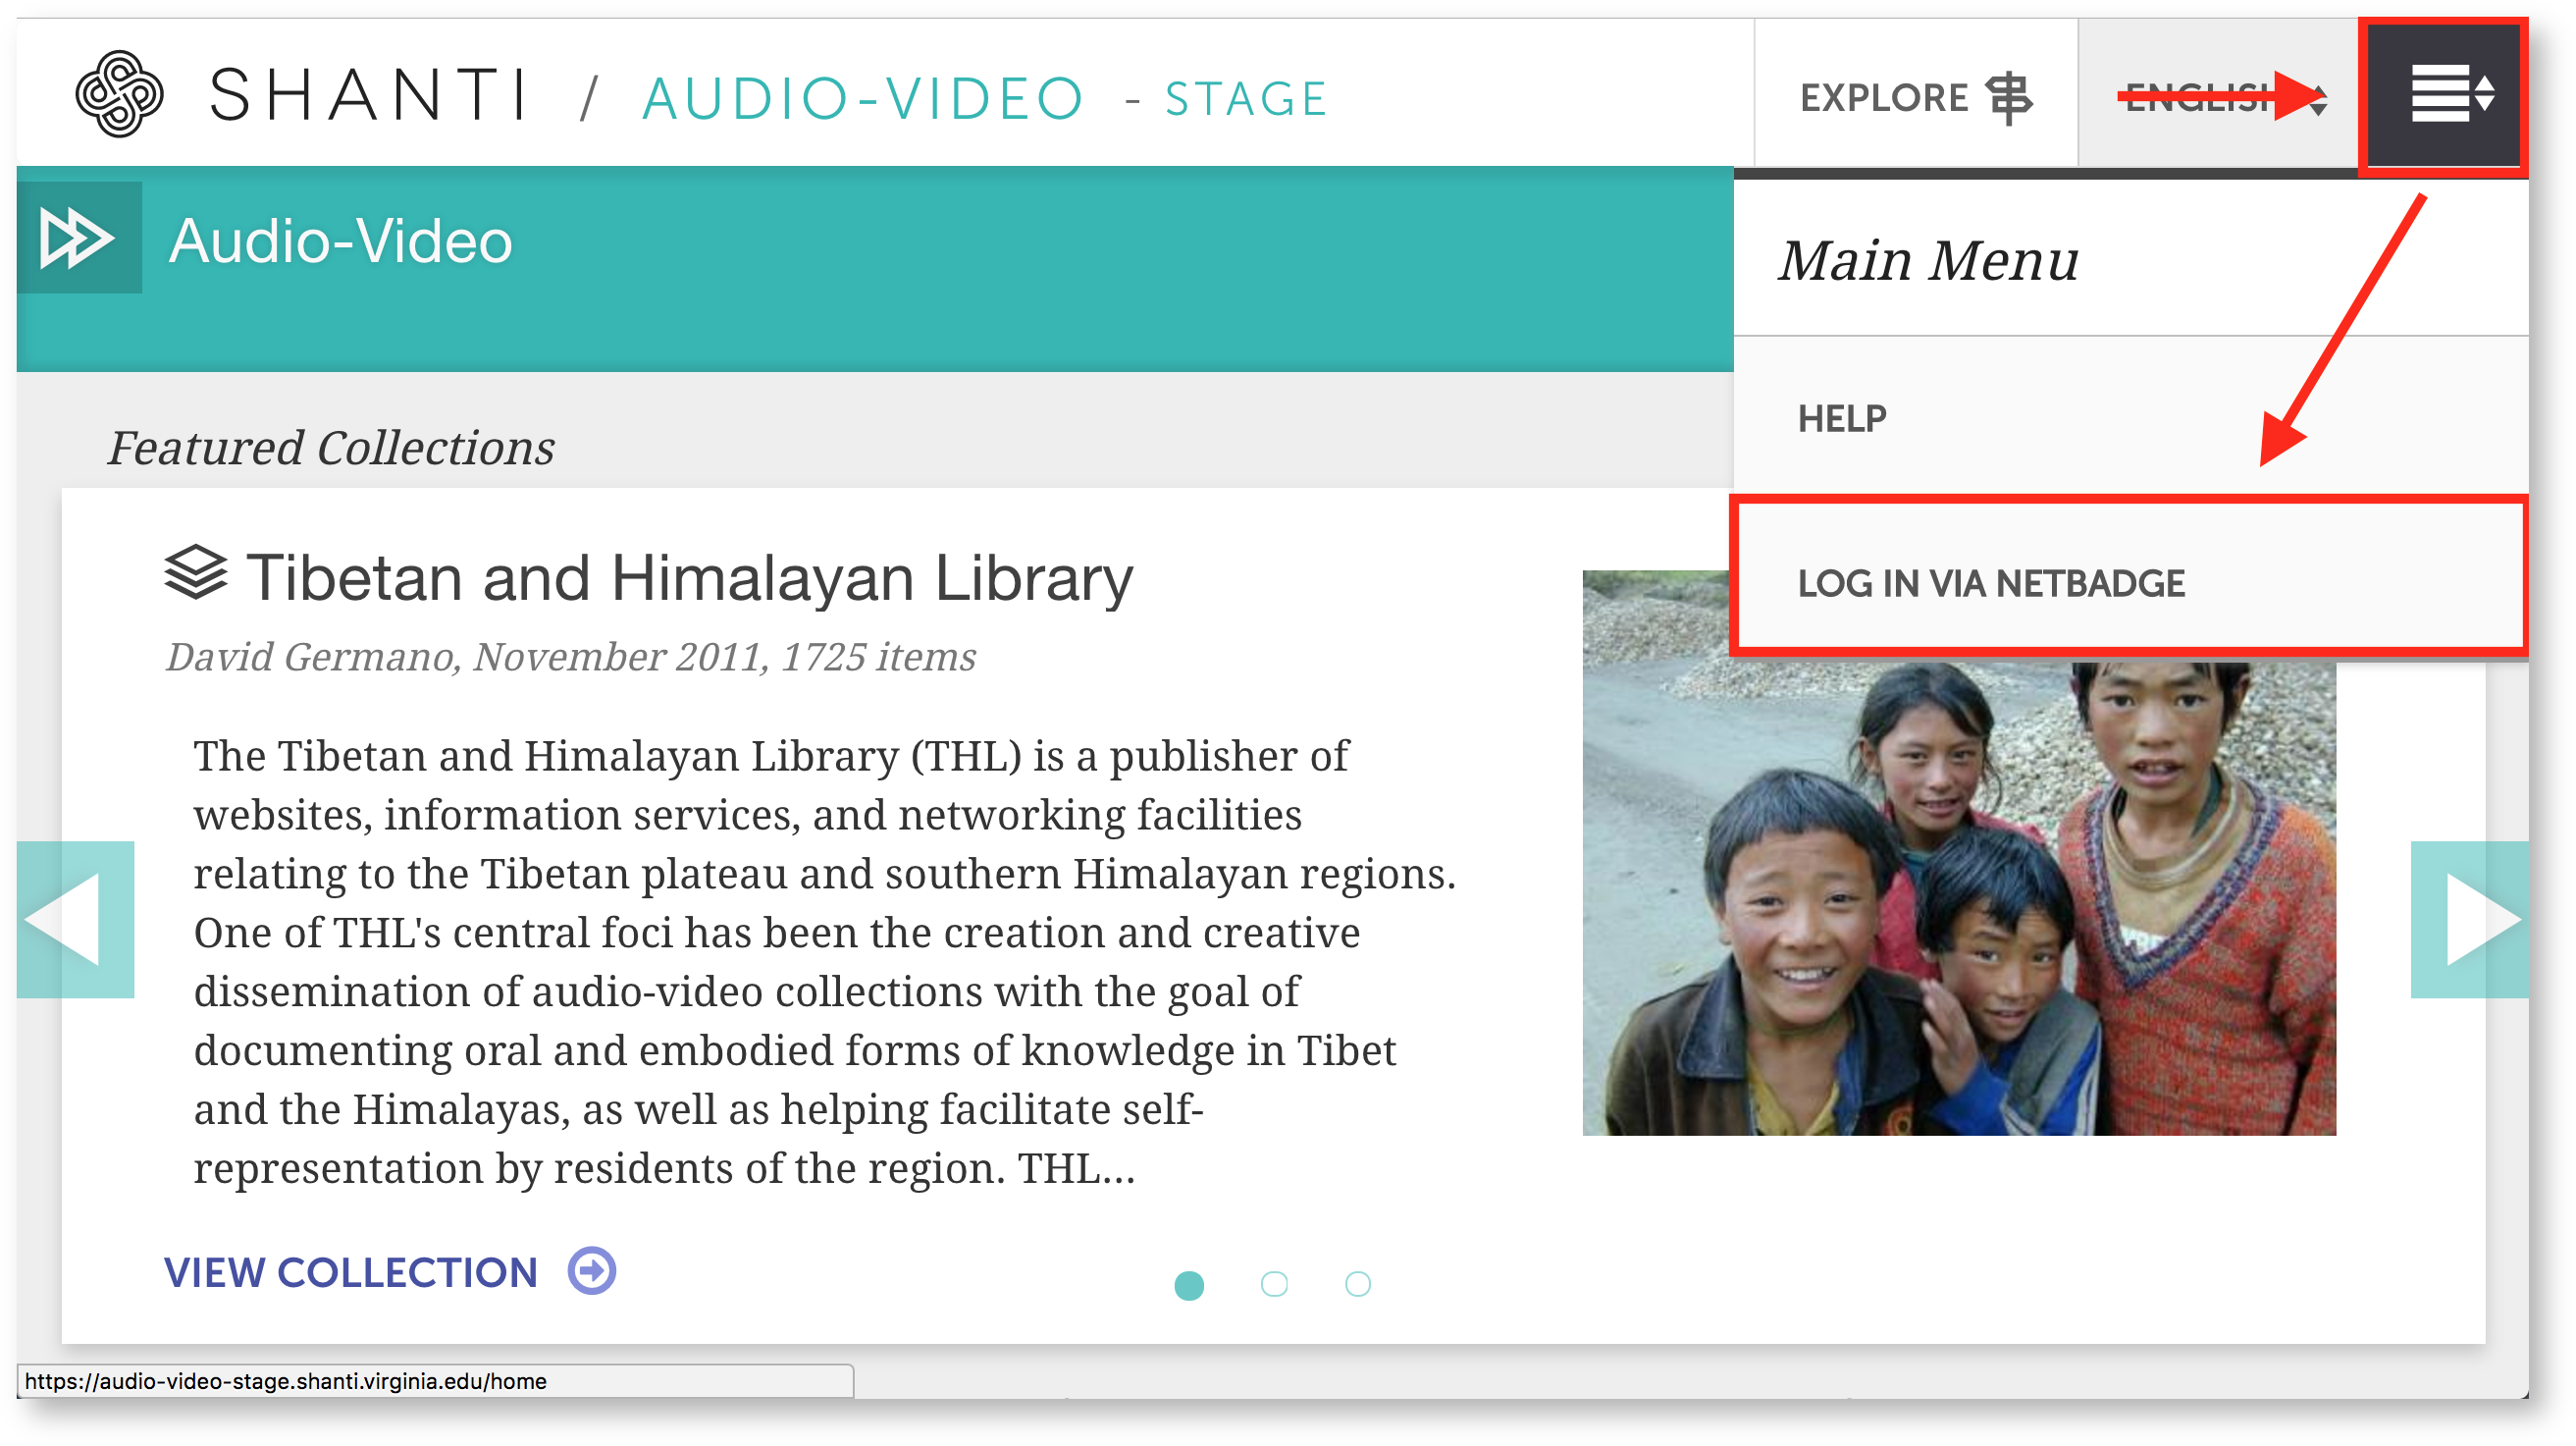 Image Added Image Added
|
| Column |
|---|
Click the Main Menu icon ( Image Modified) in the top right corner of the page. This opens a navigation menu. Then, Log in via Netbadge. Image Modified) in the top right corner of the page. This opens a navigation menu. Then, Log in via Netbadge. |
|
Image Removed
Enter your Netbadge credentials to finish signing in. You can now create your collection.
2. Make your collection
| Section |
|---|
| Column |
|---|
|  Image Added Image Added |
| Column |
|---|
Add New Collection |
|
...
on the right side of the Audio-Video page. |
|
...
A form with information for your new collection will open.
| Section |
|---|
| Column |
|---|
| 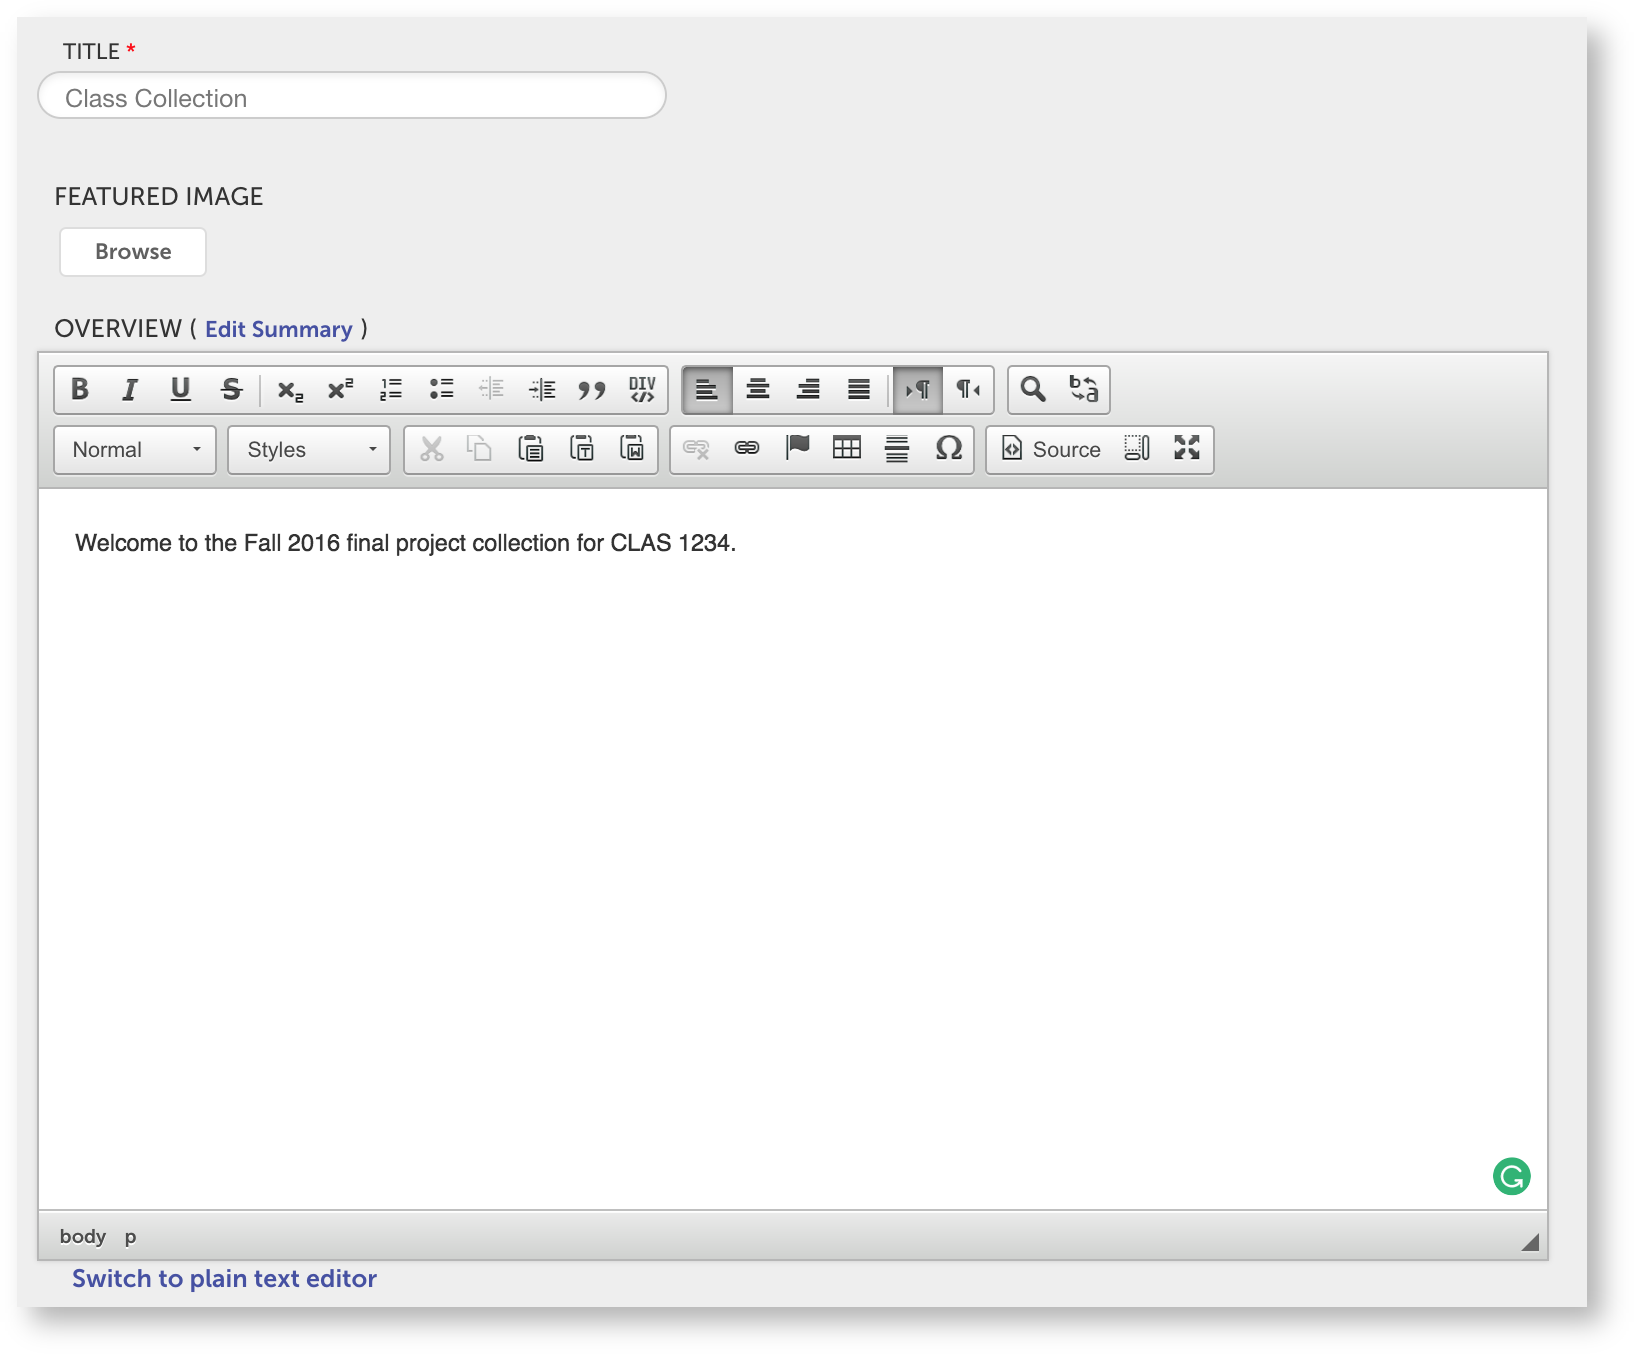 Image Added Image Added |
| Column |
|---|
Enter a title and a text |
|
overview for your overview of your collection. You can also add a featured image. |
|
Image Removed
Check the privacy settings below the overview.
| Section |
|---|
| Column |
|---|
| 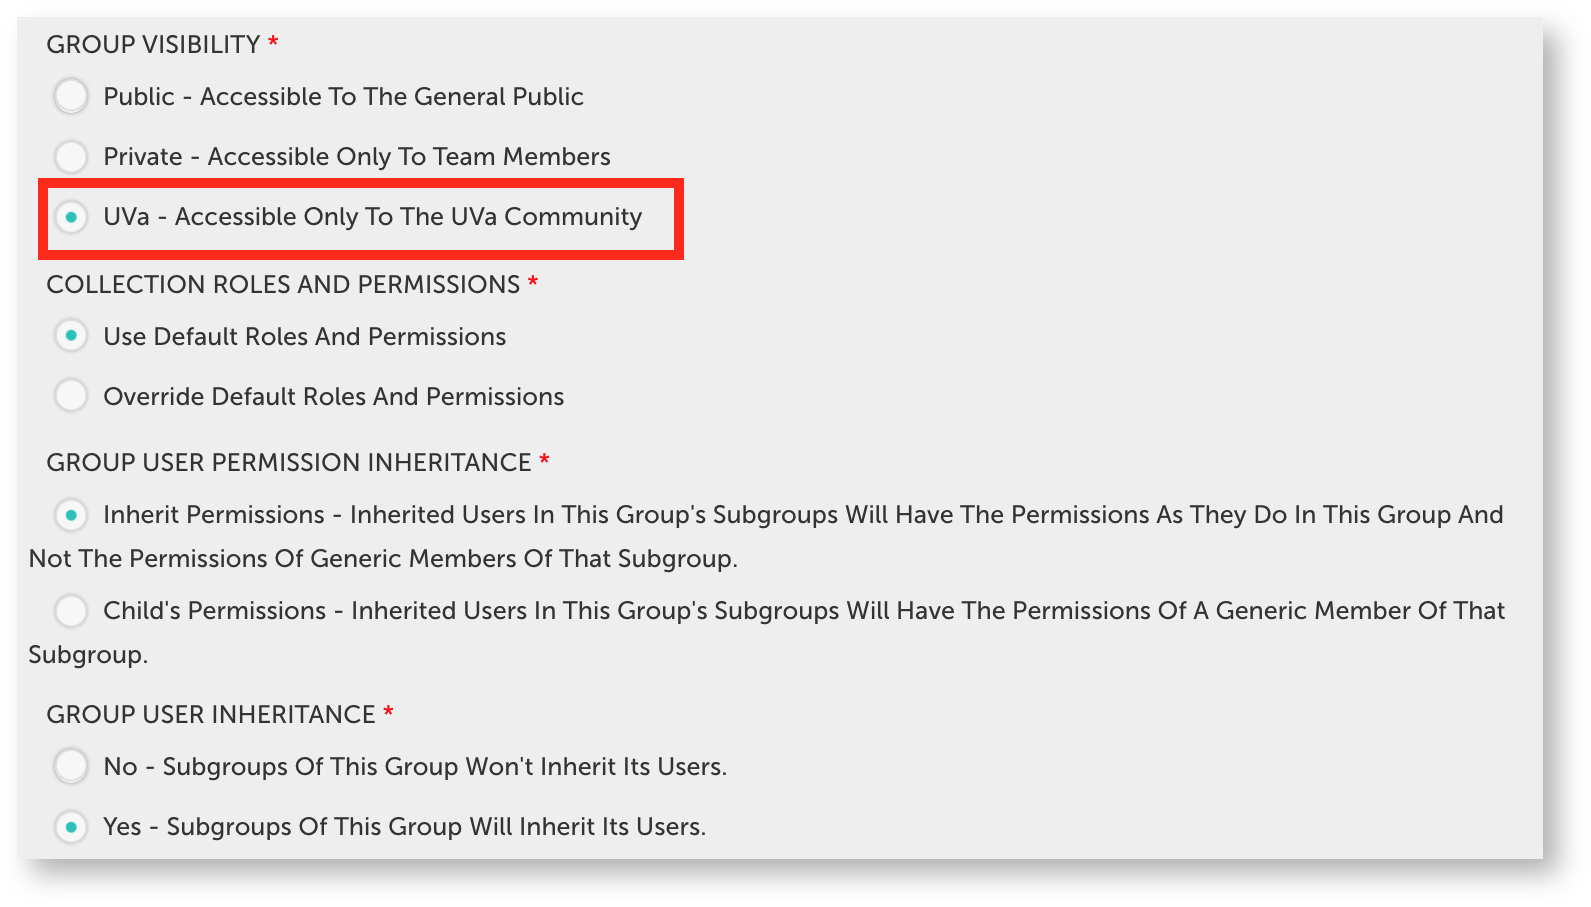 Image Added Image Added |
| Column |
|---|
Set "Group Visibility" |
|
to only UVa members only UVa members can see your collection. |
|
Image Removed| Section |
|---|
| Column |
|---|
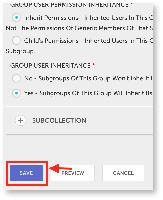 Image Added Image Added
|
| Column |
|---|
Save your collection. |
|
Image RemovedYou now have a new collection.
3. Open your collection
Open your collection to add your students or review submissions.
| Section |
|---|
| Column |
|---|
| 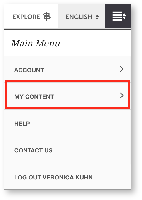 Image Added Image Added
|
|
click the  Image Removed icon from
 click the Image Added icon from any Audio-Video page. Then, |
|
click
Image Removed
Click | Section |
|---|
| Column |
|---|
| 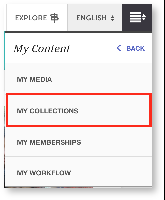 Image Added Image Added
|
|
Image RemovedYou'll see a list of your collections. Click your class collection to open it.
Add your students from this collection page.
4. Add your students
Make sure your students have logged in to Audio-Video at least once. This sets up their account automatically. If they have not logged in, you won't be able to add them to the collection.
| Section |
|---|
| Column |
|---|
| 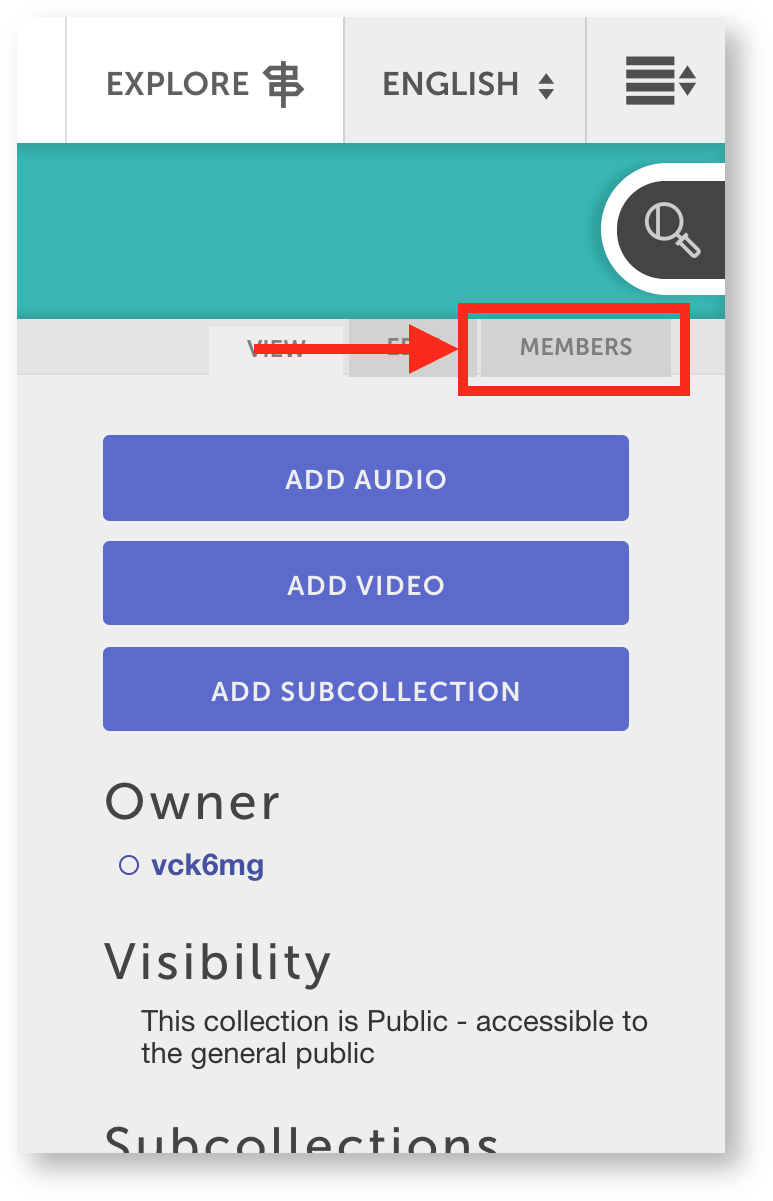 Image Added Image Added
|
| Column |
|---|
To add students, click |
|
the tab tab at the top right of the collection page. |
|
Image Removed
Then Add People. You'll a submission form for adding members.
| Section |
|---|
| Column |
|---|
| 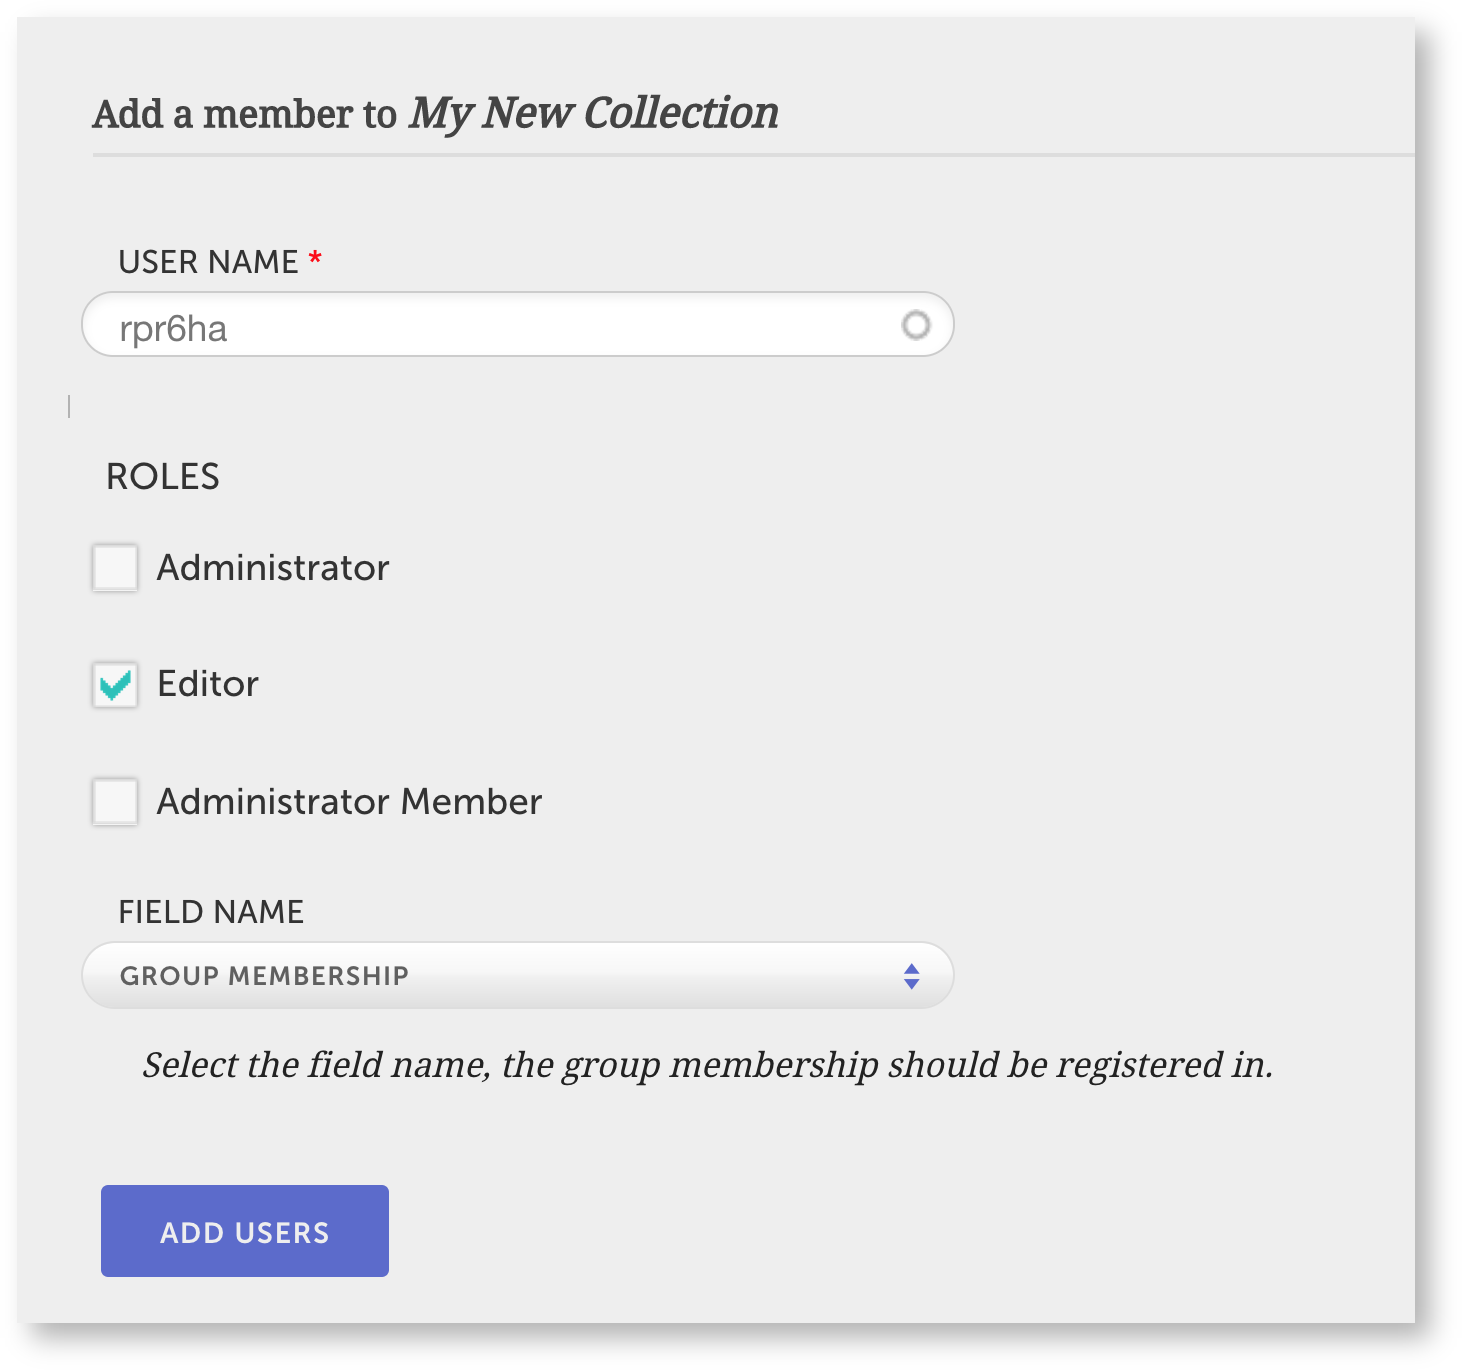 Image Added Image Added
|
| Column |
|---|
| Enter the computing id of the student you want to add under "User Name." |
|
Check Editor Check Editor under "Roles" to let students add media. Choose "Group Membership" under "Field Name" to make them members of the collection. |
|
| Section |
|---|
| Column |
|---|
| 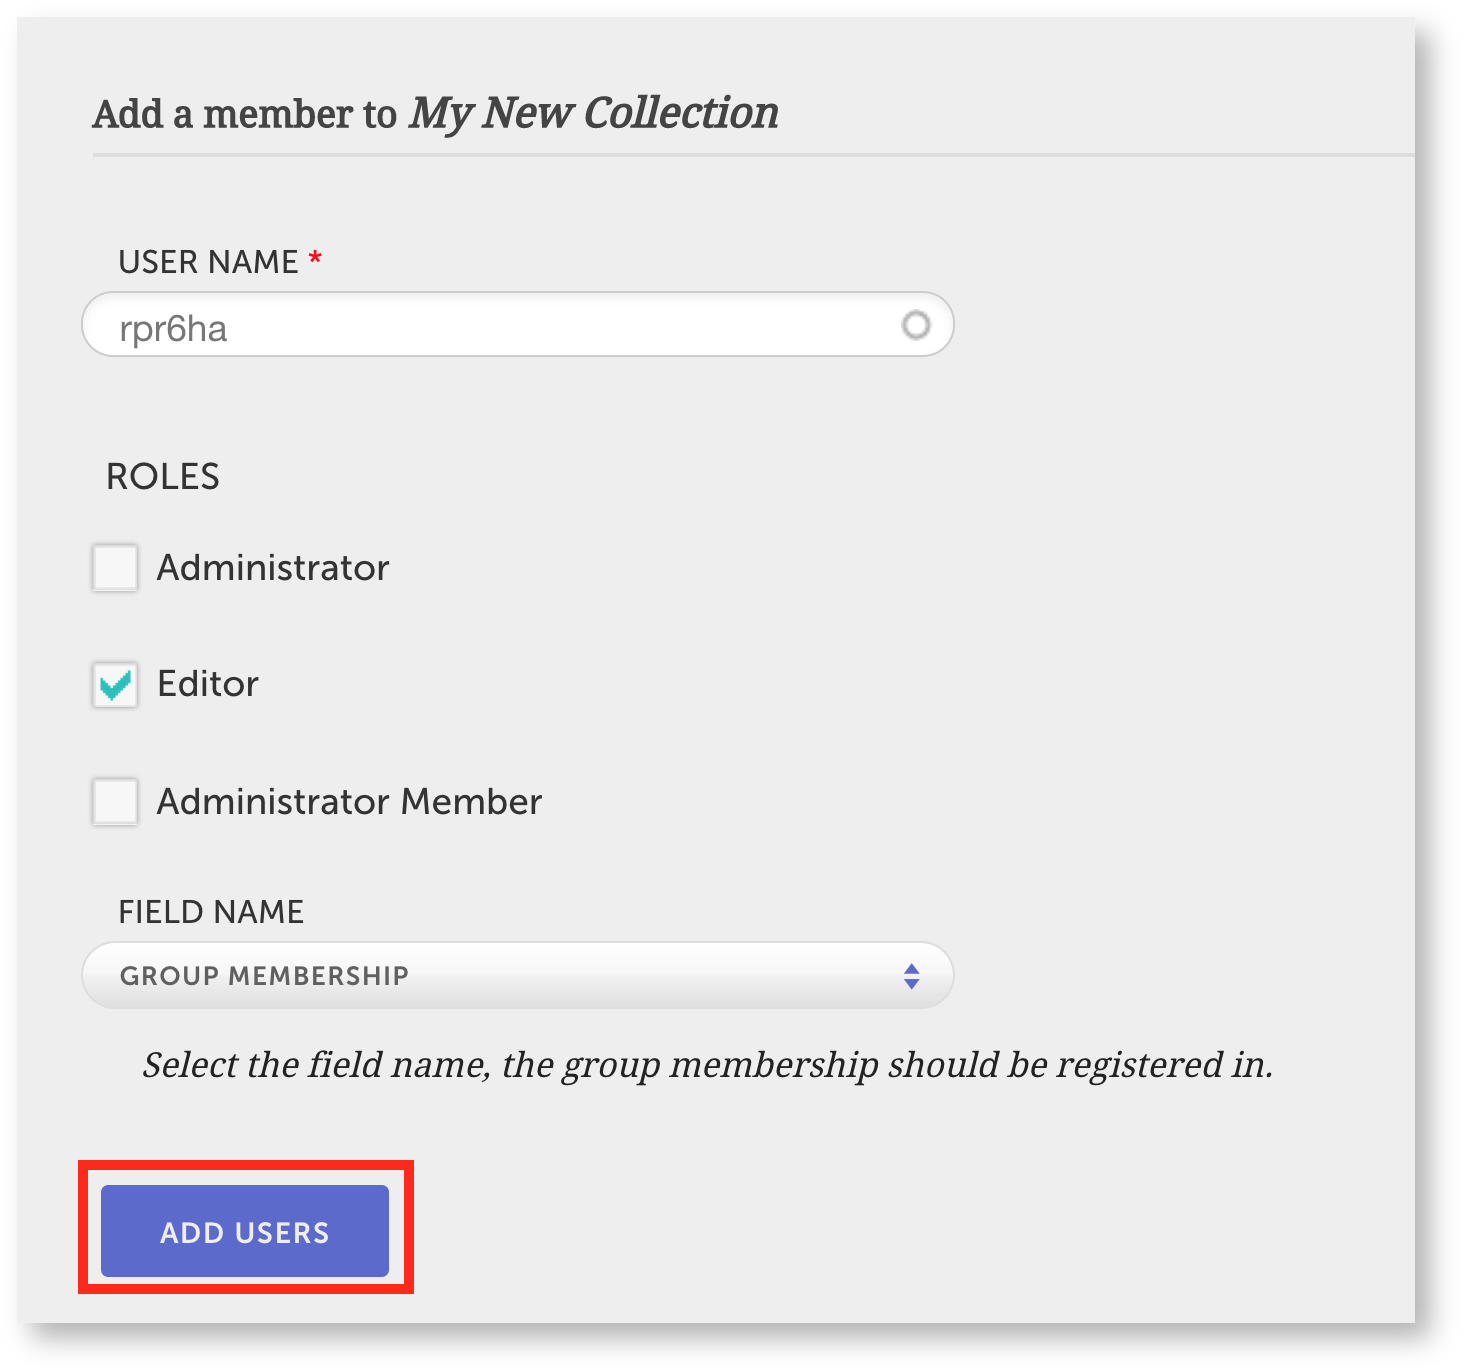 Image Added Image Added
|
|
Image Removed
Click Add Users Image Removed
Fill out the same form for all your students.
Your students are now members of the class collection.
5. Monitor collection submissions
Once the due date for submitting videos has passed, you can monitor your student's submissions.
First, open the class collection. (Remember, you use > My Content > My Collections. Then click your collection to open it.)
| Section |
|---|
| Column |
|---|
| 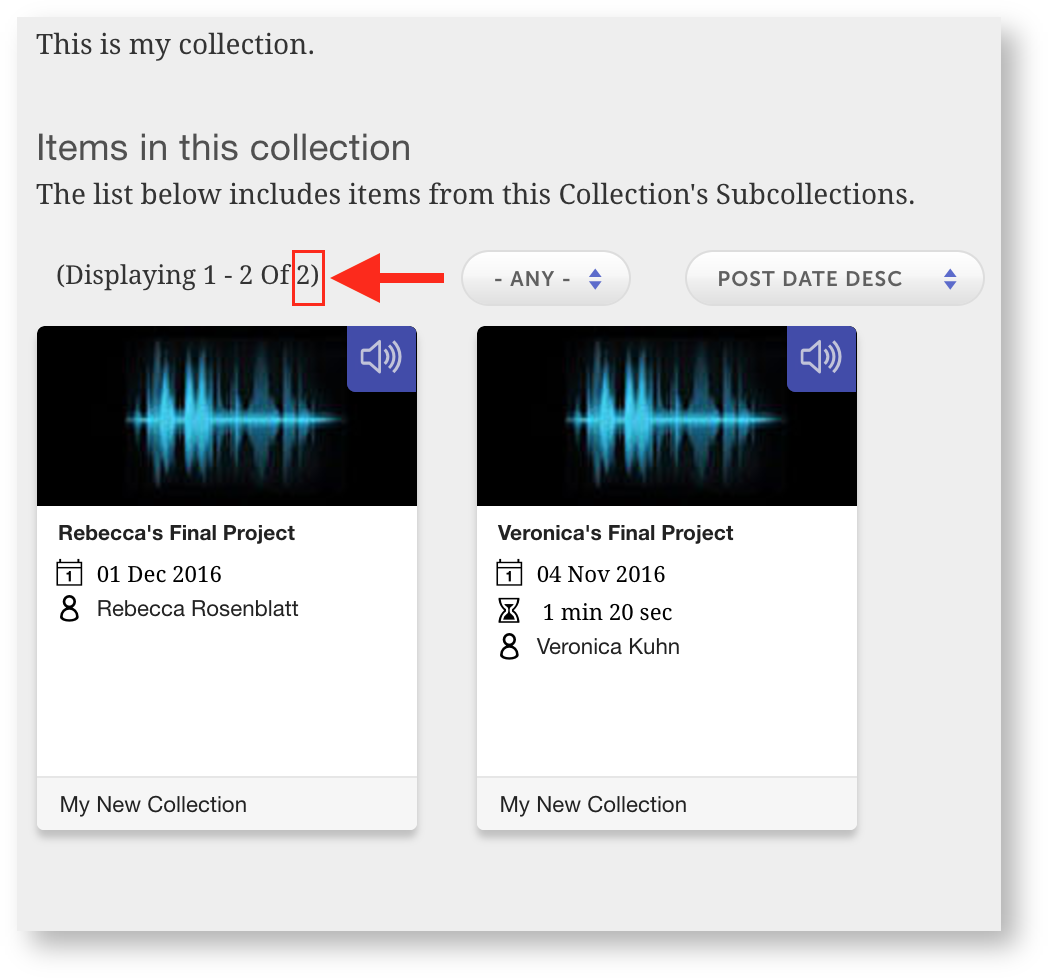 Image Added Image Added
|
| Column |
|---|
Check to make sure the number of items in the collection is equal to the number of student videos you need. If this number is too small, some students did not upload their projects. |
|
Image Removed| Section |
|---|
| Column |
|---|
| 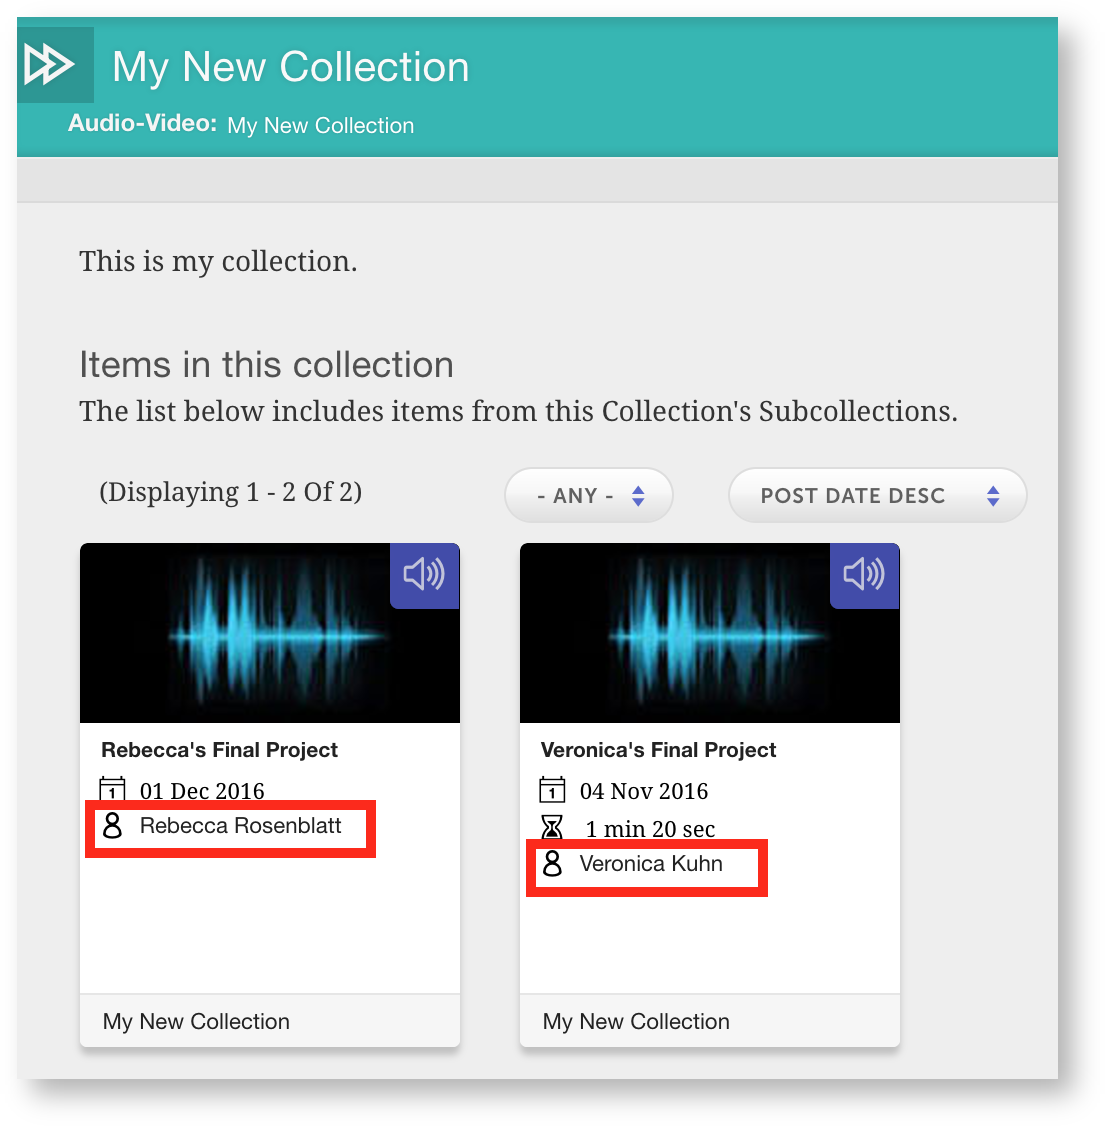 Image Added Image Added
|
| Column |
|---|
Quickly verify who submitted a video by checking the names under the preview icons. |
|
Image Removed
Then, open projects by clicking an item in the collection. You can then play and review videos.
If you see a problem with the submission
Use workflows to point it out to your student.
| Section |
|---|
| Column |
|---|
| 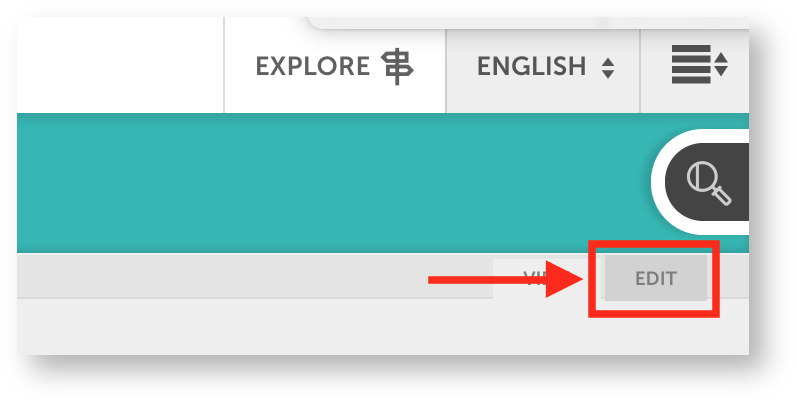 Image Added Image Added
|
|
the tab tab. This opens the video in edit mode. |
|
Image Removed| Section |
|---|
| Column |
|---|
| 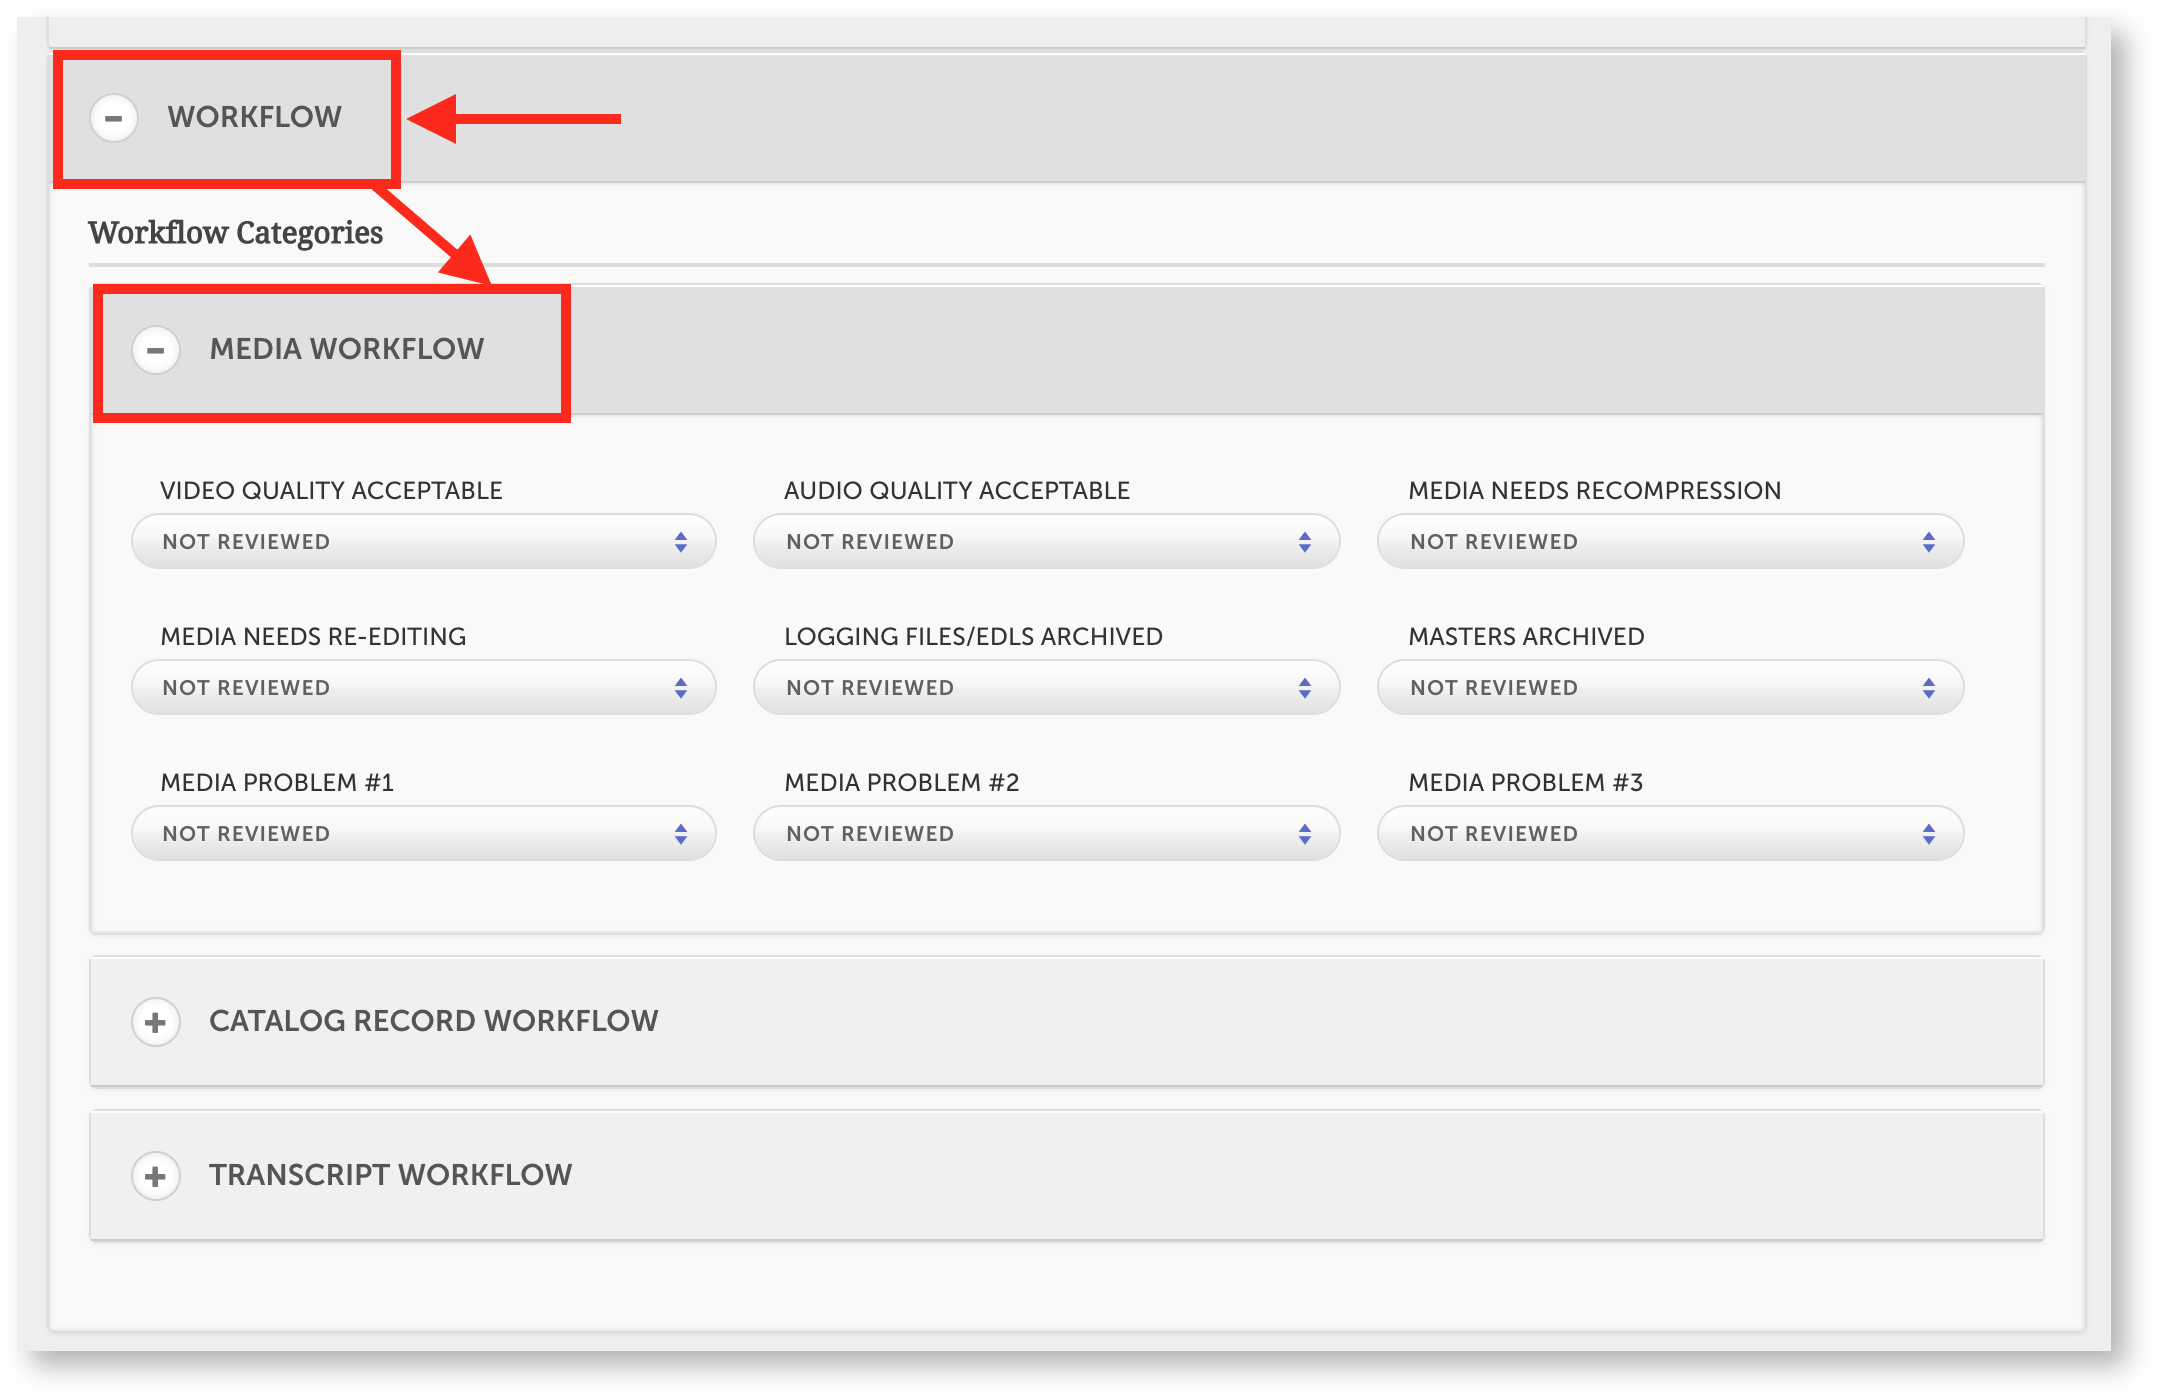 Image Added Image Added
|
| Column |
|---|
| Then, click Workflow. Several sections will appear: |
|
click Image Removed| Section |
|---|
| Column |
|---|
| 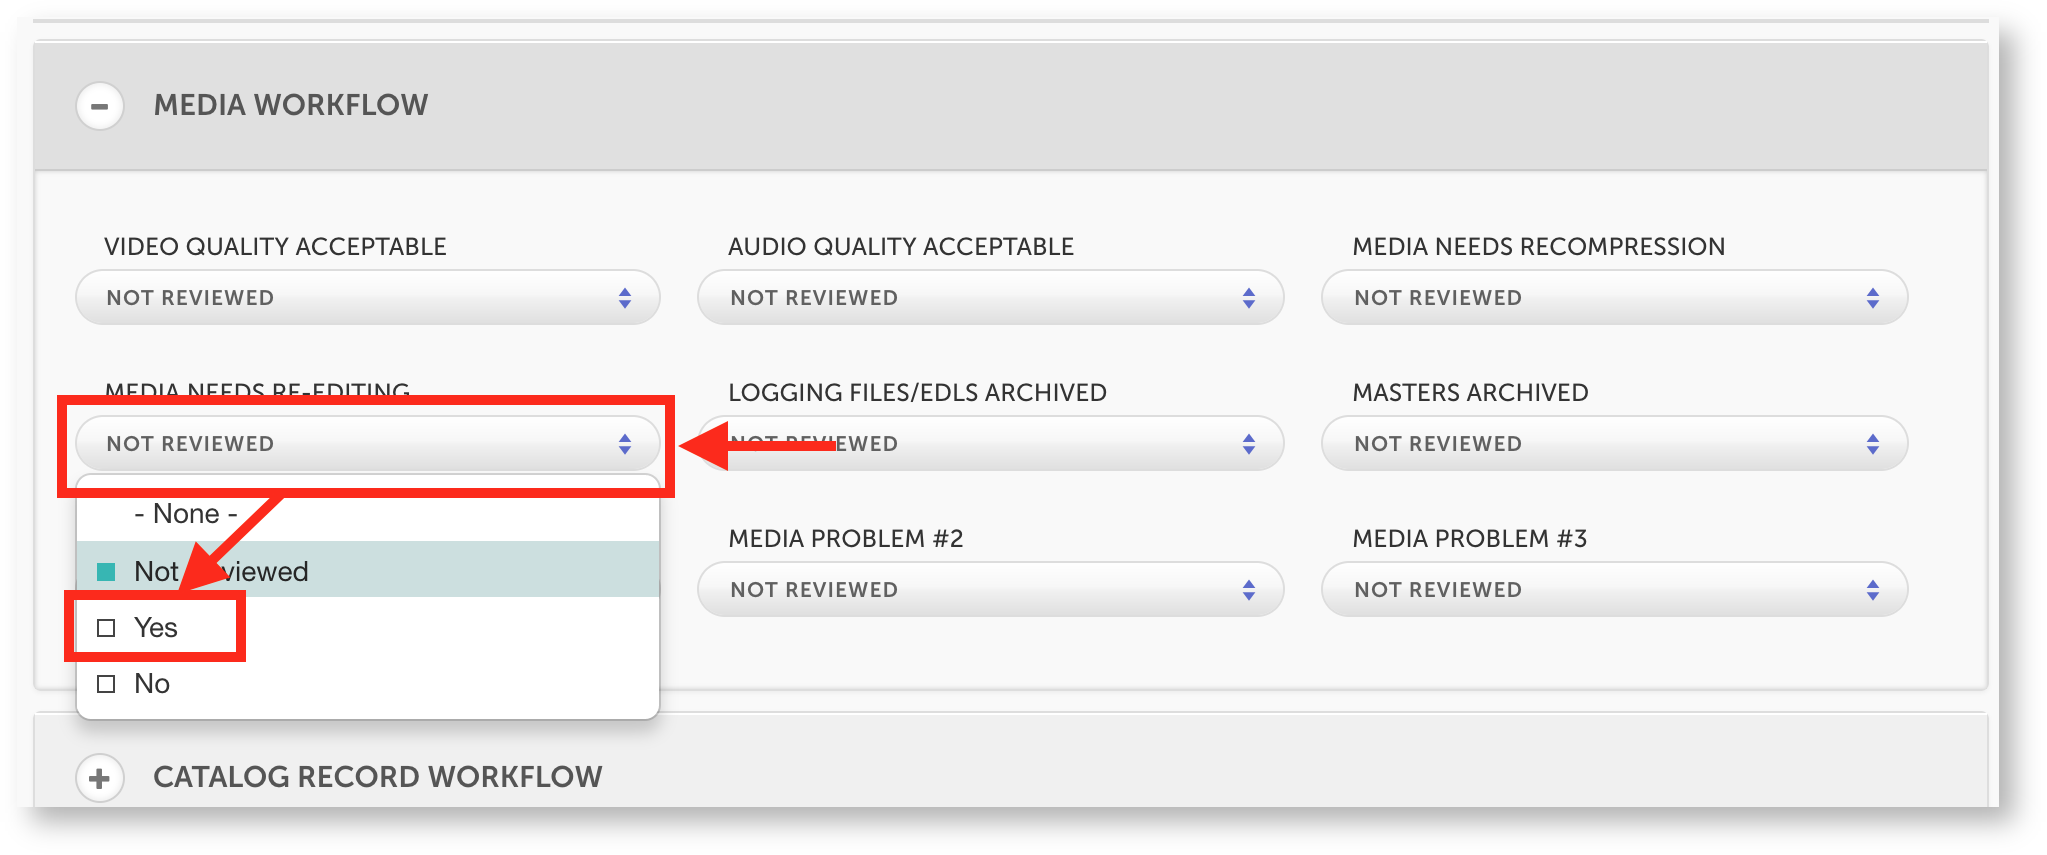 Image Added Image Added
|
| Column |
|---|
Change the "Media needs re-editing" field |
|
to Image Removed| Section |
|---|
| Column |
|---|
| 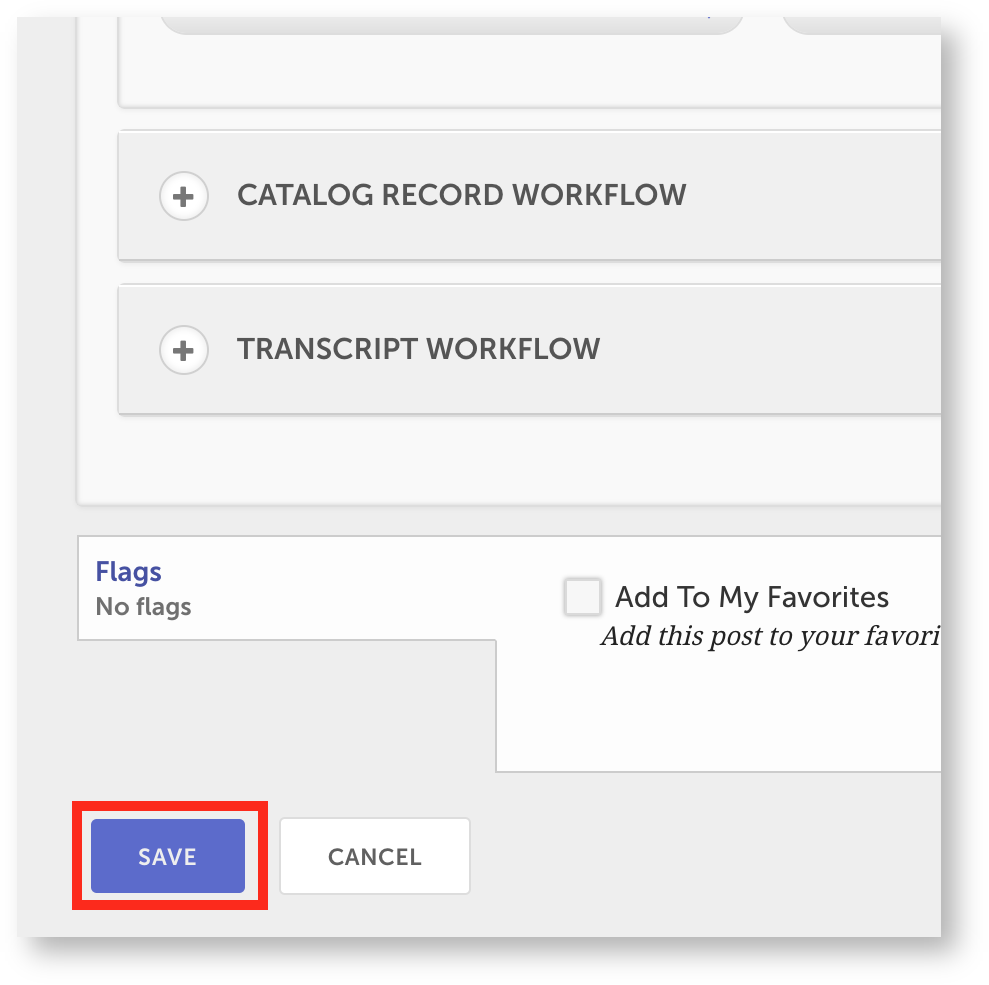 Image Added Image Added
|
| Column |
|---|
To finish, Save your changes. |
|
Image Removed
If you see a video you want to delete
| Section |
|---|
| Column |
|---|
| Image Added |
|
the tab tab on the video page. This opens the video in edit mode. |
|
Image Removed
Delete the video at the bottom of the page.
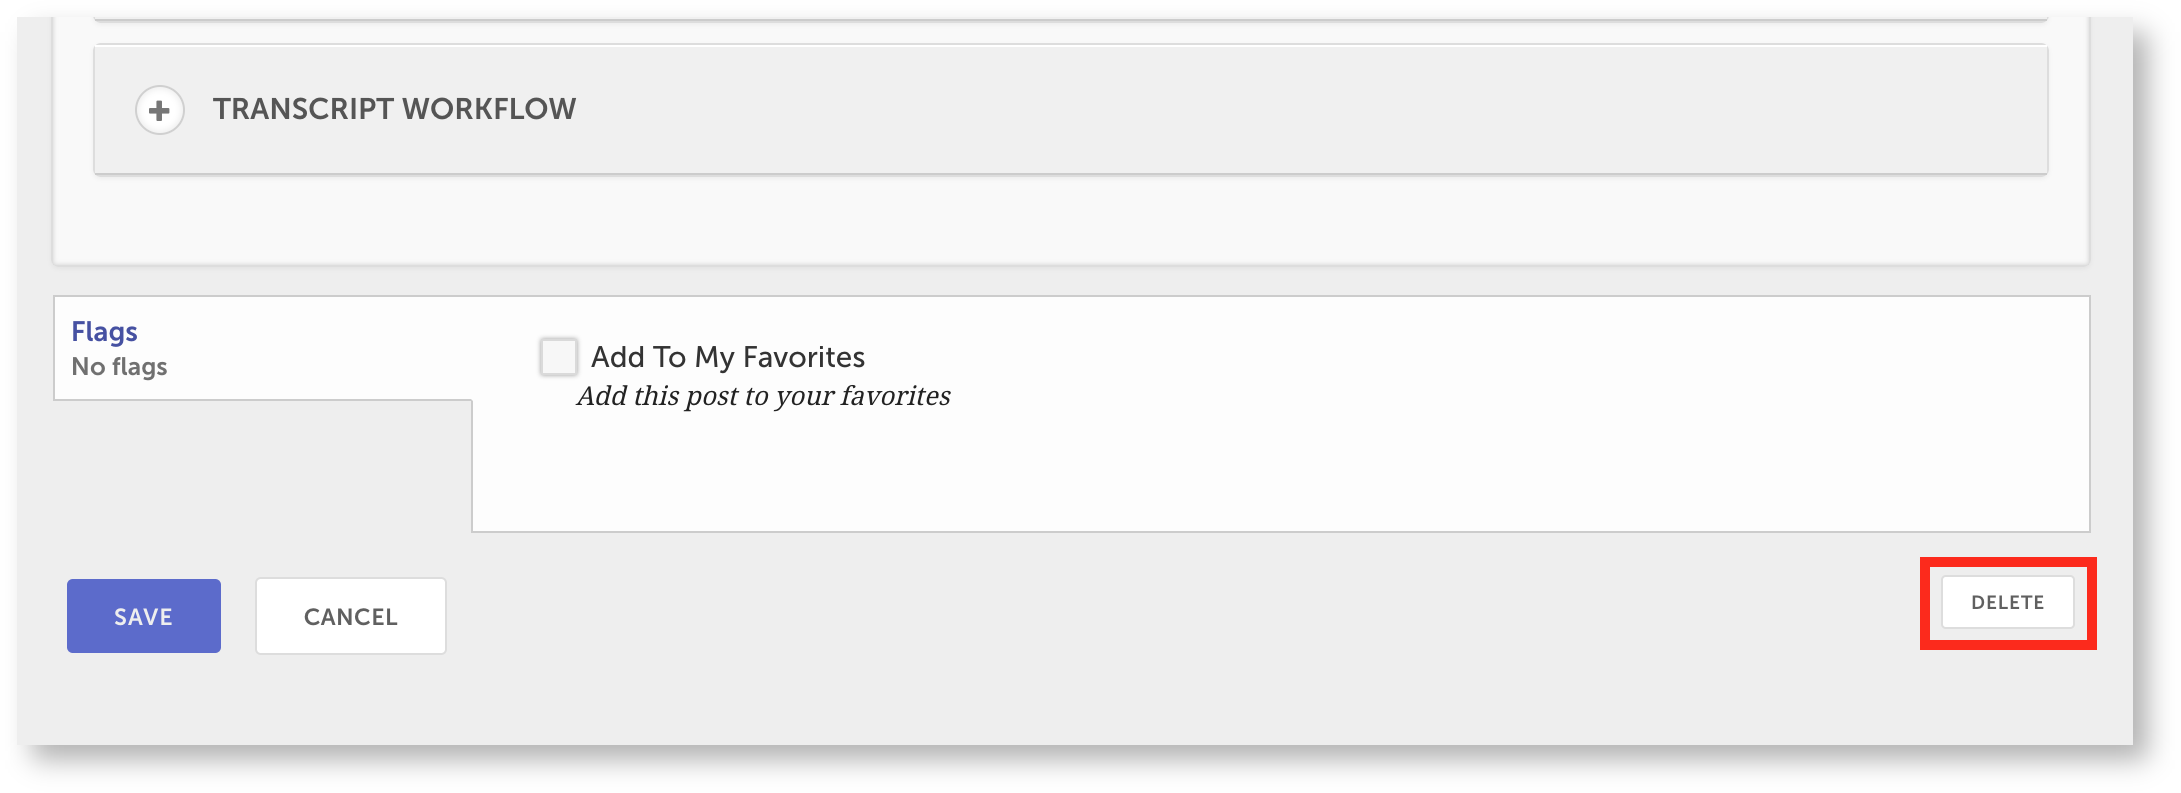
Audio-Video will check to make sure you really want to delete the video. Delete the video again to remove it from the collection.
...