(updated in December 2020)
------------------------------
Here are some recent instructions for running jobs on Rivanna (by Nick & Ishara):
1. Make sure that Prof. Keller has added you to both the spin and spinquest groups in Rivanna. Without both groups, you will not be able to gain access to the system. There are two ways of accessing Rivanna (https://www.rc.virginia.edu/userinfo/rivanna/login/); you can follow either step (2) or step (3) mentioned below.
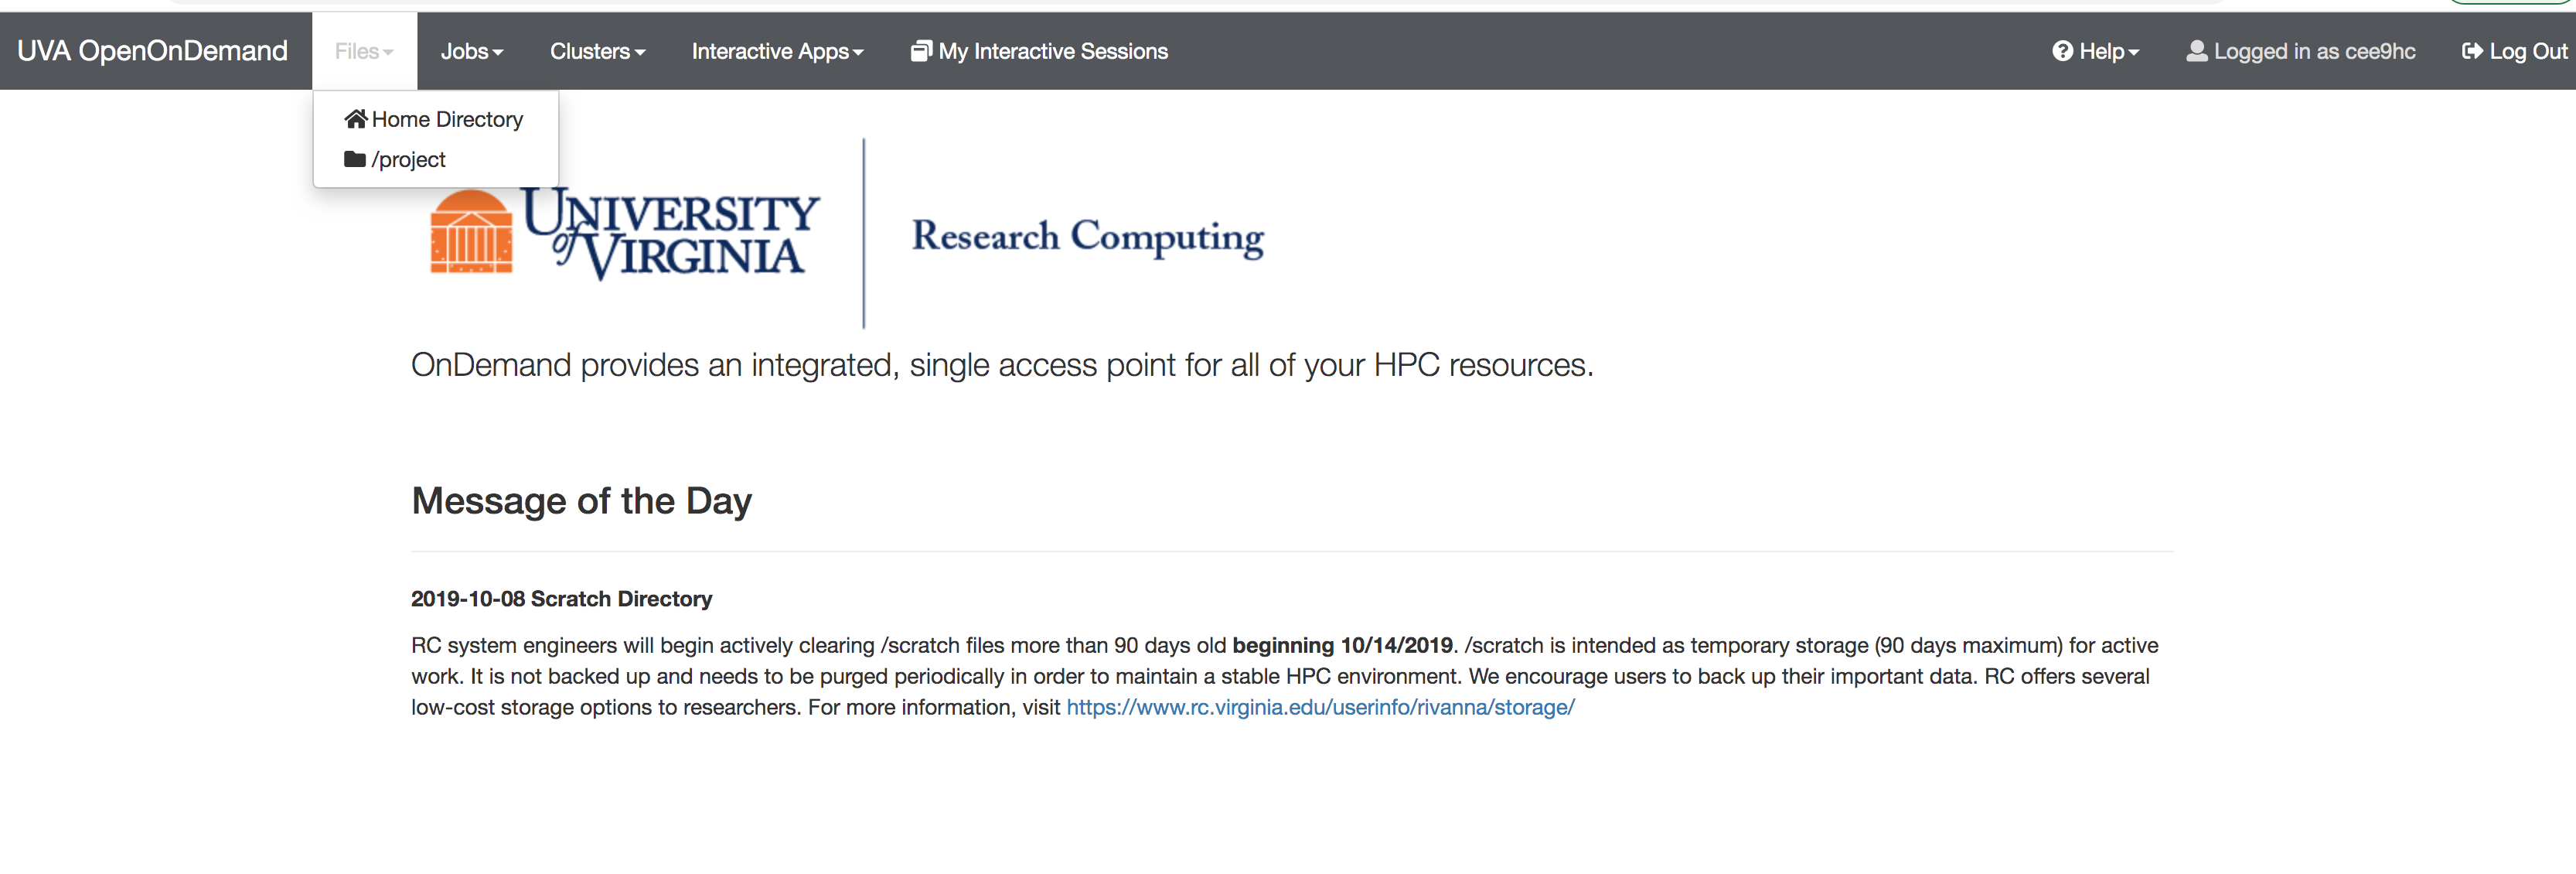
2. Web-based Access (Click on "Launch OpenOndemand" > You will need your UVA computing ID and password to log in)
- You can navigate to your "Files", "Jobs", "Clusters", etc. via the menu bar (see the above image)
- You can create directories/folders inside your "home" directory, and upload your files using the "Upload" option in the menu bar.
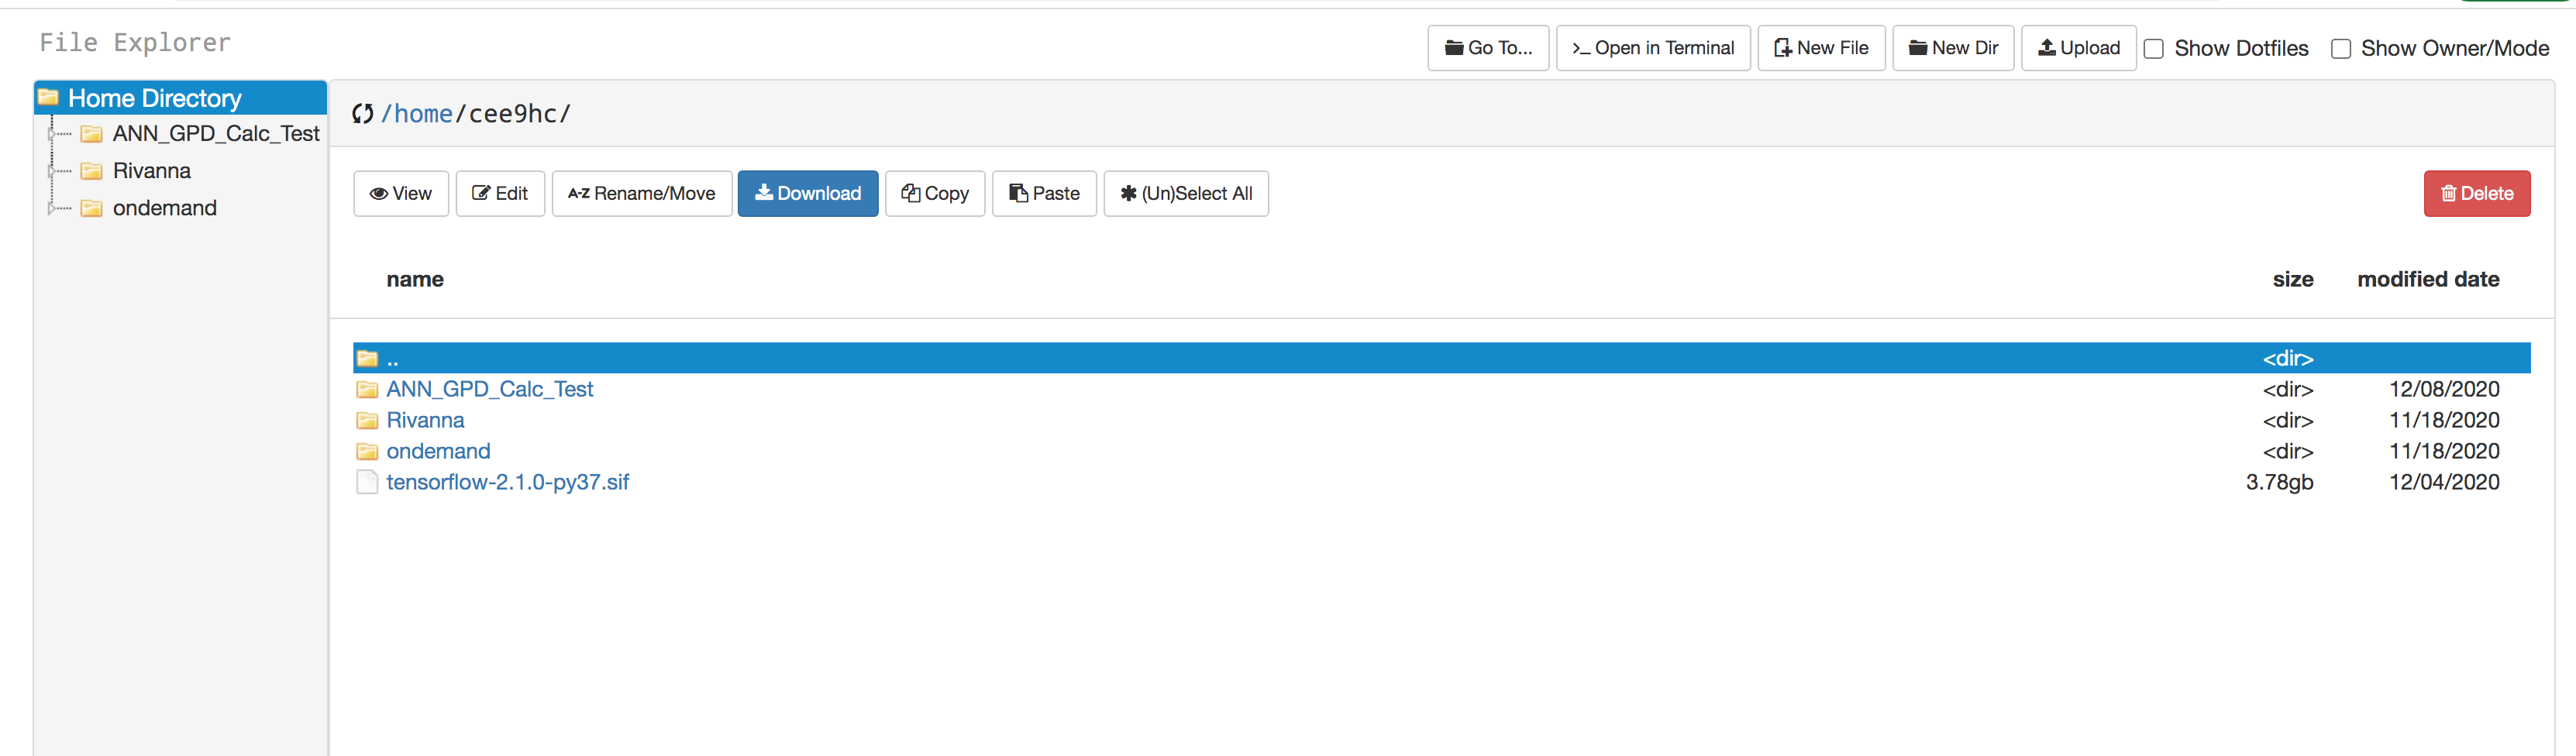
- Initially (most probably) you will not see the file "tensorflow-2.1.0-py37.sif" file in your home directory. If so, "click" on the ">_Open in Terminal" on the menu bar; a new tab on your web browser will show up with a terminal environment.
Issue this commands:
module load singularity/3.5.2
module load tensorflow/2.1.0-py37
- cp $CONTAINERDIR/tensorflow-2.1.0-py37.sif /home/$USER and then you will see that file is there in your home directory.
- Make sure you have the ####.slurm file in your working directory (corresponding to the job that you are going to do), and check that the following lines are there (please note that the file name and location are just an example).
#!/usr/bin/env bash
#SBATCH -p standard
#SBATCH --output=result_%a.out
#SBATCH -c 1
#SBATCH -t 16:30:00
#SBATCH -A spinquestmodule purge
module load anaconda/2019.10-py3.7
module load singularity/3.5.2
module load tensorflow/2.1.0-py37singularity run --nv /home/$USER/tensorflow-2.1.0-py37.sif /home/cee9hc/ANN_GPD_Calc_Test/Full_ML_fit_evaluation.py ${SLURM_ARRAY_TASK_ID}
- You will need to make sure the locations/paths mentioned in your program files contain your change computing ID. Also, within the python file, you may modify parameters such as the learning rate and numSamples with specific values.
- Issue the command: sbatch --array=0-14 Job1.slurm (please note that this "Job1" is an example, you can have your own filename)
3. Secure Shell Access:
- You will need a UVA's VPN in order to SSH to Rivanna. Follow this link and follow the instructions on the page to download and configure the VPN. There are three types of network accesss available: "UVA More Secure Network", "UVA Anywhere", and "High Security VPN". "UVA More Secure Network" would be the prefered one, but "UVA Anywhere" would also work if "UVA More Secure Network" is not available.
- Open a UNIX terminal and connect to Rivanna with the command "ssh -Y mst3k@rivanna.hpc.virginia.edu" (replacing mst3k with your computing id). The password is the same as your UVA netbadge password. If you are not now at the Rivanna command line check that the step(1) + above steps are successfully completed.
- To move the code and associated resources into your Rivanna directory, you can use secure copy from another terminal. The resources you need for running the code are the same as with the Colab notebook, except that it is necessary to run a pure python file as opposed to a notebook on Rivanna. I have uploaded a python version of the same code to the Github. One additional resource that was not previously necessary is the bash script to run the Rivanna job, called as "Job1.slurm" for this example. You will need to make sure the locations/paths mentioned in your program files contain your change computing ID. Additionally, within the python file you will want to change the learning rate and numSamples parameters to the specified values.
- Run the job with the command "sbatch --array=0-14 Job1.slurm". For more information about this command see this link. This will run all the kinematic sets simultaneously for however many replicas you specified with the numSamples parameter. For 1000 replicas, the process may take up to six or seven hours. If you desire to run only a handful of kinematic sets for 1000 replicas that can be done much more quickly but requires some slight changes to the code (The replicas would be parallelized instead of the kinematic sets. In fact, both could be parallelized, but Rivanna prevents you from running more than a few thousand jobs simultaneously). Let me know if that is the case and I can edit the code for you.
4. Once the job is started, you will see a job ID in your Rivanna terminal. You can monitor the progress of your job by navigating the the "Jobs" page on your web browser (see fig 1 above).
5. The results of the replicas will be in your home directory of Rivanna under the name Results(0-14).csv. These can be sent back to your local system for analysis with the scp command or downloading via the OpenOnDemand