Operations
The following procedures suppose that you use the remote control interface (i.e. Cryo Control Panel; CCP). When you use the front panel of the magnet PS, some button operations are different.
Things to-do
- We should get the information of Clamped/Reate-Limit/Quench from the Mercury-iPS to the VI
- We need to be able to ramp-down 0A with 0.5A/m rate, so there should be a preset for that.
- Need a manual override in the VI.
- We need a power-indicator on the shim power supply. These are the shim-coil-power indicators.
- We need a field indicator in the cave.
Precautions
No operation can be made when the magnet is being filled with LHe.- The magnet LHe level is so high (>20%??) that LHe remains even if soft quench happens.
- A time to ramp up/down the magnet should be planned in advance, since it takes at least 1.5 hours.
- You should remember that any deviation from the standard procedure might cause quench.
- You are expected to know what should happen at each step and confirm that it happened. You had better go through this procedure with another person who has already carried it out.
- You should search for any indication of quench during the operations, such as error messages on the magnet PS, sudden changes of Tank B, Coil T, Coil B, the magnet pressure, etc.
- You can use this chart preset: https://e906-gat1.fnal.gov/data-summary/e1039/target-par-preset/magnet_ramp.php
To Ramp Up
- Confirm that the shim PS is powered ON (if you can go in the hall).

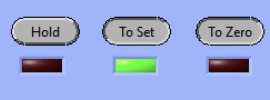
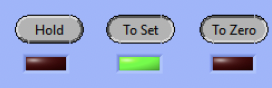
- Press "To Zero", to confirm that CCP can communicate with the magnet PS.
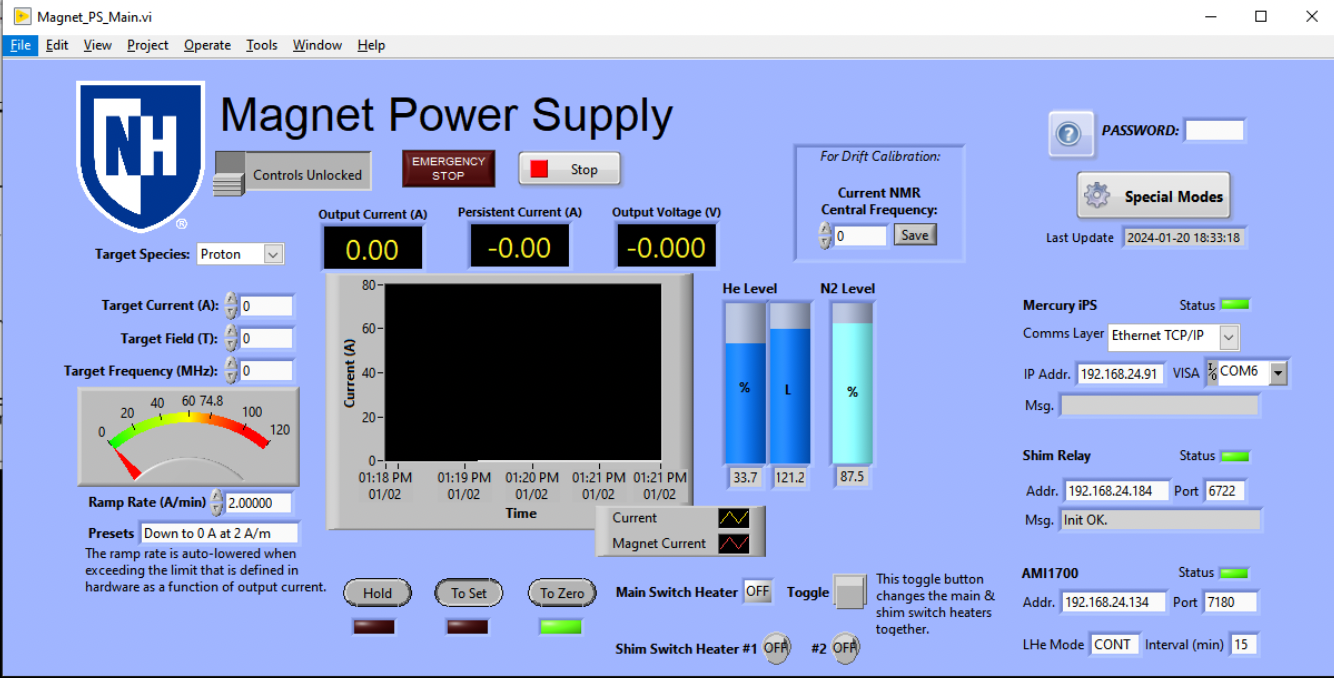
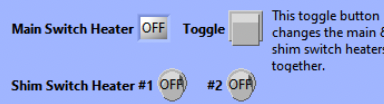
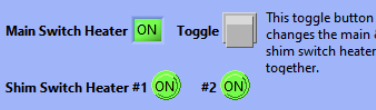
- Press the Toggle button of the main switch heater. It turns on the main switch heater and also the two shim switch heaters.
- When you use the PS front panel, you have to press additionally the two buttons of the shim switch heaters on CCP, to turn them on.
- When you use the PS front panel, you have to press additionally the two buttons of the shim switch heaters on CCP, to turn them on.
- Confirm that the two LEDs on the shim PS are ON (if you can go into the hall).

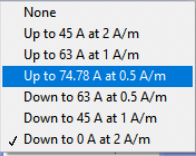
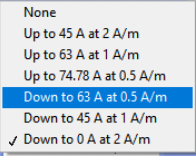
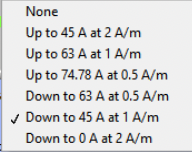
- Set "2 A/m" and "45 A".
- You can use the "Presets" selector, or enter the values into the text boxes.
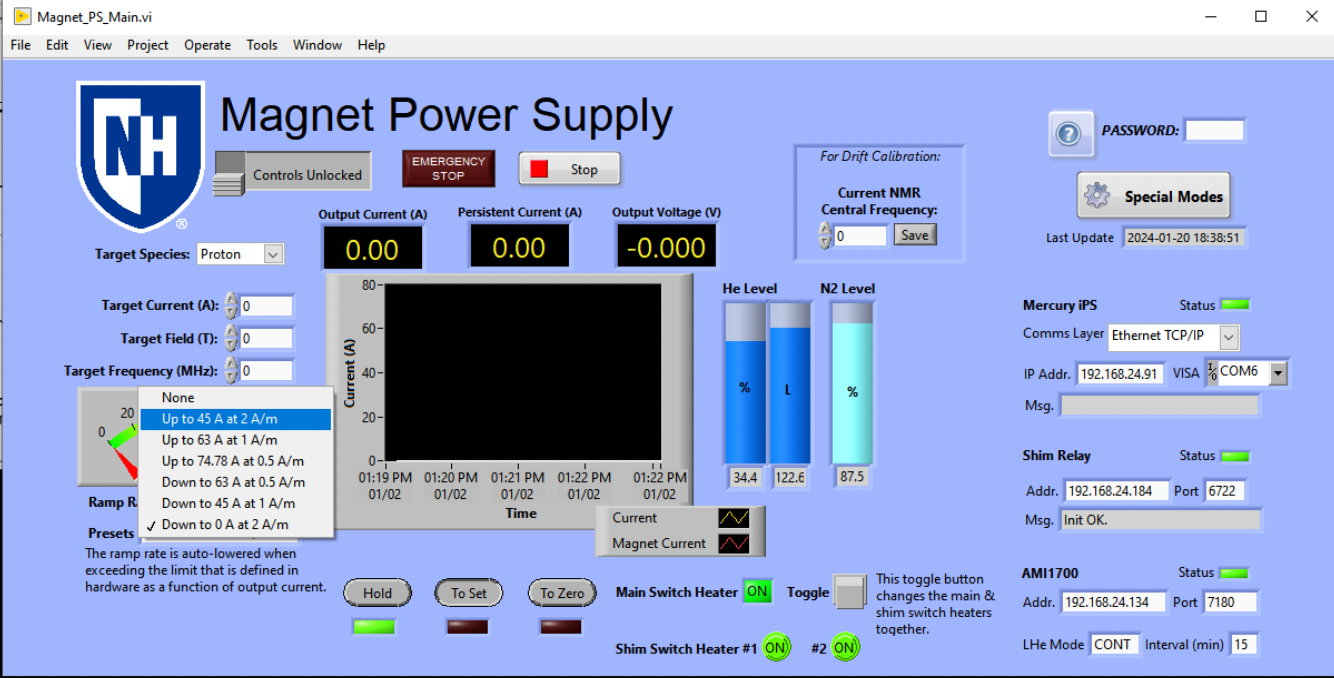
- You can use the "Presets" selector, or enter the values into the text boxes.
- Press "To Set" and wait until the current becomes the set point (SP) and "HOLD". It takes 23 minutes.

After ~23 minutes.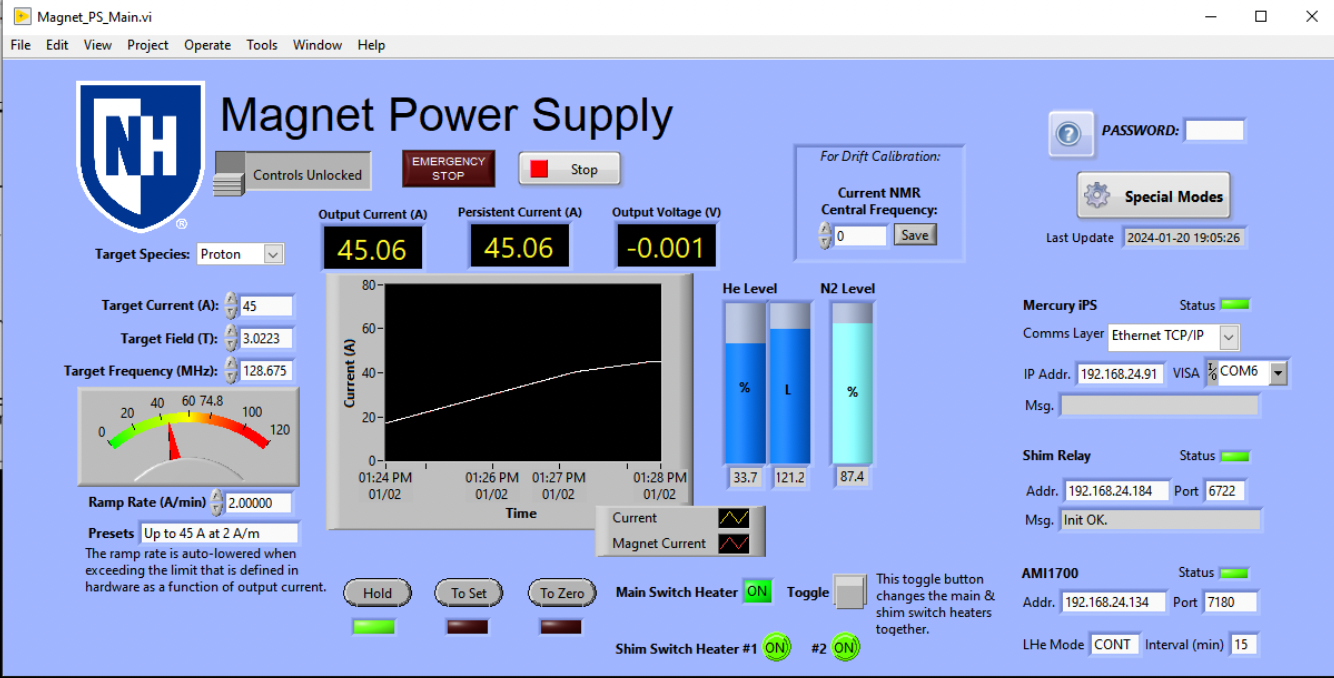
- Set "1 A/m" and "63 A".
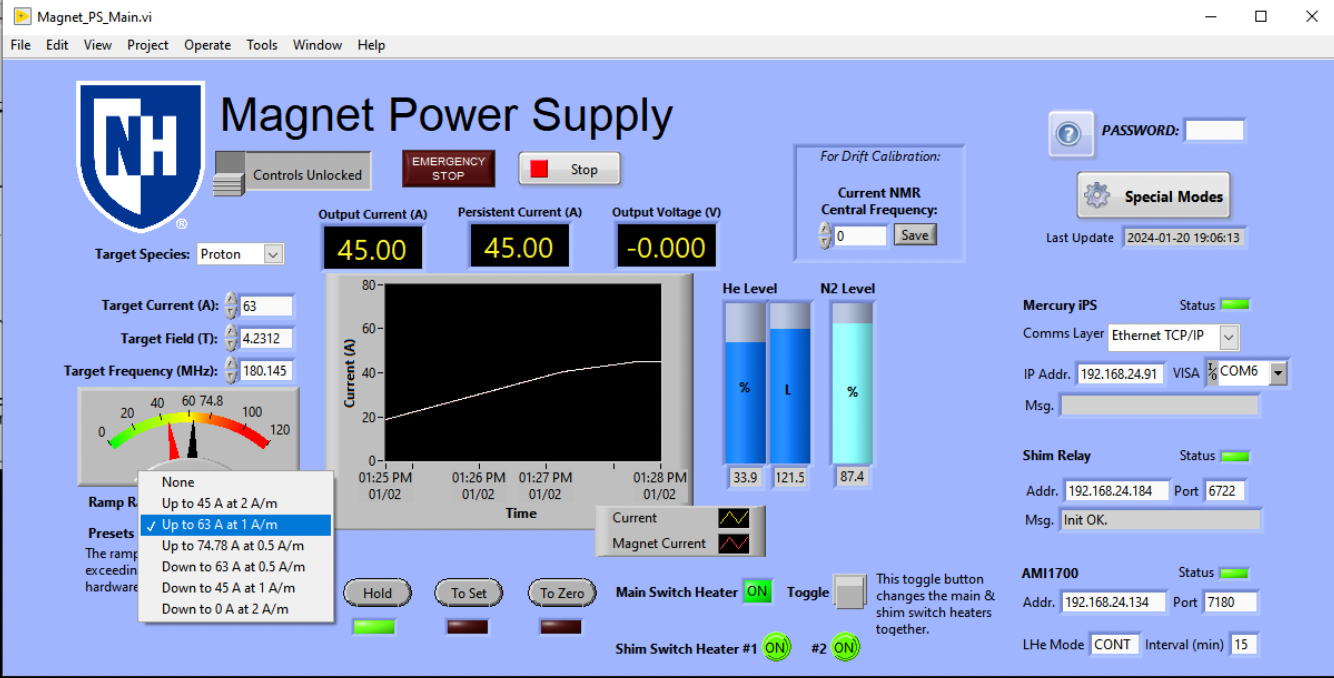
- Press "To Set" and wait until the current becomes the SP and "HOLD". It takes 18 minutes.
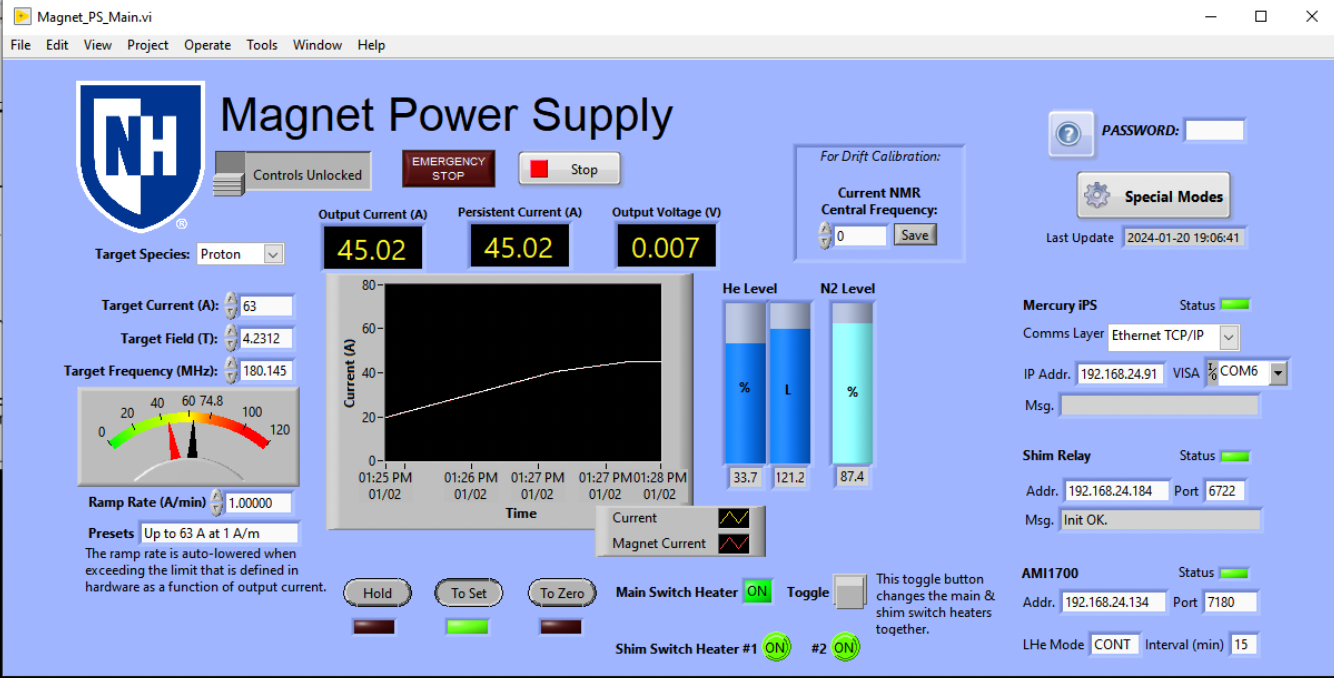
After ~18 minutes
- Set "0.5 A/m" and "74.78 A".

- Press "To Set" and wait until the current becomes the SP and "HOLD". It takes 24 minutes.
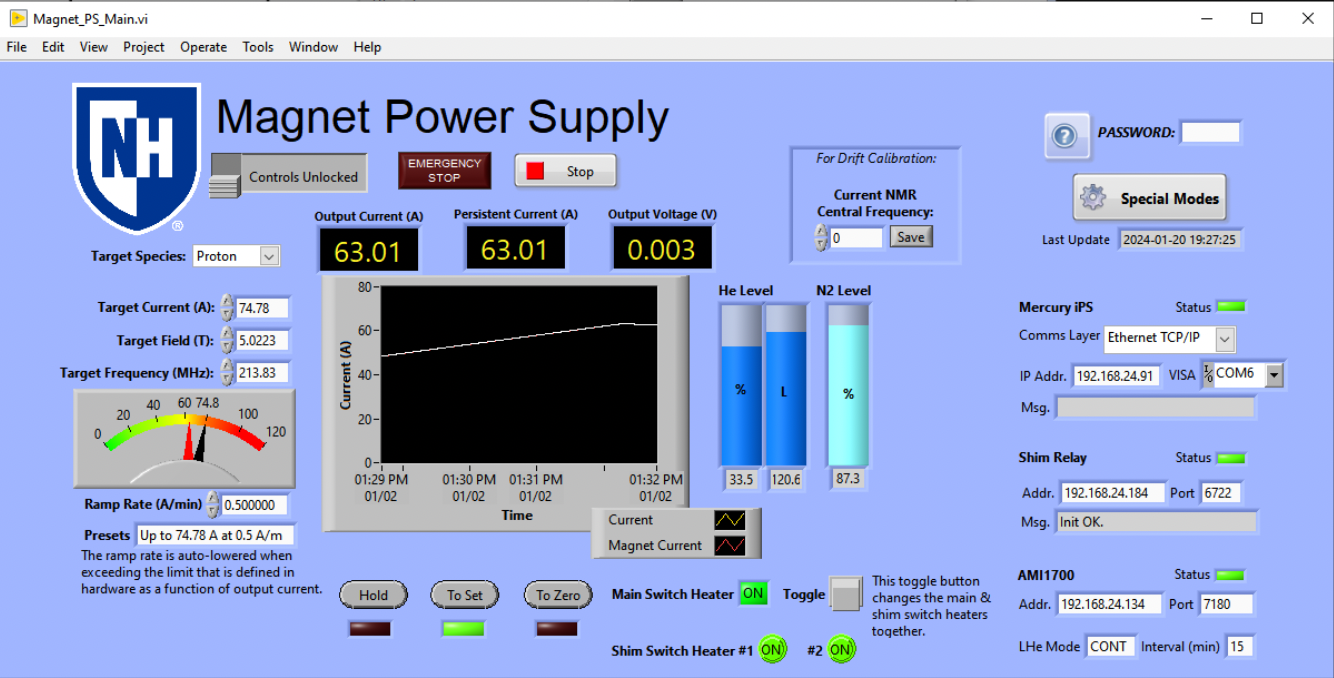
After ~24 minutes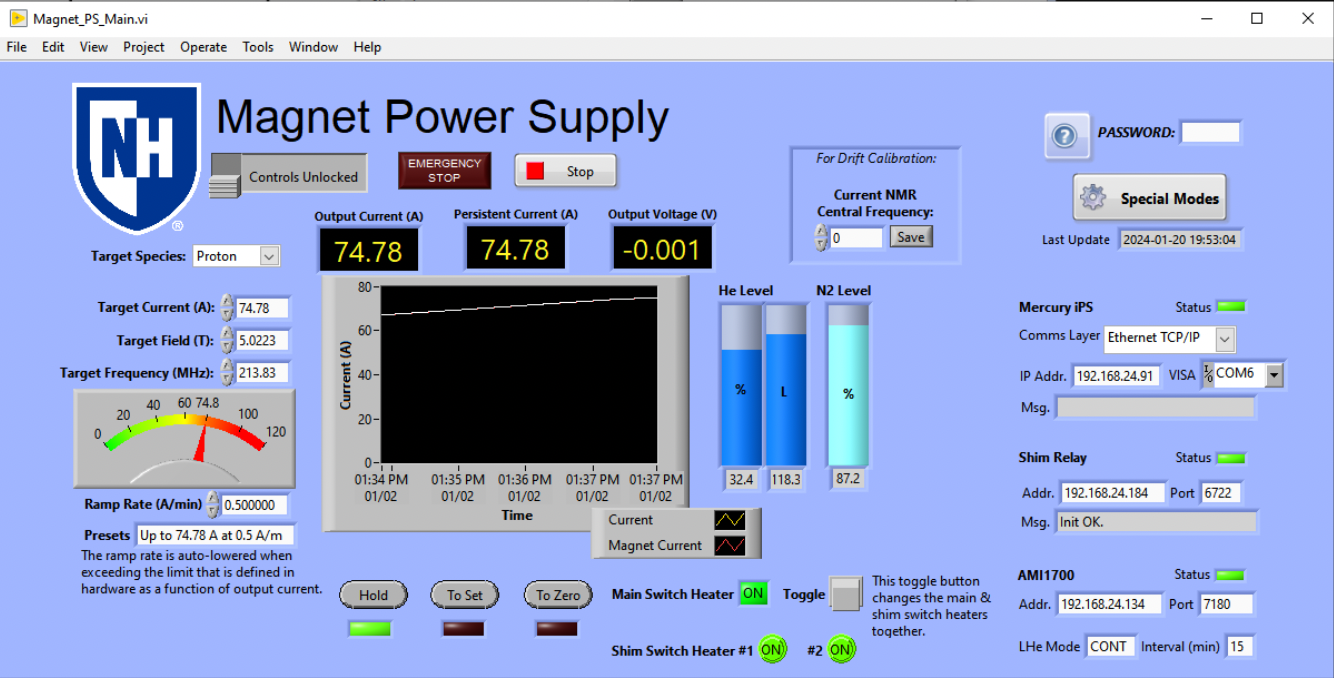
- Switch to the persistent mode, if you want. Follow the steps in the next section.
Reference: UVA elog 154
To Switch to Persistent Mode
- Press the Toggle button of the main switch heater. It turns off both the main and shim switch heaters.

- Press "To Zero" and wait until the current becomes 0 A and "HOLD". It takes 4 minutes, where the ramp rate is slow at the beginning.

To Switch from Persistent Mode
- If this is a ramping-down for the first time after a long time (i.e magnet was ramped-up after a long time since it was turned-OFF), then you should verify the magnetic field as the first step.
Skip to the Step #2 if this is not the case. - Verify that the shim PS (the bottom one in the following picture) is powered ON. If not, turn it on and check why it was off.

- Confirm that the main and shim switch heaters are OFF. If not, something is wrong. Also, the two LED bulbs Z1 and ZY-Z2 are OFF (see the bottom module of the above picture).
- Set "74.78 A", using the Presets selector. The ramp rate becomes "0.5 A/m" but it will not matter.
- Press "To Set" and wait until the current becomes the SP and "HOLD". It takes 2.5 minutes.
 → after ~2.5 minutes →
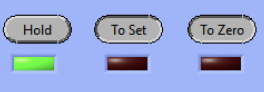
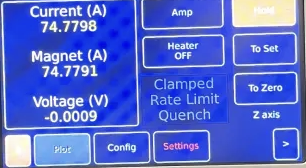
Confirm that "Clamped" nor "Quench" is not red (if you can go into the hall).
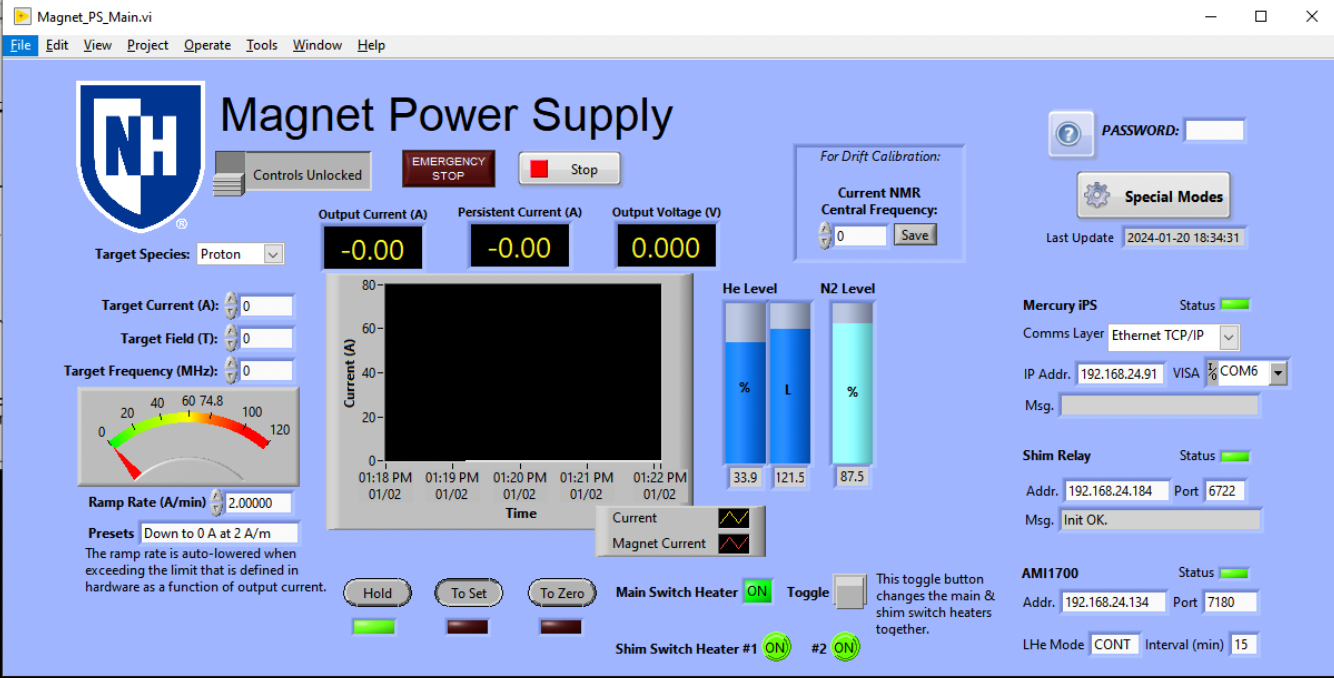
- Press the Toggle button of the main switch heater. It turns on both the main and shim switch heaters.
When you do this step, you should see the two LED bulbs Z1 and ZY-Z2 are ON.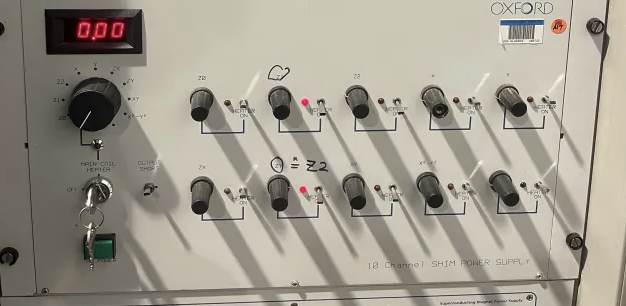
To Ramp Down
- Switch back from the persistent mode, if necessary, by following the previous section.
- Set "0.5 A/m" and "63 A".
- Press "To Set" and wait until the current becomes the SP and "HOLD". It takes 24 minutes.
 → after ~24 minutes →
If you are in the NM4 Hall, and you see that the display shows "Rate Limit" in RED, then wait for a few minutes and observe the strip charts and this module's display.
This indicates that the Mercury-iPS is more cautious with the rate of 'current' and it is adjusted by itself.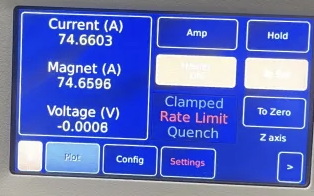
After a few minutes, the display should look like the following.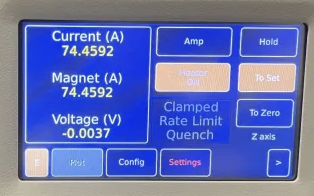
Wait until the VI indicates that it switched to "HOLD"
- Set "1 A/m" and "45 A".
- Press "To Set" and wait until the current becomes the SP and "HOLD". It takes 18 minutes.
 → ~ 18 minutes →
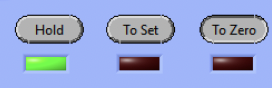
- Set "2 A/m" and "0 A", then Press "To Set". Then, the screen should be similar to the following screen.

- Wait until the current becomes the SP and "HOLD". It takes 23 minutes. Then, the screen should be similar to the following screen.

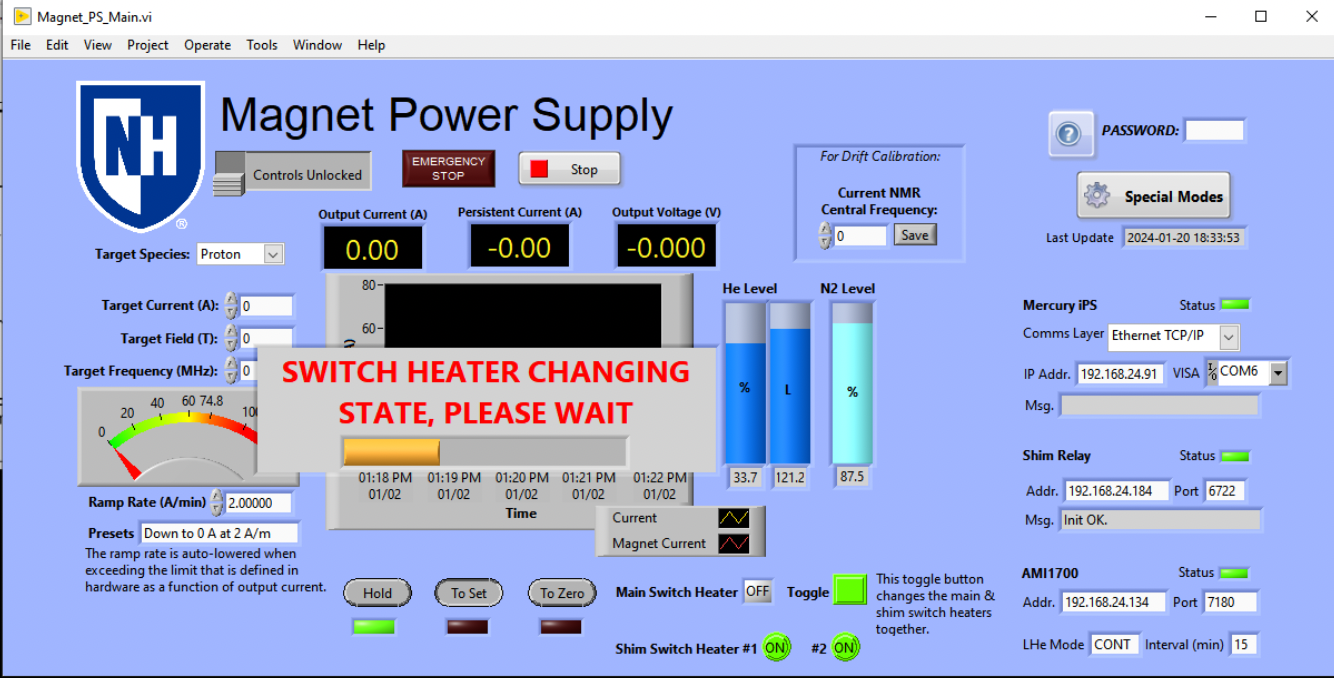
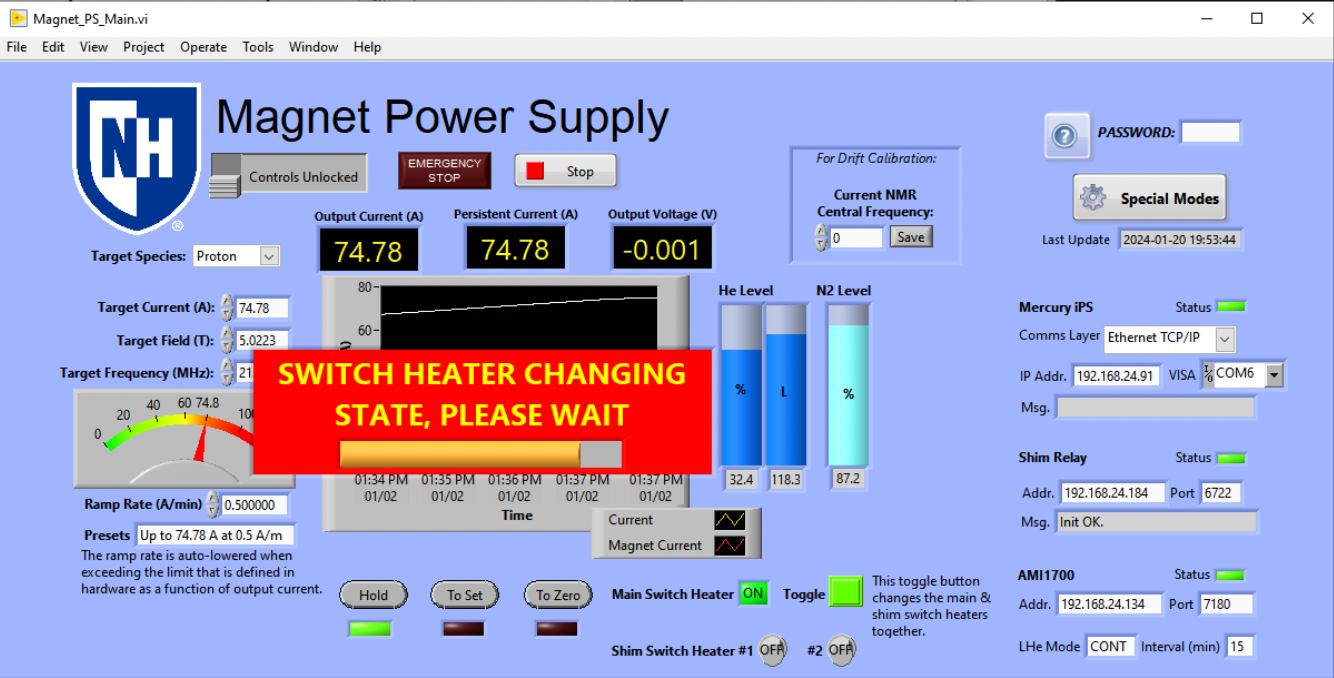
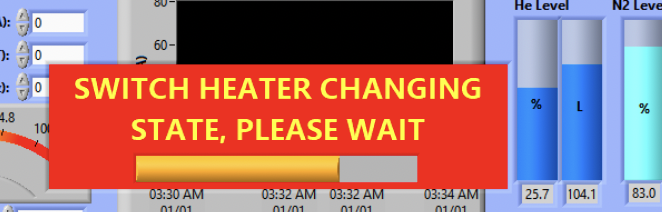
- Press the Toggle button of the main switch heater. It turns off both the main and shim switch heaters. The following screenshot was taken during the process after pressing the toggle button.

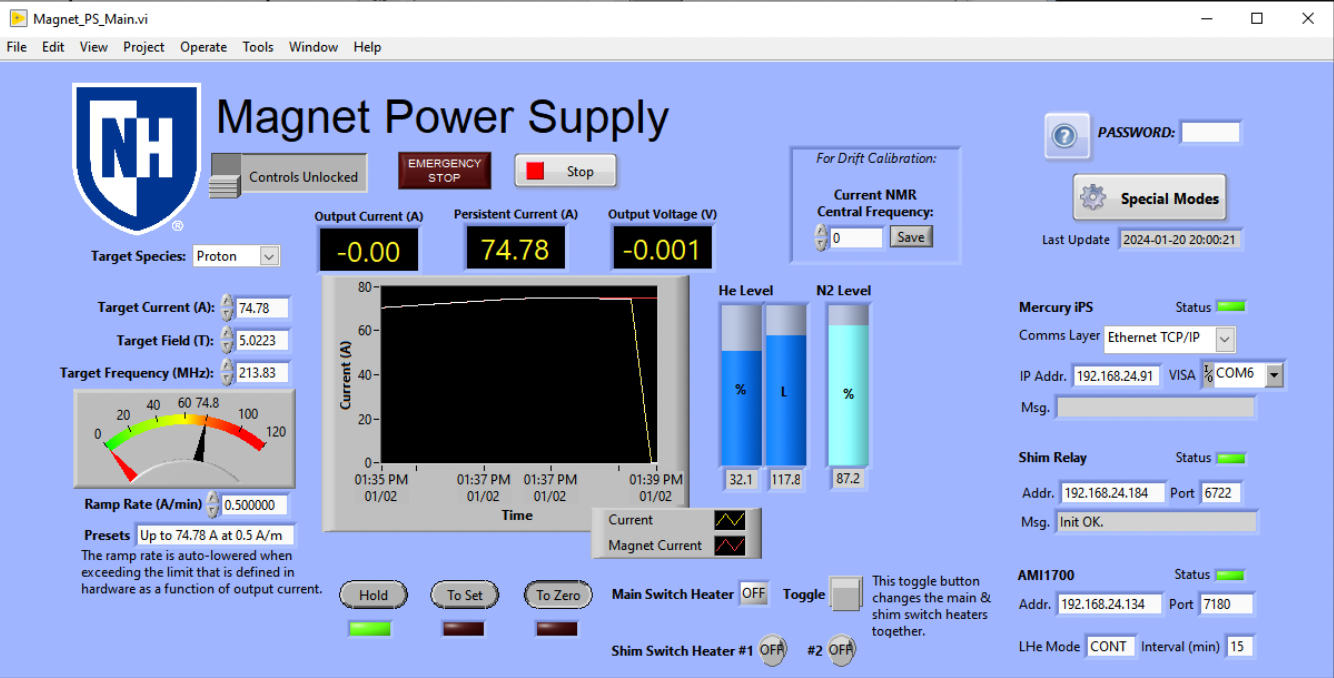
At the end, if you can access the NM4 hall, then ensure that the two LED bulbs Z1 and ZY-Z2 are OFF. Also ensure the Mercury-IPS shows ZEROs for Current(A), Magnet(A), Voltage(V) as shown in the following picture.
Reference: UVA elog 174
Documents
- ORC 2049 - ORC of Super conducting magnet electronic connectors (in the target cave)
- oxford_seppo_magnet_cryostat_handbook.pdf
- oxford_seppo_work_notes.pdf
t.b.w.